
1975-2014 Mustang Hurst Line Lock Install
Last Updated December 15, 2023 | Kevin BrentA line lock install is a useful way to consistently perform a burnout in your Mustang. While it's possible to do a burnout manually, a line lock makes the process easier by automatically locking the front brakes at the press of a button.
Line locks are almost a requirement for Mustang owners interested in drag racing. This is because installing a line lock gives you an easy way to spin the rear wheels and get some heat into them. In this guide, we'll show you how to install a Hurst Line Lock on your 1975-2014 Ford Mustang, giving you easy access to burnouts and improved performance at the track. Follow the steps below for a quick Hurst line lock install that can drastically improve your track days.
Hurst Line Lock Installation Instructions
For this Mustang line lock install, we used a line lock installation kit from Hurst. This install will require some wiring, so make sure you're comfortable with adjusting your Mustang's electrical system.
The Hurst Roll Control is useful primarily in drag racing and designed to provide positive locking action to the front wheels of your car. This enables you to hold your Mustang rigidly in the burnout box or on the starting line, eliminating the chance of rolling through the lights.
Tools Needed:
- 3/8" Ratchet
- 7/16" Ratchet
- Torque Wrench
- 13mm Socket
- 15mm Socket
- 18mm Socket
- 21mm Socket
- 29mm Socket
- 13/16” Socket
- 17mm Socket
- Clip Removal Tool
- Hammer

Step 1: Locate Solenoid Mounting Location
To begin the Mustang line lock install, remove the negative battery cable from the battery. Once the battery is disconnected, find a location to place the line lock solenoid from the Hurst line lock kit. An easy location is by the master cylinder and distribution block.

Step 2: Drill Mounting Holes
Use a drill and a 7/32-inch drill bit to drill three holes in the metal at the mounting location you chose.

Step 3: Attach Solenoid
Fasten the solenoid to the Mustang engine bay using the supplied 10mm bolts.

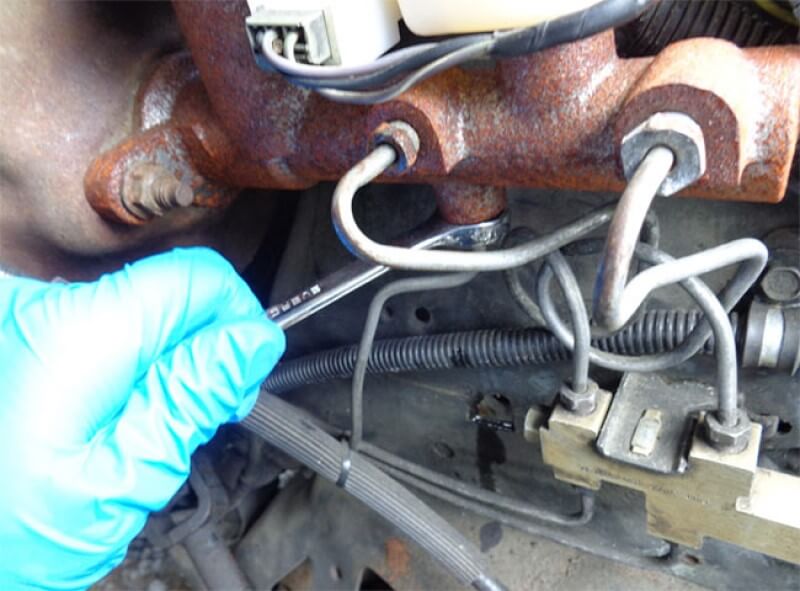
Step 4: Disconnect Master Cylinder Line
Use a 12mm line wrench to disconnect the line from the bottom rear port on the brake master cylinder.
Step 5: Plug Master Cylinder
Using a pipe plug from the Hurst Mustang Line Lock Install Kit and an 11mm wrench, cover the port in the master cylinder and tighten the plug.

Step 6: Install Solenoid Fittings
Install one of the 90 degree fittings from the Line Lock Install Kit into the bottom port of the solenoid. Place the other 90 degree fitting in the top port of the master cylinder. Use pipe sealant on the threads before installing. Use a 12mm wrench to tighten the fittings.

Step 7: Cut Line to Match Solenoid Fitting
Use a tubing cutter to cut the line you removed so that it matches up with the 90 degree fitting.

Step 8: Flare Tube Line
Use a double flaring tool to flare the end of the line.

Step 9: Attach Flare Nut to Tubing
Grab a 3/16-inch by 1/8-inch NPT tubing flare nut from the kit. It will be attached to one of the brake lines. Place the nut onto the brake line you just cut. This can be cut off using a tube cutter.

Step 10: Attach Master Cylinder Line to Solenoid
Locate the line you removed from the bottom of the Mustang master cylinder. It should be coming from the driver side front wheel. Secure the line to the bottom front port on the solenoid. Thread the 3/16-inch by 1/8-inch fitting into the 90 degree fitting on the bottom port of the solenoid. Use the 12mm line wrench to tighten it.

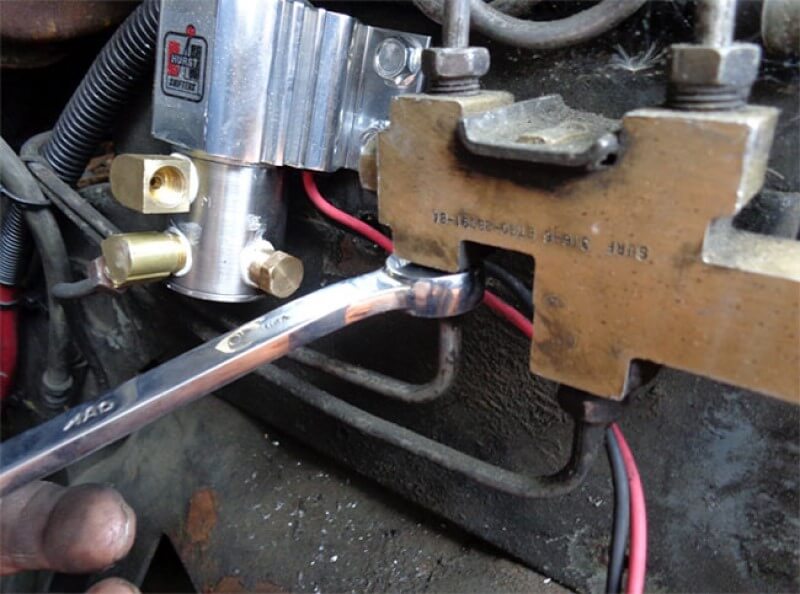
Step 11: Disconnect Distribution Block Brake Line
Use a 12mm line wrench to disconnect the brake line that attaches to the rear bottom port on the distribution block.
Step 12: Attach NPT Connector to Solenoid
Add sealant to the 3/16-inch by 18-inch NPT male inverted connector from the Mustang line lock kit and secure it into the left port on the solenoid.

Step 13: Cut Brake Line
Cut the disconnected brake line so it is the right length to attach to the left port on the solenoid.

Step 14: Cut and Flare Brake Line
Remove another tube flare nut from the brake line in the Install Kit. Place it onto the brake line you removed from the distribution block and cut the line to the correct length. Use a double flare tool to flare the line.

Step 15: Tighten Flare Nut
Attach the flare nut to the connector on the left port of the solenoid. Tighten it with a 12mm line wrench.

Step 16: Attach Additional Flare Nut
Take the other half of the brake line from the distribution block and attach a flare tube nut from the install kit to the end that you cut.
Use a double flaring tool to flare the end of the Mustang brake line.

Step 17: Bend Brake Line
Use a tube bender to bend the brake line so that the one end of the brake line will fit into the bottom rear port on the distribution block and the other end will fit into the top front port of the solenoid.

Step 18: Attach Brake Line Fittings to Distribution Block
Once you have the brake line in the correct shape, attach the brake fittings to the Mustang distribution block and solenoid. Tighten the fittings with a 3/8” line wrench and an 11mm line wrench.

Step 19: Remove Mustang Under Dash Screws
Choose a location to install the indicator light. For this install, we attached the light on the bottom part of the dash. Use the torx screwdriver to remove the screws that hold your Mustang's dash trim in place.

Step 20: Remove Steering Column Collar
Use the Phillips screwdriver to remove the screws that hold the plastic collar covering the Mustang steering column.

Step 21: Drill Hole in Dash Panel
Use a drill to make a hole in the dash panel large enough for the red indicator light.

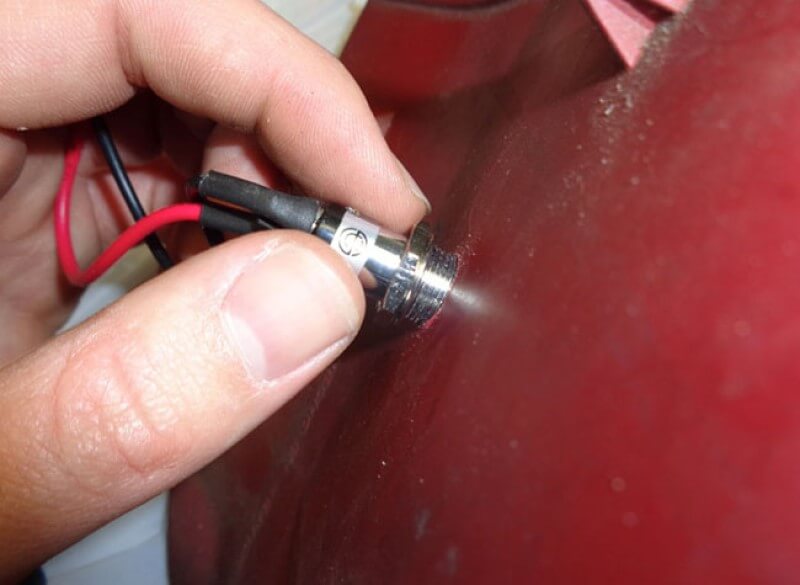
Step 22: Attach Red Light Indicator to Dash Panel
Insert the red indicator light into the hole in the dash panel and tighten the supplied nut on the back of the light.
Step 23: Drill Hole in Under Dash Body
Before putting the panel back on the dash, use a dremel tool to open a hole up on the dash so that the wiring from the light can fit through it.

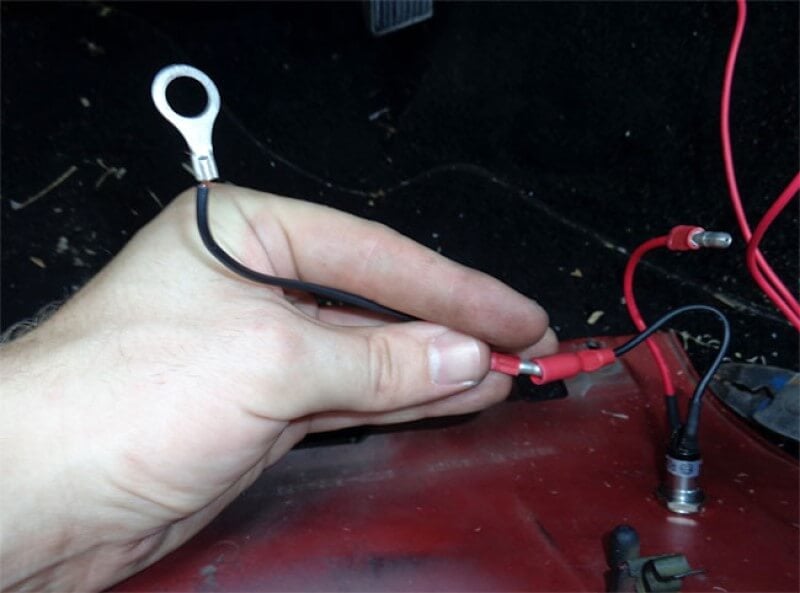
Step 24: Ground Indicator Light Wiring
Crimp an extension wire to the ground wire on the indicator light. Then, crimp a fisheye connector onto the end of the wire. Find a bolt under the dash that you can use to connect the extension wire to ground the wire.
Step 25: Run Wire to Solenoid
Run a 12 gauge wire from the inside of the car out to the solenoid using the hole you created earlier.

Step 26: Connect Indicator Light Wiring to Fuse
Connect the indicator light wire to the supplied fuse using a connector and a crimping tool.

Step 27: Power Starter Solenoid
Crimp a fisheye connector onto the other end of the fuse and connect that to the starter solenoid to get power.

Step 28: Extend Power Wire
Feed another wire through the Mustang firewall and use a connector to attach it to the power wire coming from the solenoid.

Step 29: Connect Black Wire with Fisheye Connector
Connect a fisheye connector to the black wire coming from the solenoid and attach it to one of the mounting bolts on the solenoid.

Step 30: Connect Fuse and Switch Wiring
Inside of the car, run the wire from the fuse to the red wire from the switch. Connect the two by crimping a connector between them.

Step 31: Connect Solenoid and Switch Wiring
Crimp the wire from the solenoid to the black wire on the switch.
Run another wire from the solenoid wire and connect it to the red wire on the red light indicator.

Step 32: Reinstall Steering Column Trim
Reinstall the steering column plastic collar and the lower dash plastic.

Step 33: Connect Indicator Light Wiring
Make sure you have all of the wires connected from the switch to the light, the fuse, and the solenoid.
Bleed the brake lines at the solenoid. Start the car and test your new Mustang Hurst Line Lock

Upgrade the Rest of Your Mustang's Brakes
With a new Mustang Hurst line lock installed, your Mustang will have easier and more consistent access to burnouts. If you're planning on trying out your new line lock on the track, it's important to make sure your Mustang's brakes are in good condition. Aftermarket brakes are a great option for any enthusiast looking to add performance to their Mustang. Brake upgrades offer improved stopping power to pair with increased performance, ensuring you maintain control in any condition. Shop our wide selection of aftermarket Mustang brake parts and make the most of your Mustang's line lock function.


