
Classic Mustang Gas Tank Install
Last Updated August 31, 2023 | Bill TumasThere's nothing worse than filling up your Classic Mustang before a weekend cruise only to find gas dripping out from underneath your car. If this sounds familiar, it might be time to replace your rusty, damaged fuel tank with an aftermarket unit.

How to Install a Fuel Tank Kit on a Classic Mustang
In this article, we're going to show you how to install a new fuel tank on your 1965-1970 Ford Mustang. The fuel tank kit we're using includes the tank and all of the hardware needed to properly install the new fuel unit.
This is a relatively simple install that can be done by most home mechanics. For more in-depth information on the installation process, check out the video below.
Tools Needed:
- Flathead Screwdriver
- Phillips Head Screwdriver
- Hammer
- 3/8 Ratchet
- 1/2" Socket
- 3/8 Socket
- 1/4" Ratchet
- 7/16 Ratchet
- 5/16 Socket
- Short Extension
- Wire Cutters
- Pry Bar
- 3/8 Open End Wrench
- Scraper
- Safety Glasses
- Lift OR Jack and Jack Stands
- Multimeter
Step 1: Jack the Car Up
Using your jack and jack stands or lift, jack the car up until you're able to work comfortably underneath it.
Step 2: Drain the Fuel
Drain the fuel in the tank completely by using the drain plug or through the sending unit.

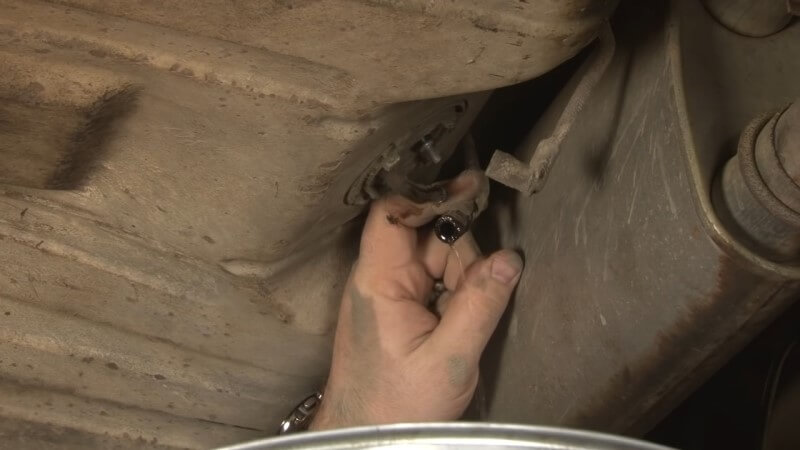
Step 3: Disconnect the Sending Unit
Remove the sending unit wire from the stud and then disconnect the hose from the fuel tank.
Step 4: Clear Out Your Trunk
Now, move to your trunk and clear out any items or trim to allow you to access the fuel tank.

Step 5: Remove Trunk Bolts
Then, remove the twelve bolts holding the tank in place.

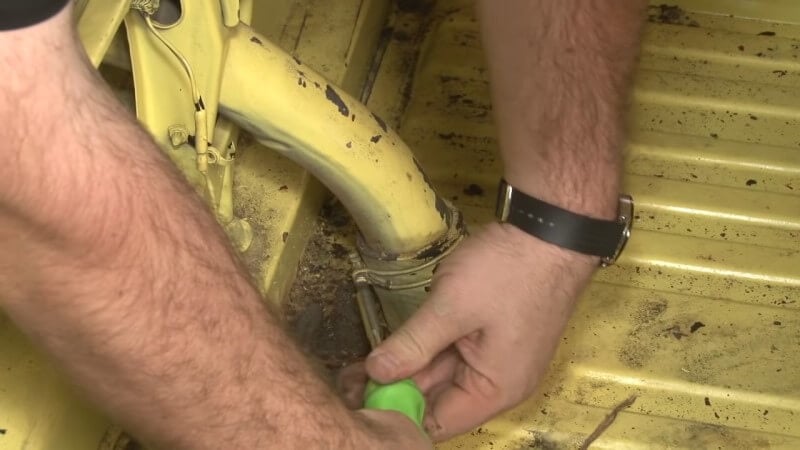
Step 6: Loosen Filler Pipe Clamps
Loosen the two screws on the clamps holding the filler pipe to the filler pipe seal. Then, remove the clamps.
Step 7: Remove the Filler Pipe Hardware
First, remove the gas cap and locate the five bolts holding the filler pipe in place. There are four bolts underneath the gas cap and then one on the inside of the trunk. Then, remove the bolts.

Step 8: Remove the Filler Pipe
Pull the filler pipe off of the tank while rotating the whole assembly. It should slide off. Then, twist the hose off the pipe and remove the filler pipe.

Reminder: You're going to reuse the filler pipe when installing your new kit, but you get a new filler pipe hose and gasket so you can throw away the originals.
Step 9: Loosen the Fuel Tank
Even though we've removed the hardware holding the fuel tank in place, there is still some sealant holding it up. Use a pry bar to loosen the sealant around the edges of the fuel tank from inside the trunk.

Step 10: Remove the Fuel Tank
Then, remove the fuel tank.

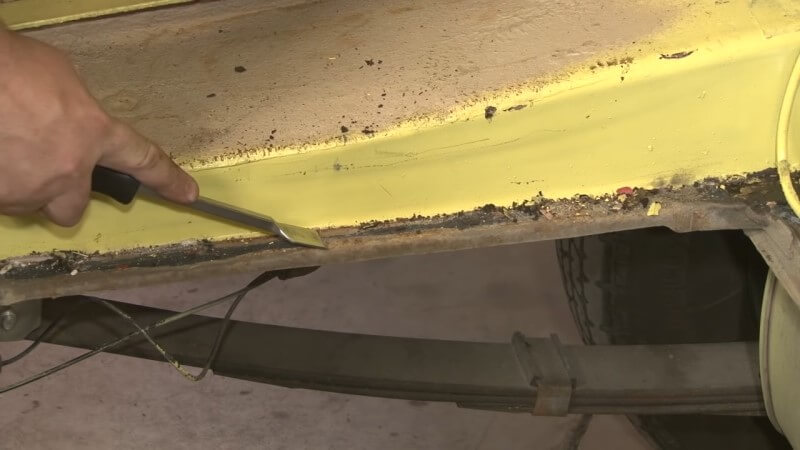
Step 11: Scrape Off Old Sealant
Using your scraper, scrape off the original sealant on the edges of the fuel tank area to give yourself a clean area to apply the new sealant to later.
Step 12: Apply Primer (Optional)
If you have any areas where bare metal is showing after scraping off the sealant, we recommend you apply a coat of primer to protect it from rust before installing the new fuel tank. Otherwise, you can skip to step 13.

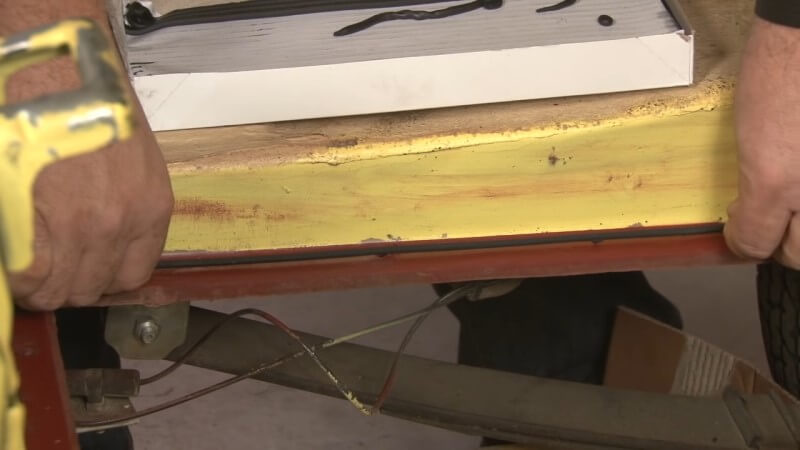
Step 13: Apply Strip Caulk
Apply strip caulk around the outside edge of the fuel tank area before installing the tank. This replicates the OEM sealant.
Step 14: Test the New Sending Unit
Before installing the new fuel tank, it's a good idea to test the new sending unit. Using your multimeter set to Ohms, ground it anywhere on the chassis and push the positive on the stud. You should see anywhere from 70-80 Ohms.
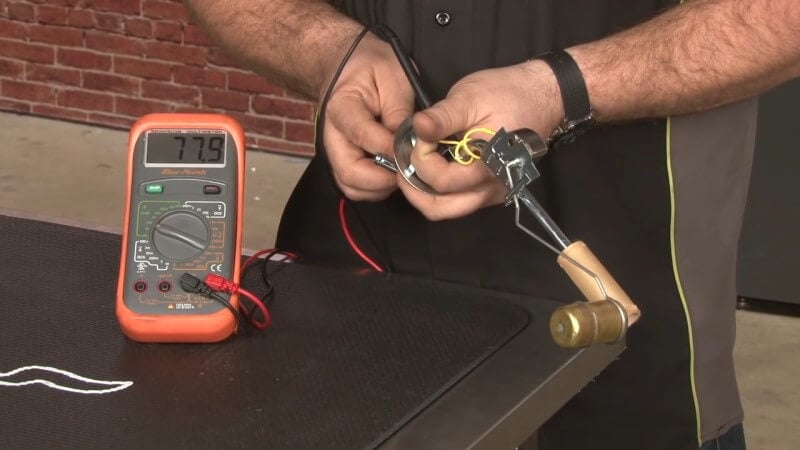
Then, move the float up to simulate the inside of the fuel tank. The number should decrease to around 8-10 Ohms by the time it can't move anymore. This ensures your new sending unit is working properly.
Step 15: Insert the New Sending Unit into the Fuel Tank
Install the rubber ring onto the fuel tank and then slide the sending unit into the hole in the fuel tank. Make sure that the stud is facing down after you slide it through.

Step 16: Lock the Sending Unit into Place
Install the metal ring included in the kit into place and turn it a quarter turn by hand. Then, using a hammer and flathead screwdriver, hammer it into place the rest of the way.

Step 17: Install the New Tank
Slide the new tank into place and ensure the strip caulk is properly seated around all of the edges.

Step 18: Install New Hardware
Then, install and tighten down the new hardware to lock the fuel tank into place.

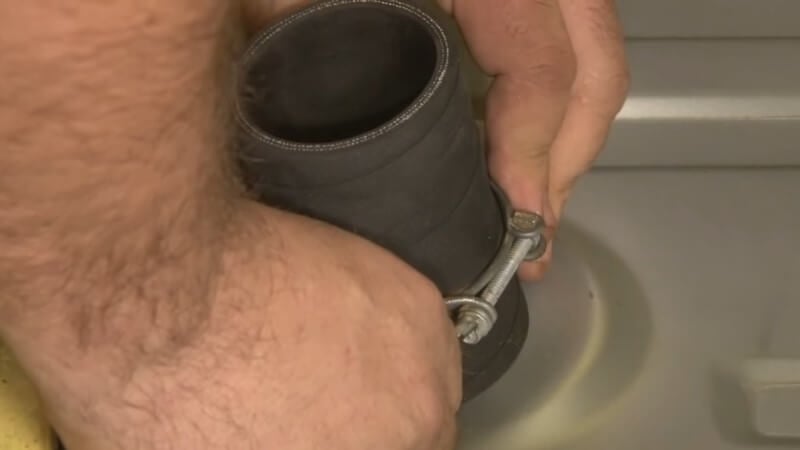
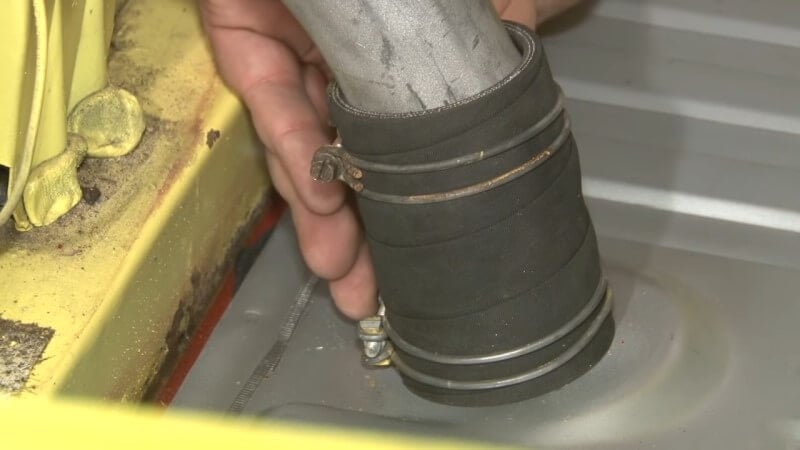
Step 19: Install New Fuel Filler Pipe Hose
Slide the new fuel filler pipe hose into place on the fuel tank. Then, slide the two clamps over top of the new hose without tightening them.
Step 20: Insert the Fuel Filler Pipe
Before installing the fuel filler pipe, slide the new gasket into place on the pipe. Then, insert it through the hole where the gas cap covers and into the fuel filler pipe hose.

Step 21: Tighten the Clamps
Then, slide the two clamps into place on either end of the fuel filler pipe hose and tighten them down.
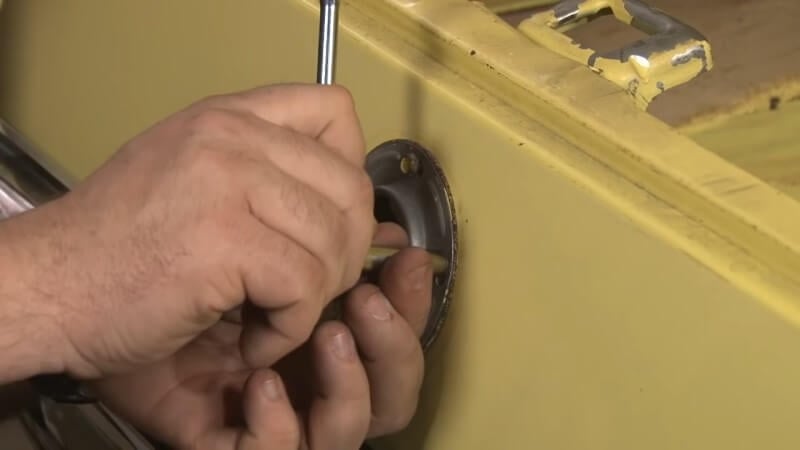
Step 22: Reinstall Hardware
Reinstall the four bolts holding the fuel filler pipe in place and the one for the gas cap.
Step 23: Reconnect Fuel Sending Unit
While under the car, reconnect the fuel sending unit using a new clamp to replace the one we took off.

Congratulations, you're all done!
Have Peace of Mind with a New Fuel Tank
Leaks and other damage to the fuel tank add up and can cause a ton of different issues as your Classic Mustang ages. Replacing your old damaged fuel tank with a new one can fix those issues and give you the peace of mind you're looking for the next time you take your ride for a spin.


