
Installing a Dual Master Cylinder in a 1965-1966 Mustang
Last Updated February 9, 2024 | Nate MoonisThe single master cylinder that the 1965-1966 Mustang came equipped with from the factory provides fluid pressure to all four wheels at the same time. All four wheels are linked together in a hydraulic fluid circuit. If a problem develops in any of the four brakes, lines, hoses, or single master cylinder, that creates a fluid pressure loss. This will cause you to lose both front and rear brakes.
With a dual master cylinder, the brakes are split front and rear. If a problem develops in the front, only the front brakes would be lost. You would still have the rear brakes to bring you to a stop. The same would happen if you had a problem with the rear brakes, you would still have the front brakes to bring you to a stop.
1965-1966 Mustang Dual Master Cylinder Conversion
In this installation guide, we'll walk you through how to install a dual master cylinder onto your 1965-1966 Mustang. This is the perfect mod for those looking to improve brake pedal feel while also keeping you safe in the event of a failure.

Tools Needed
- 3/8 Ratchet
- 5/8 Socket
- 9/16 Socket
- 6" Extension
- 9/16 Wrench
- 1/2" Wrench
- 7/16 Wrench
- 3/8 Line Wrench
- Flathead Screwdriver
- Flashlight
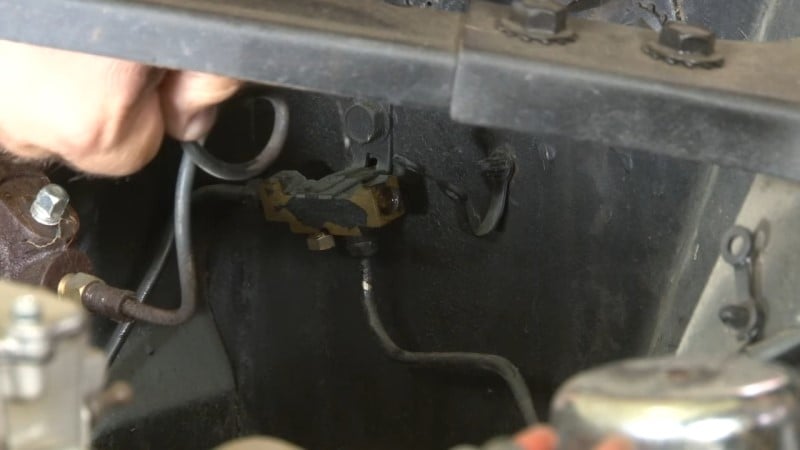
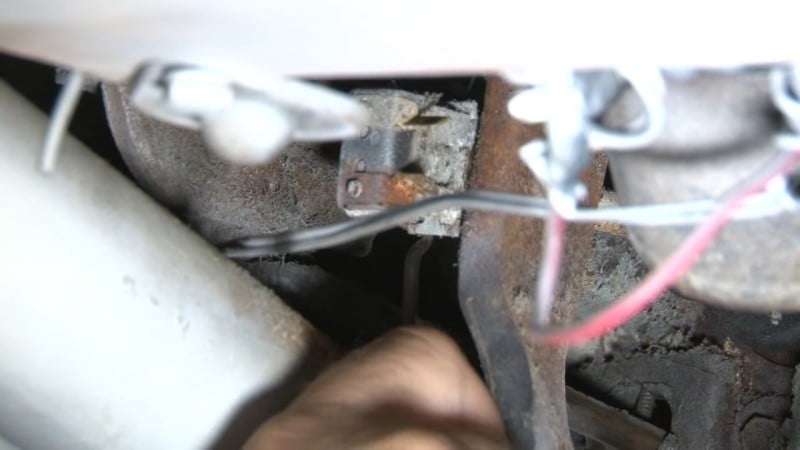
Step 1: Remove Rear Brake Line
Disconnect the rear brake line from the distribution block by loosening it with a wrench. Bend the line out of the way after you've disconnected it.
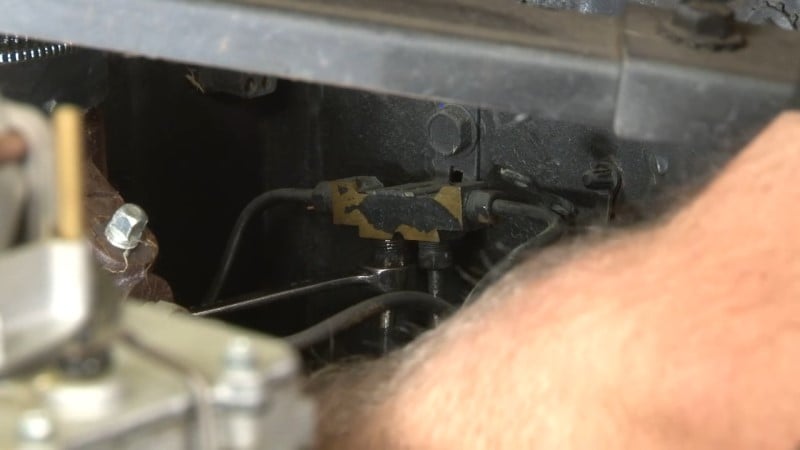
Step 2: Insert Plug into Distribution Block
Gently screw the supplied plug that comes with the kit into the hole created by the brake line you just removed on the distribution block. Then, tighten it into place with a wrench.
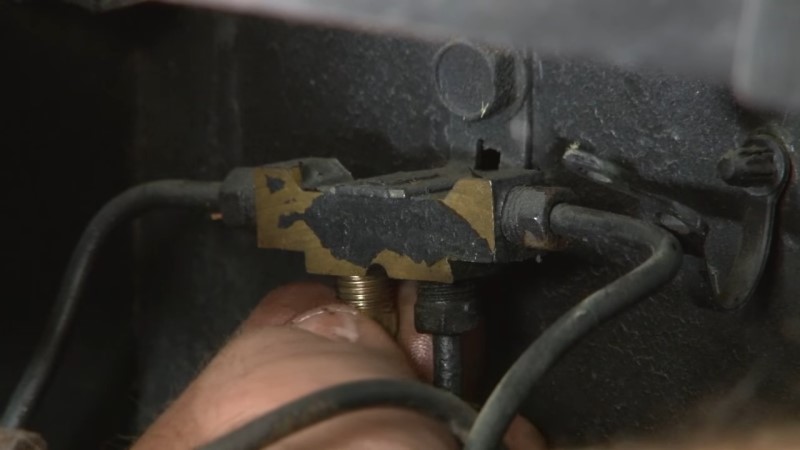
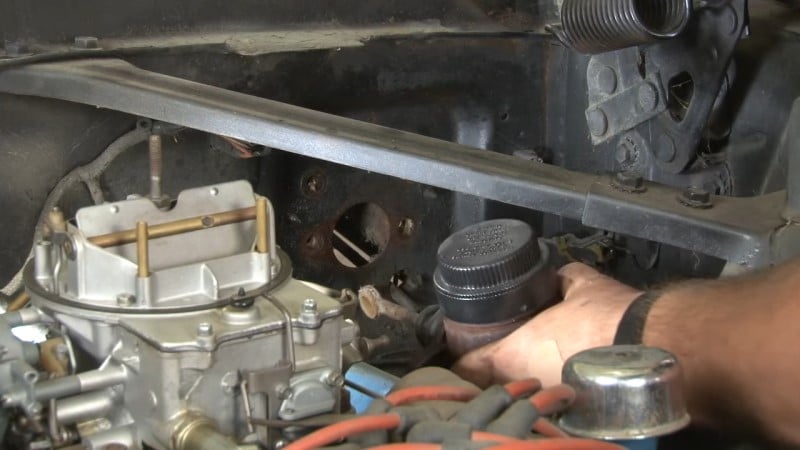
Step 3: Remove Front Brake Line
Disconnect the front brake line that runs from your factory master cylinder to the distribution block using a wrench.
Step 4: Disconnect Pushrod from Brake Pedal
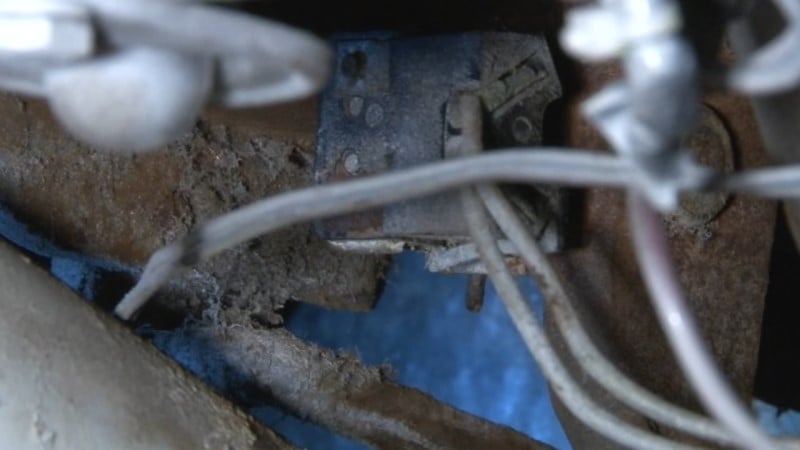
While underneath the dash, remove the harness that goes to your brake light switch.
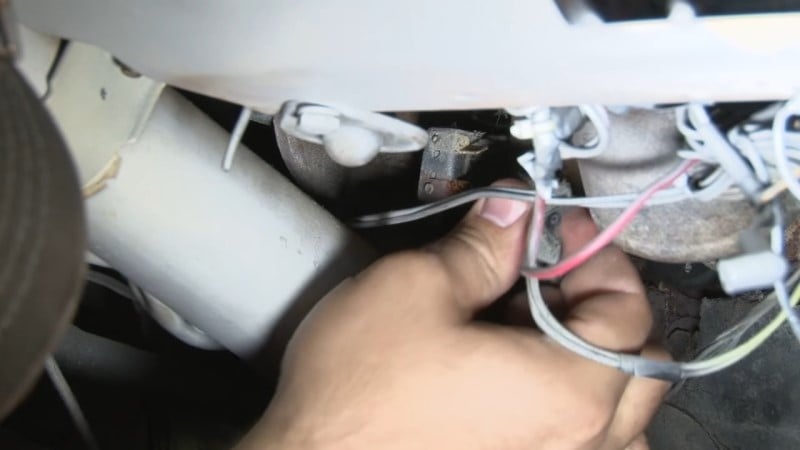
Then, disconnect the cotter pin behind the brake light switch and separate the pushrod from the brake pedal.
Step 5: Remove Master Cylinder
Remove the two lower bolts connecting the master cylinder to the firewall.

This allows you to separate the factory master cylinder from the firewall and remove it from the car.
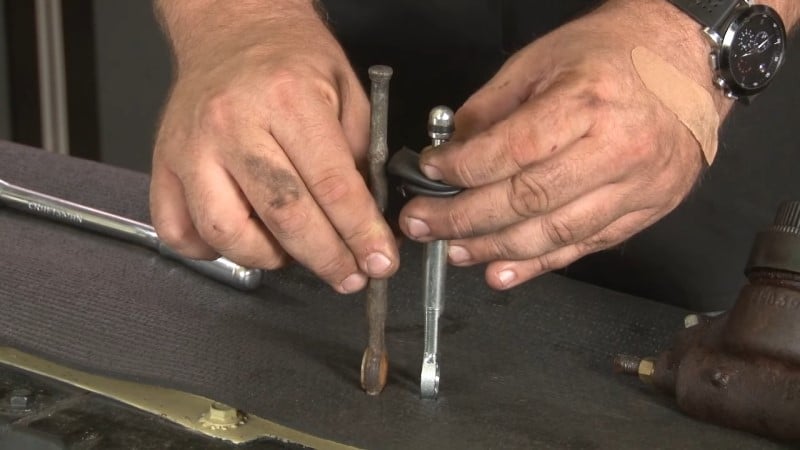
Step 6: Remove Factory Pushrod
Push the factory master cylinder in a vise and insert a punch into the hole on the end of the pushrod. Then, hammer out the factory pushrod from the master cylinder. Keep in mind that this process can be challenging and might take a while.

Step 7: Measure Factory Pushrod
Measure the factory pushrod to determine if it's the same length as the new replacement. If the factory pushrod is longer, reuse it in the new assembly.
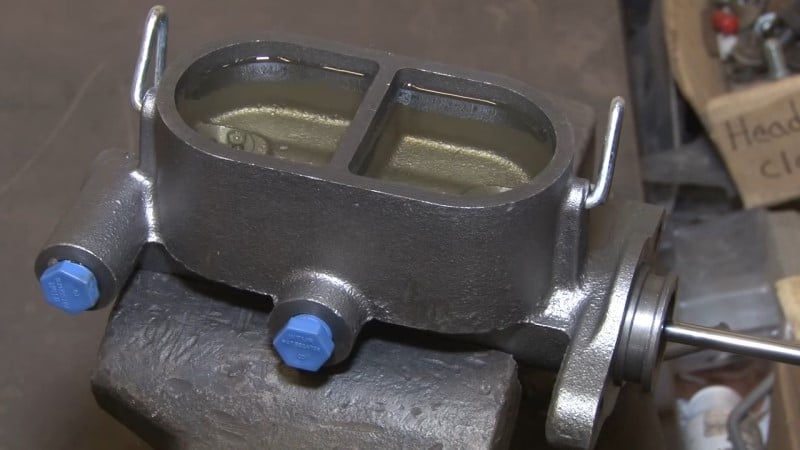
Step 8: Pull Out Plugs on Replacement Master Cylinder
Pull the two yellow plugs out from the replacement master cylinder.

Then, screw the blue plugs supplied with the kit into place on the holes you just opened.

Step 9: Bleed Master Cylinder
Put the new master cylinder in a vise and pour brake fluid into the top reservoir until it's full.

Then, insert a flathead screwdriver where the pushrod would go and push in and out until all of the bubbles have stopped rising to the surface of the reservoir.
Step 10: Install Pushrod Boot
Slide the supplied pushrod boot over the end of the master cylinder.
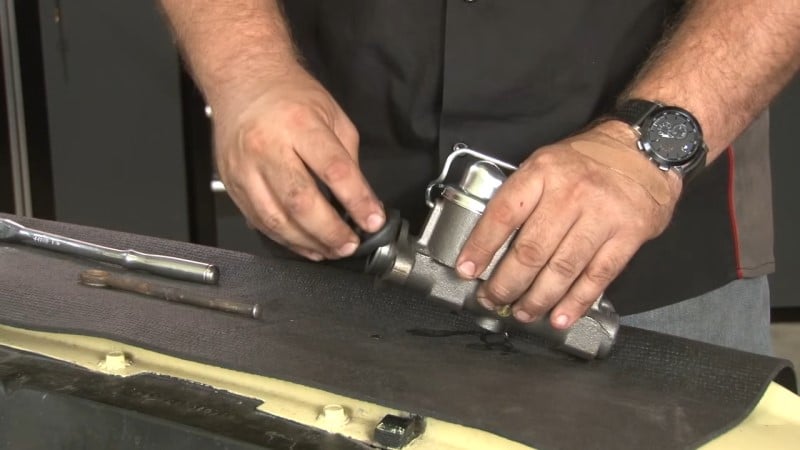
Step 11: Install Pushrod
Insert the pushrod into the boot until it's locked into place. The factory pushrod doesn't have a clip to hold it into place, so it's only held on by the pushrod boot. This is fine and once the master cylinder is bolted into place it won't matter.

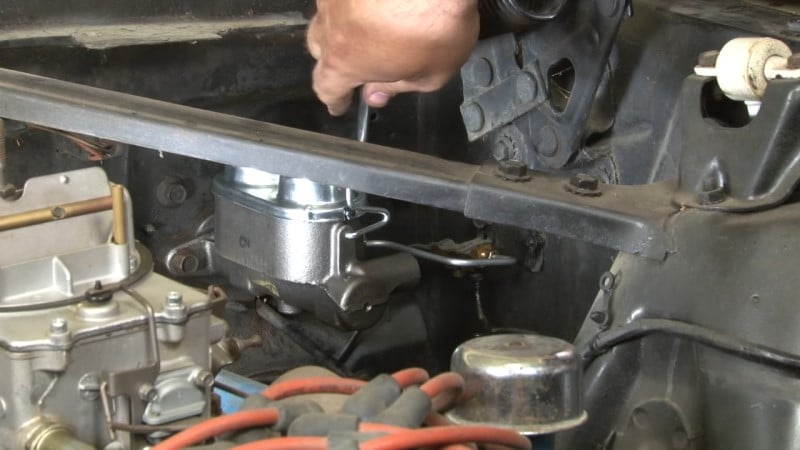
Step 12: Reattach Master Cylinder to Firewall
Insert the replacement master cylinder into the hole in the firewall where you removed the original unit. Bolt it into place after you've got it properly seated.

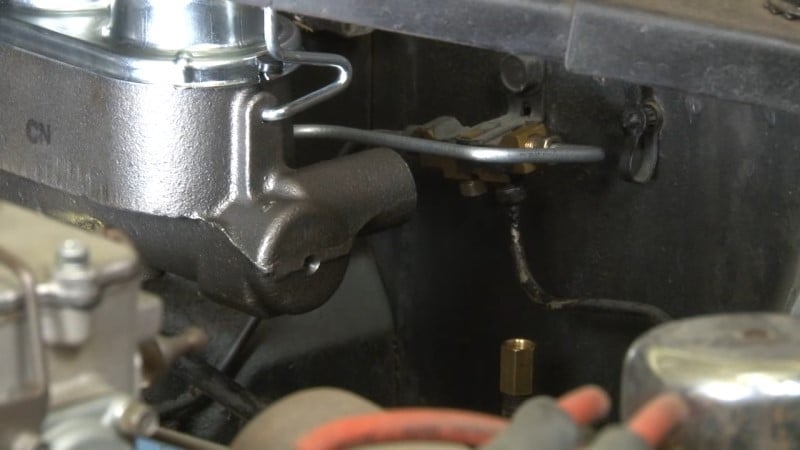
Step 13: Install Front Brake Line
Attach the hard line with the black fitting to your distribution block from the rear port on your master cylinder. Then, tighten it into place.
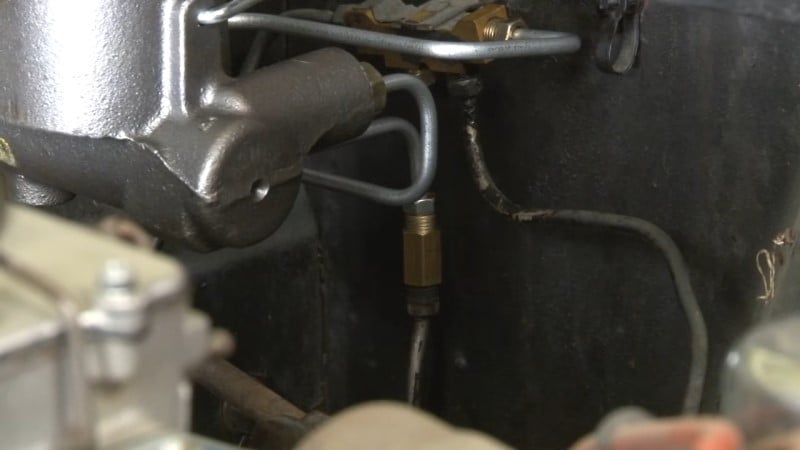
Step 14: Install Rear Brake Line
Screw the supplied union into place on the brake line then bend it back into place before installing the new rear brake hard line.
Connect the new hard line to the master cylinder first then connect it to the union we just installed. Be careful not to kink the line while moving it into place. Then, tighten all of the fittings on the rear brake line with a wrench.
Step 15: Reconnect Pushrod to Pedal
Reach back underneath the dash and reconnect the pushrod to the pedal assembly. Then, reattach the cotter pin and brake light switch to ensure everything is working properly.
Congratulations, you're all done!
Never Have a Mushy Brake Pedal Again
Replacing the factory master cylinder in your 1965-1966 Mustang is a quick and easy job that ensures your brake pedal feels responsive. Plus, you'll never have to worry about brake failure again after installing a dual master cylinder. If the unit we installed doesn't work for you, check out the rest of our Mustang master cylinder collection below.


