How to Install a New Clutch in Your 1986-2001 Mustang
Last Updated November 15, 2023 | Nate MoonisInstalling a new clutch in your 1986-2001 Mustang is essential if you're planning to push the stock drivetrain to its limits. Increases in horsepower can cause the stock clutch to start to slip or give out entirely from the increased power and torque. Ensure your clutch can handle everything you throw at it by upgrading to a performance clutch.
In this guide, we're going to show you how to install an upgraded clutch kit in your 1986-2001 Mustang. Your new clutch will be able to transfer more power from the engine to the rear wheels while also withstanding more heat than a standard clutch.
How to Install a Clutch Kit in a 1986-2001 Ford Mustang
For this install, we used an ACCELATEC "King Cobra" Style clutch kit for 1986-2001 Mustangs. While the process is largely the same for any other clutch kit, there may be a few kit-specific differences. Keep that in mind when following the guide below.

Tools Needed
- Socket Wrench
- Standard Socket Set
- Standard Wrench Set
- Swivel Socket
- Floor Jack
- Jack Stands
- Flathead Screwdriver
- Loctite
- Hammer
- Clutch Alignment Tool
Step 1: Jack Up the Car
Use your floor jack and jack stands to carefully raise your car. Secure the car on four jack stands.

Step 2: Disconnect Battery Terminal
Locate your car battery and disconnect the negative terminal to prevent any unwanted electrical short circuits.
Step 3: Remove Shift Boot
Remove your shift knob by twisting it until it comes off. Then, remove the shift boot.
Step 4: Remove Shifter
Remove the four bolts holding your shifter mechanism to the transmission using your socket wrench and socket set. Then, pull the shifter mechanism from your car.

Step 5: Unfasten Driveshaft Bolts
Head under your car and locate the connection between the driveshaft and rear axle. Then, remove the four bolts holding the driveshaft to the rear axle.

Step 6: Detach the Driveshaft
Then, slide the driveshaft towards the rear of the car and remove it entirely.

Step 7: Disconnect Exhaust Mid-Pipe
Unbolt the eight bolts connecting your mid-pipe to the headers and the rest of your exhaust system. Then, disconnect the two O2 sensors and remove your mid-pipe. You should be able to easily access your transmission after this.

Step 8: Unbolt Transmission Mount
Use your socket wrench to unbolt the two bolts holding the transmission to the transmission mount.

Step 9: Remove Transmission Crossmember
Before unbolting anything, be sure to have your floor jack under the rear of the transmission to support it and prevent the transmission from falling. Then, unfasten the bolts on either end of the transmission crossmember and remove the crossmember.

Step 10: Disconnect Back-Up Light
Locate the back-up light sensor and disconnect it. See the picture below for the location of the sensor.

Step 11: Disconnect Speed Sensor
Unscrew the single bolt holding the speed sensor in place and remove the speed sensor.

Step 12: Remove Clutch Cable Dust Shield
Locate the bolt holding the dust shield in place and unscrew it. Then, remove the dust shield.

Step 13: Move Clutch Cable
Push and slide the Mustang clutch cable out of the transmission. It should be free-hanging and not connected to anything.

Step 14: Remove Wiring Harness Push Pins
Go along the wiring harness attached to the transmission and remove and push pins holding it to the transmission. Then, let the harness hang to the side.

Step 15: Unbolt Starter
Locate your Mustang's starter and remove the three bolts holding it to your transmission.
Step 16: Disconnect the Transmission from the Engine
If you removed the floor jack from underneath your transmission, now is the time to move it back into place and support the transmission before removing these bolts. After you've done that, remove the seven bolts holding the transmission to the engine. There are three on the driver's side, two on the passenger's side, and two on top.

In order to reach the bolts on top of the transmission, allow your engine and transmission to sag a little and use a swivel socket. Then, slide the transmission straight back until it's no longer connected to the pilot bearing and lower it down.
Step 17: Remove Old Flywheel
Secure your flywheel with a flathead screwdriver to stop it from spinning. Then, unbolt the six bolts holding it to your engine.

Step 18: Install New Flywheel
Seat the new flywheel into place, then reinstall the six flywheel bolts you removed in the previous step. Be sure to apply a small amount of Loctite on those bolts before installing. Then, install the three dowel pins onto the new flywheel by hammering them into place. These are used to align your clutch.

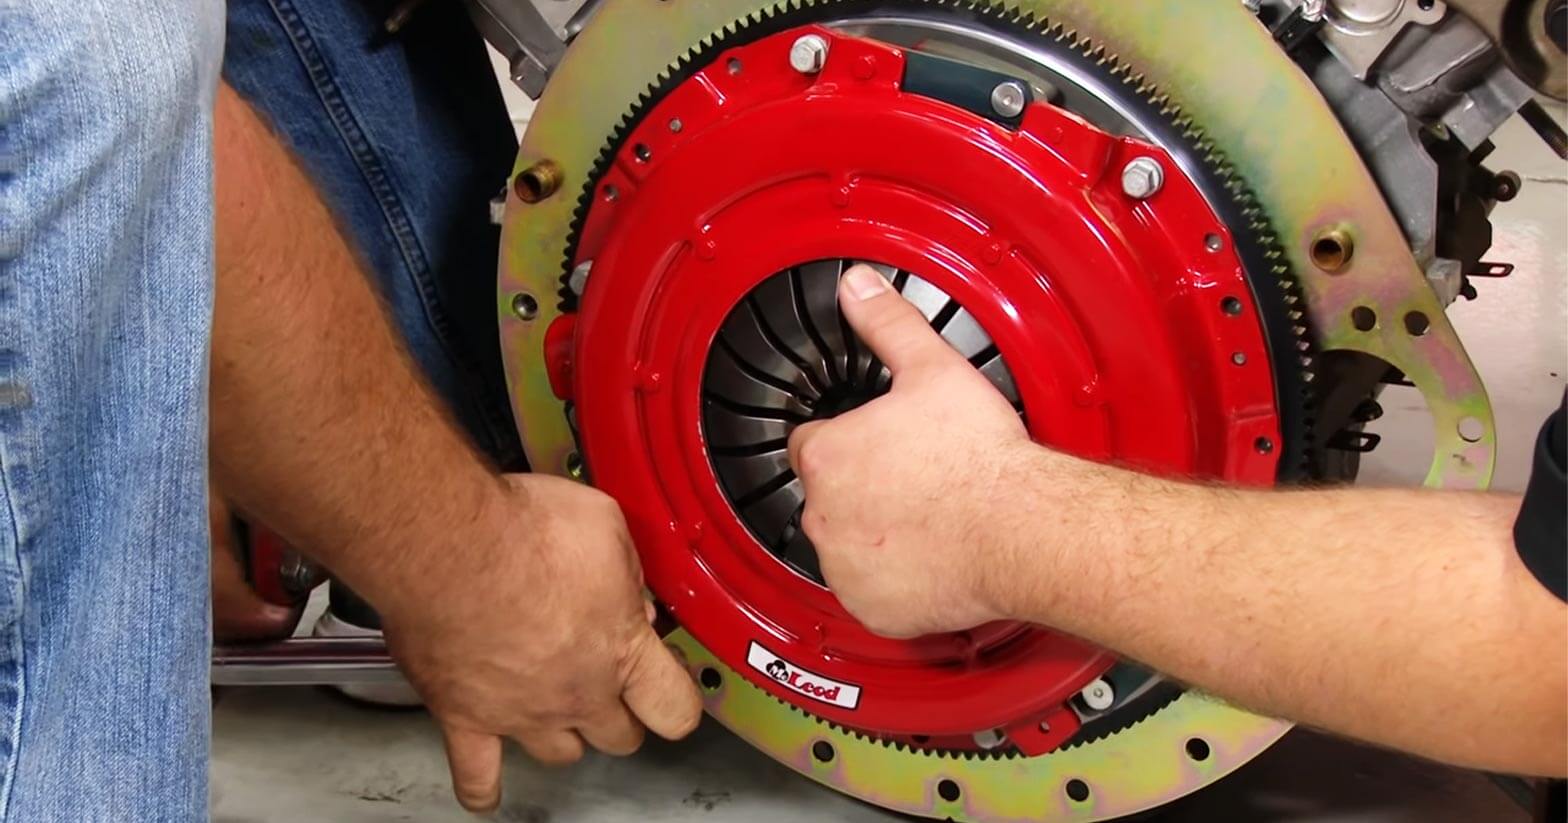
Step 19: Install Clutch Disc and Pressure Plate
Gently place your clutch disc and pressure plate onto your flywheel. Use your clutch alignment tool to hold the clutch in place while you line the clutch up with the bolts on the flywheel.

Step 20: Tighten the Clutch Into Place
Align the clutch with the three dowel pins mentioned in step 18. Then, tighten the clutch and pressure plate into place.

Step 21: Lift Transmission Into Place
Lift the transmission up using the floor jack and slide it into place against the engine. Then, reinstall the starter by tightening down the three bolts you removed earlier.
Step 22: Reconnect the Transmission and Engine
Reinstall the seven bolts that hold the transmission to the engine.

Step 23: Reinstall Clutch Cable
Pull the clutch cable onto the Mustang clutch release level to reinstall it properly. Then, reattach the clutch cable dust shield with the bolt you removed earlier.

Step 24: Reconnect Speed Sensor
Reconnect the Mustang speed sensor with the bolt you removed earlier.

Step 25: Secure Your Transmission
Set the transmission crossmember into place and reinstall the two bolts you removed earlier. Then, reinstall the transmission mount onto the crossmember with two more bolts.

Step 26: Reconnect Driveshaft
Slide the driveshaft back into place and reinstall the four bolts you removed earlier.

Step 26: Reinstall Exhaust Mid-Pipe
Reinstall your exhaust mid-pipe with the eight bolts you removed earlier. Then, reconnect everything on your harness by plugging it back in. This includes the O2 sensors and back-up switch.

Step 27: Reattach Shifter
Inside the car, reattach your shifter mechanism to the transmission with the four bolts you removed earlier.

Step 28: Button Up Your Shifter
Reinstall the shift boot retainer and slide your shifter bezel over the shifter. Then, screw on your shift knob.

Congratulations, you're all done!
Experience Quick, Satisfying Shifts with a New Clutch Kit
Swapping out your stock clutch for an upgraded clutch kit is a challenging but rewarding project that completely changes your ride's shift performance and feel. While it may not be the right upgrade for every enthusiast, upgrading to a performance clutch can take your driving experience to the next level. If you're looking to modernize your clutch but aren't sure the King Cobra kit clutch kit is right for you, check out our other clutch kits for your Mustang.


