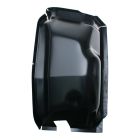
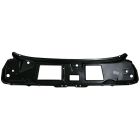
Cowl Panel Assembly Mustang 1969-1970
Highlights
- Heavy Gauge Stamped Steel
- Upper And Lower Cowl Panels
- High-Quality Reproduction
- Restores Original Appearance


Cowl Panel Assembly for all 1969-1970 Mustangs.
This Cowl Panel Assembly is a direct fit replacement for original sheet metal on your 1969-1970 Mustang. Cowls on vintage Mustangs commonly leak and need significant rust repair. This Cowl Panel Assembly will get the job done right!
Features and Benefits:
- Heavy Gauge Stamped Steel
- Direct Fit Replacements
- Quality Steel Construction
- Black Finish
This Cowl Panel Assembly is made out of heavy gauge stamped steel. It comes with the upper and lower cowl panels. You'll love the way it looks once you install it on your Mustang, and you'll be one step closer to having a fully-restored pony car.
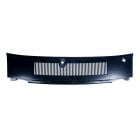
Please Note: The cowl grille is not included in this assembly.
California Residents: Proposition 65 Warning
Related Categories: Mustang Parts, Mustang Body & Sheet Metal, Mustang Cowl Area