How to Install a Cat-Back Exhaust on a 2021+ Ford Bronco
Last Updated April 16, 2024 | Hamilton SchuttUpgrading to a cat-back exhaust on your new Bronco is a great way to boost power and transform the exhaust note. Cat-back exhausts eliminate backpressure and let exhaust flow freely, helping your engine run better.
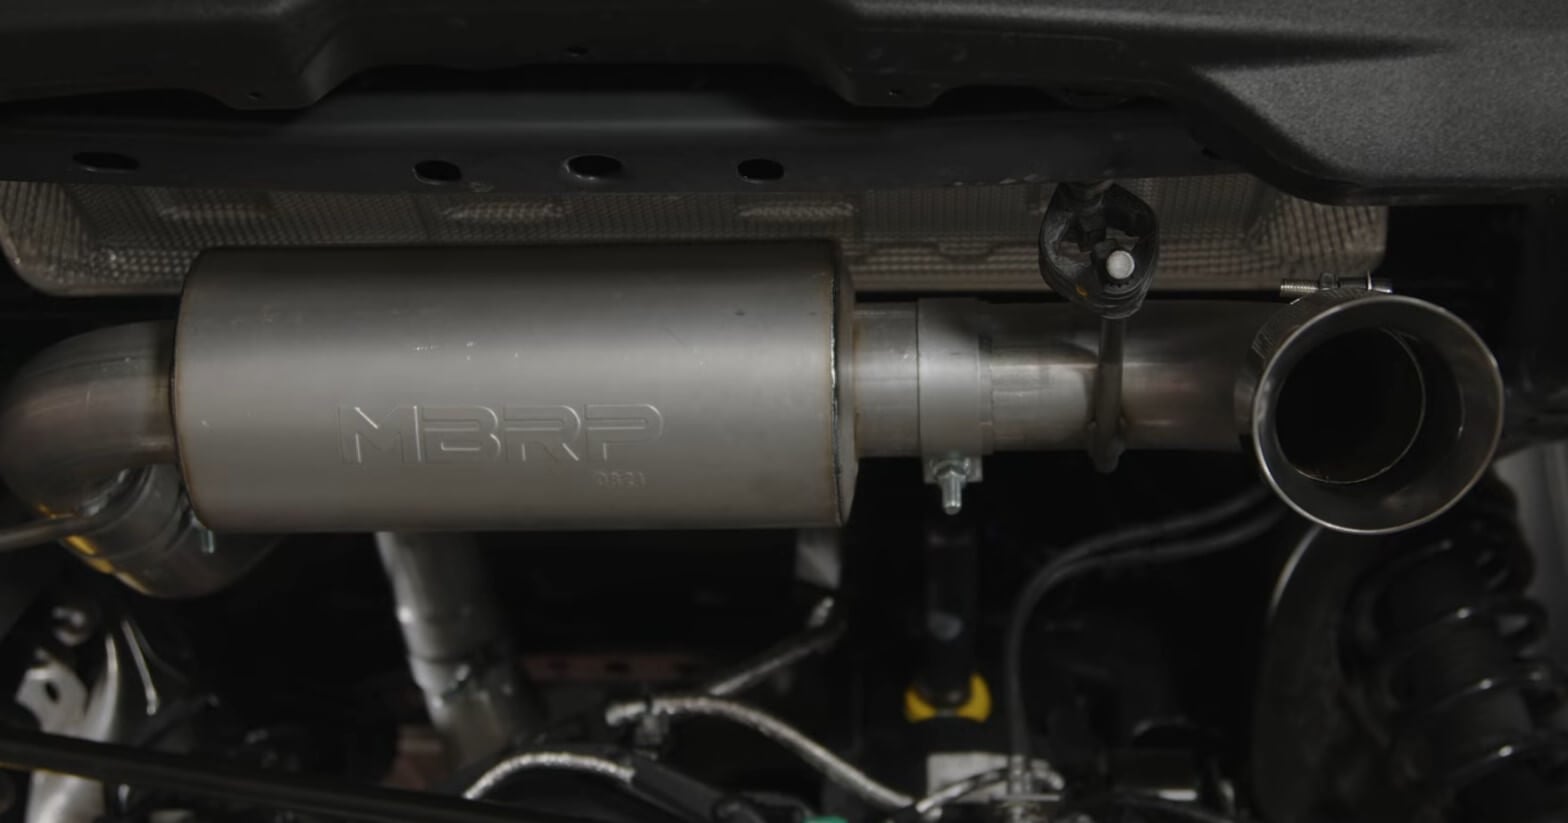
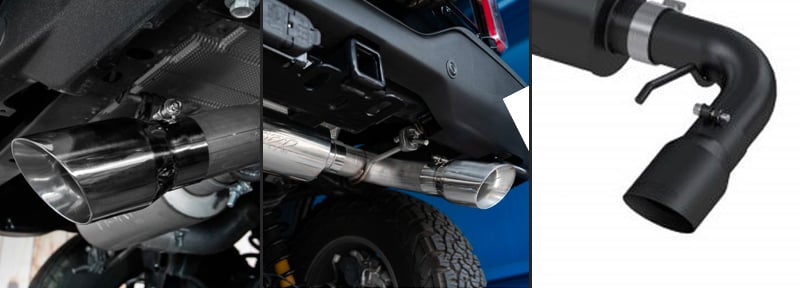
Different exhausts have different sound qualities. This lets you select an exhaust note that suits your ride's personality. Where the stock exhaust is a bit softer and more subtle, an aftermarket MBRP cat-back takes things up a notch for a more aggressive tone.
Before You Get Started
This installation is surprisingly simple, but there are a few things to keep in mind before getting to work:
- You'll likely be reusing the factory hardware, so keep it organized.
- Having a second set of hands will be helpful, so grab a friend.
- Keep your stock exhaust as a spare. It'll be nice to have a backup should your new exhaust go toe-to-toe with a boulder and lose that battle.
- Installing an aftermarket exhaust won't directly impact your warranty. But, should a problem arise that can be traced back to the aftermarket part, your warranty may be voided. Familiarize yourself with the Magnuson-Moss Warranty Act to avoid getting duped by a dealership.
- Your exhaust kit options depend on which engine your Bronco has. However, there are some kits, like the one we used, that are cross-compatible with slight modifications.
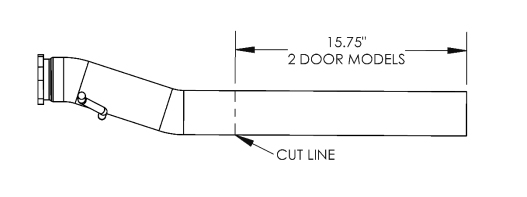
- Many exhaust kits fit the 2- and 4-door models. However, most require you to cut 15 ¾” off the mid-pipe to install on a 2-door bronco. The exception would be kits that come with two different-sized mid-pipes. If you cut the pipe, you can either leave the edge jagged or file it down depending on how professional you want the install to look.
Bronco Cat-Back Exhaust Installation
Swapping your Bronco's exhaust is easy, quick, and generally the same for 2-door and 4-door Broncos. For our exhaust upgrade, we used a cat-back kit from MBRP but the steps should be similar for most aftermarket cat-backs. Use these steps in conjunction with MBRP's installation instructions.
Installation Time: 1-½ - 2 hours
Required Tools:
- Lift or Jack and Jack Stands
- ⅜” Ratchet
- 15 mm Socket
- 10 mm Socket
- 10 mm Wrench
- 5/16” Allen Key
- Hanger Removal Tool
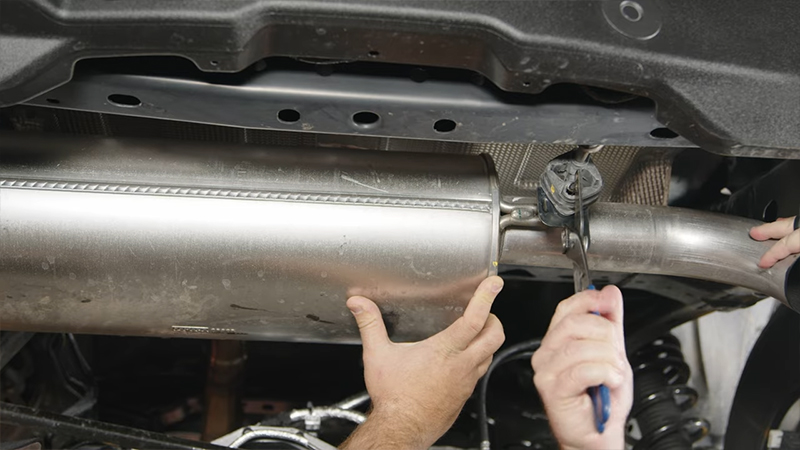
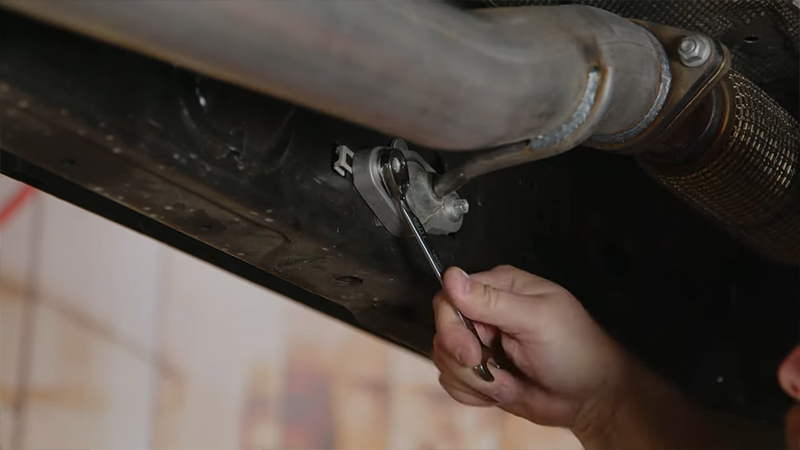
Step 1: Loosen Muffler Clamp
Loosen the clamp holding the muffler to the over-axle pipe.
Step 2: Pull Muffler Hanger Arms Out of Insulators
Remove the muffler's hanger arms from the insulators with a hanger removal tool.
This is where it's helpful to have an extra set of hands to hold the muffler so it doesn't fall once it's free from the hangers.
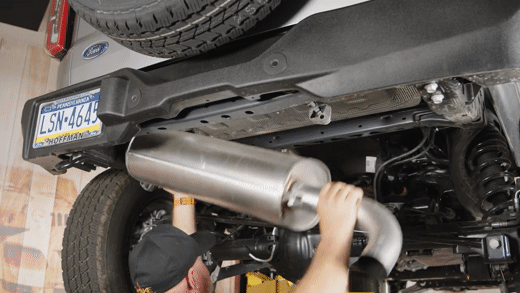
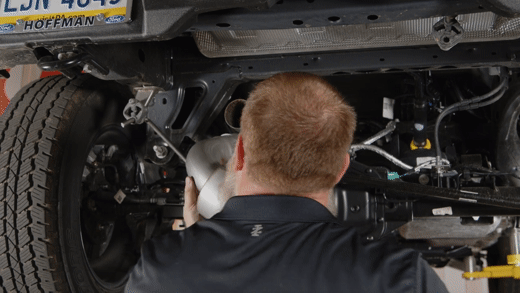
Step 3: Remove Muffler
Twist the muffler free from the over-axle pipe.
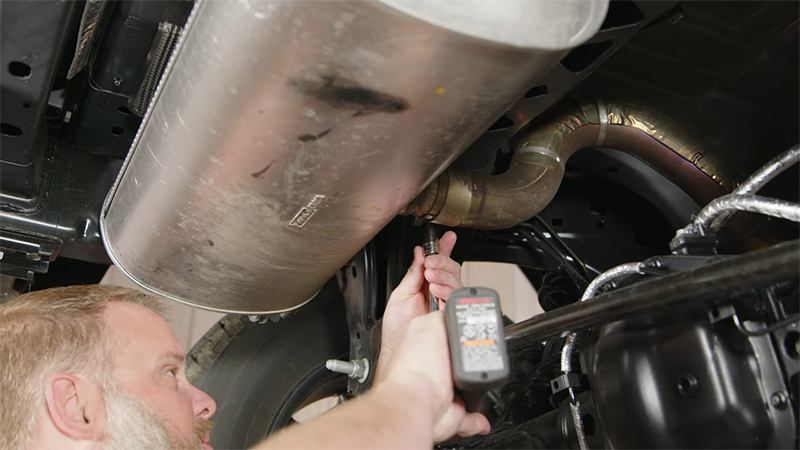
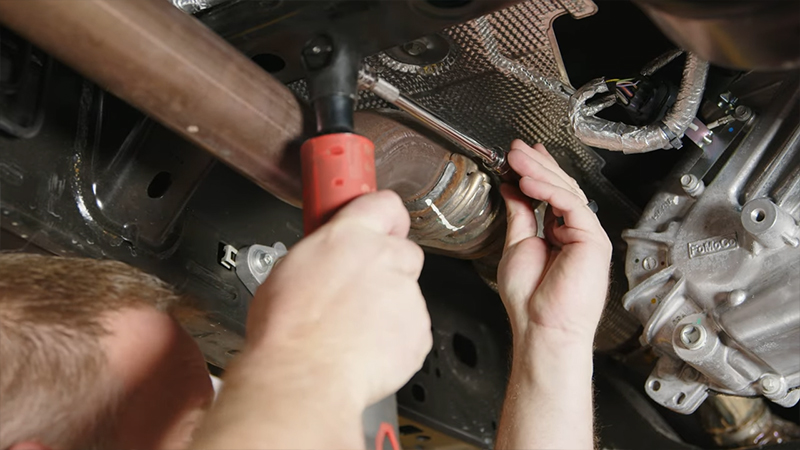
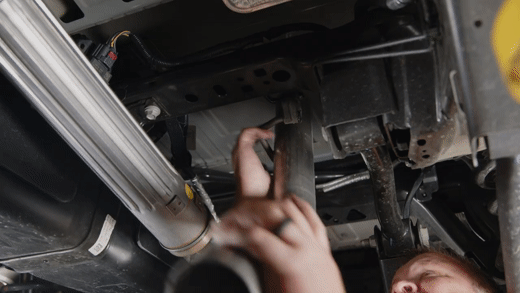
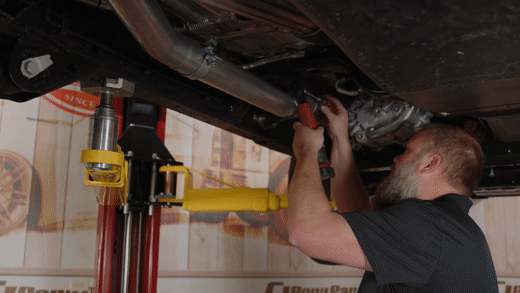
Step 4: Remove Downpipe Nuts
Remove the two nuts securing the mid-pipe to the downpipe.
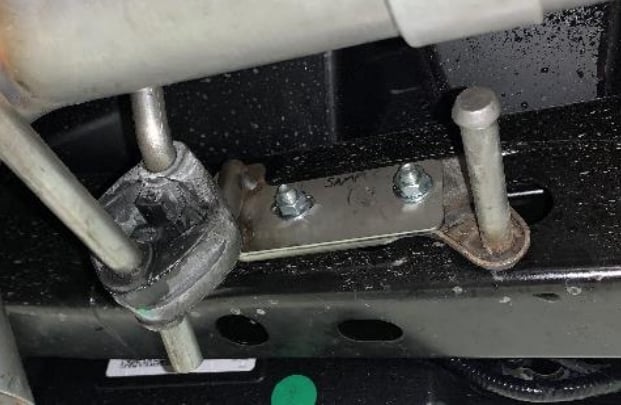
Step 5: Remove Hanger Bracket from Frame Rail
Remove the two bolts holding the hanger bracket to the frame rail.

Step 6: Disconnect Stock Exhaust
Pop the over-axle pipe hanger arm out of the insulator near the rear axle.
Step 7: Remove Stock Exhaust
Slide the exhaust off the downpipe and over the axle to remove it.

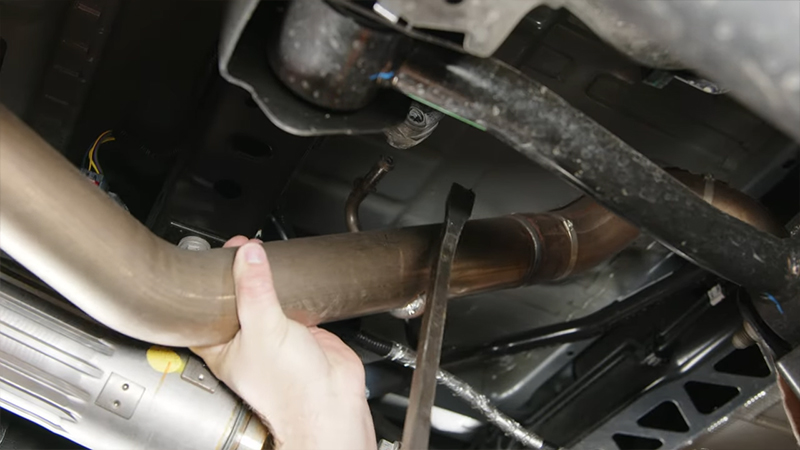
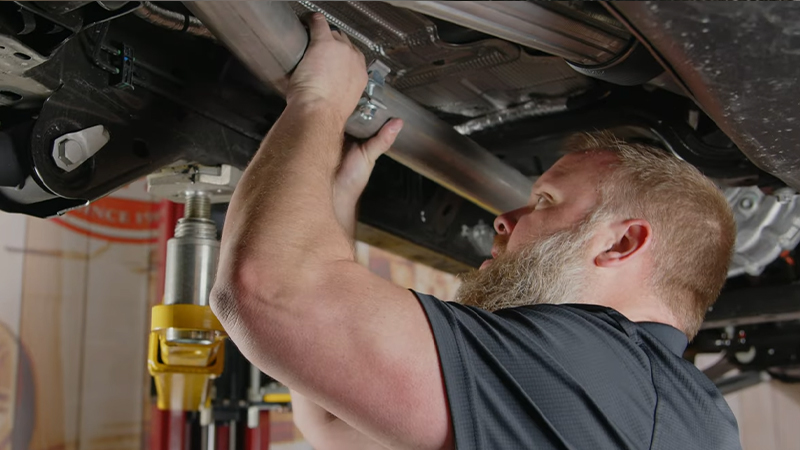
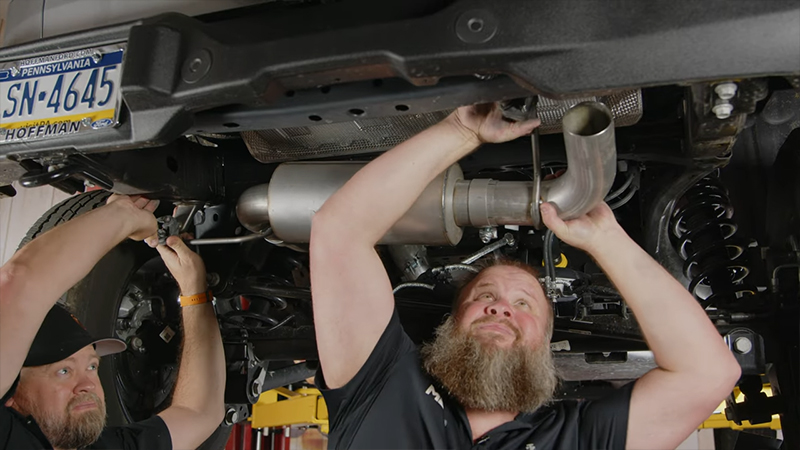
Step 8: Install Mid-Pipe
Slide the stock frame rail bracket from Step 5 onto the arm on the new mid-pipe.
Secure the mid-pipe to the factory downpipe's bolts with the two stock nuts, but don't fully tighten them yet.
Step 9: Reinstall Stock Bracket to Frame Rail
Bolt the stock bracket back onto the frame rail and tighten the bolts all the way down.
Step 10: Insert First Over-Axle Pipe into Hanger Insulator
Slip the first over-axle pipe's hanger arm into the insulator near the axle.
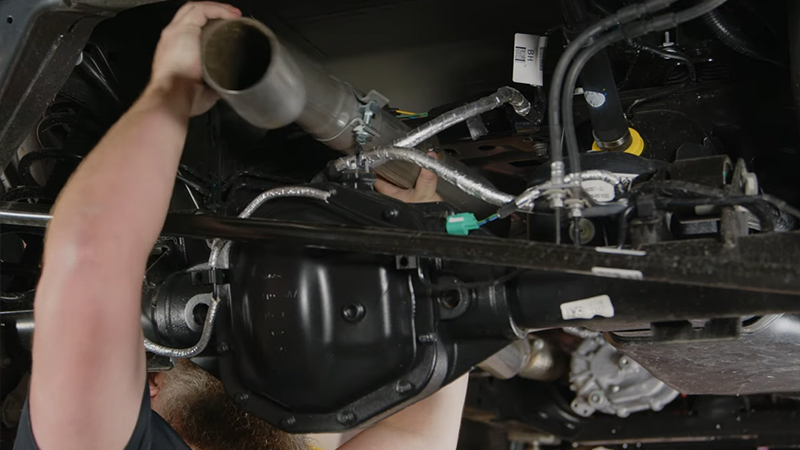
Step 11: Connect Over-Axle Pipe to Mid-Pipe
Add a clamp to the end of the over-axle pipe that does not have a hanger arm and connect it to the mid-pipe.
Step 12: Install Second Over-Axle Pipe
Connect the second over-axle pipe to the first with a clamp.
Step 13: Install Muffler
Clamp the muffler to the end of the over-axle pipe.
Slip the muffler hanger arm into the driver-side hanger insulator and insert the over-axle pipe into the muffler.
Step 14: Install Passenger-Side Hanger Bracket (2.3L Models Only)
If you have a 2.7L model, move on to Step 15.
Remove the rubber insulator from the stock passenger-side hanger and slide it onto the included 2.3L hanger bracket.
Remove the two flange nuts holding the stock hanger in place. Then, position the included 2.3L spacer onto the bracket bolts followed by the new hanger.
The new hanger's arm should be positioned to the left side, with the stock hanger arm still present on the right.
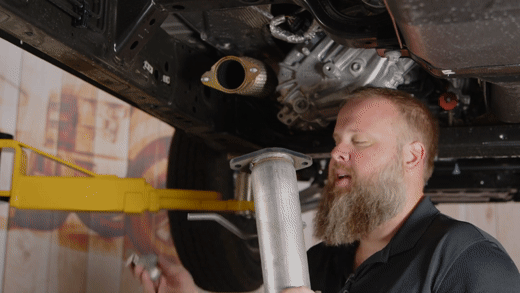
Step 15: Install Tailpipe
Clamp the tailpipe to the muffler outlet.
Push the tailpipe hanger arm into the passenger-side hanger insulator.
If you have a 2.3L model, use the new hanger arm instead of the stock one.
Step 16: Install Exhaust Tip
Slide the exhaust tip onto the tailpipe and tighten the tip's integrated clamp.
Step 17: Tighten It All Up
Go back through the exhaust and tighten down each loose bolt to finish the installation. This includes mid-pipe nuts, first over-axle pipe clamp, second over-axle pipe clamp, muffler clamp, tailpipe clamp.
Enjoy Your New-Found Sound and Power
Now that you've installed your new exhaust, it's time to pop those doors off and hit the road. Take your new exhaust system out for a test run on your favorite trail or start looking for your next upgrade!


