
2021+ Ford Bronco Tire Carrier Installation
Last Updated September 27, 2024 | Kevin BrentUpgrading to a larger wheel and tire combo on your Ford Bronco is an exciting way to enhance its looks and performance. However, you’ll likely need a new spare tire carrier to accommodate the bigger spare. In this case, adding an aftermarket spare tire carrier is an ideal solution. This guide will walk you through the step-by-step process of removing the factory spare tire carrier and installing a new spare tire carrier from RTR.

Ford Bronco Spare Tire Carrier Install Instructions
For this install, we chose this adjustable spare tire carrier for 2021-2024 Ford Broncos from RTR. The kit comes with some unique customization options, allowing you to adjust the fitment of the carrier based on the size of your Bronco’s spare tire.
The installation process is simple and should only take around an hour. You’ll be ready to hit the trail again in no time with a new set of larger wheels and tires.
Tools and Materials Needed:
- Cutting Pliers
- ⅜” Ratchet or Impact Wrench
- 10mm Socket
- 13mm Socket
- 16mm Socket
- 21mm Socket
- T-10 Torx
- T-15 Torx
- T-20 Torx
- T-25 Torx
- Brake Cleaner Fluid
- T-30 Torx
- T-45 Torx
- Extensions
- 13mm Wrench
- 16mm Wrench
- 5mm Allen Wrench
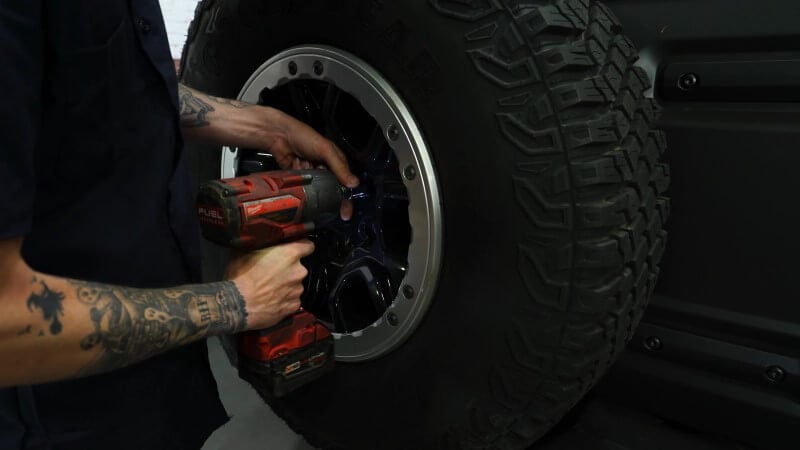
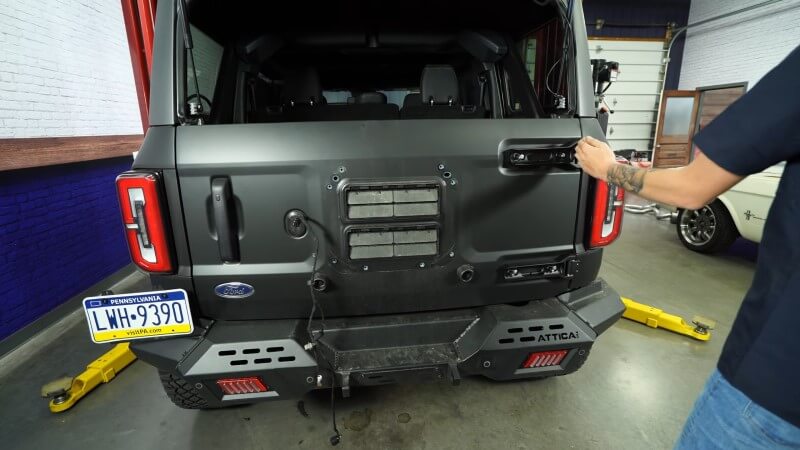
Step 1: Remove the Factory Spare Wheel
Loosen and remove the bolts securing the spare wheel to the existing spare tire carrier. Set the spare wheel aside for later.
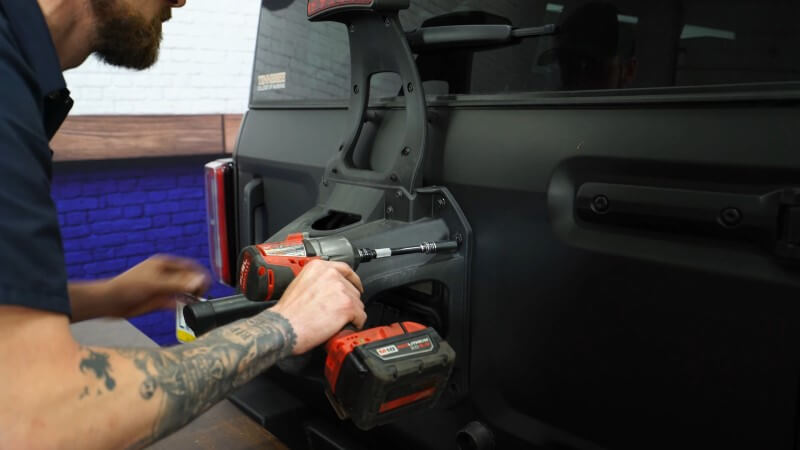
Step 2: Remove the Factory Spare Tire Carrier
Remove the eight bolts securing the factory spare tire carrier. Use a workbench or some kind of support to hold the tire carrier as you work. Remove the two plastic hardware pieces to free the insulation foam.
Then, remove the four screws holding the brake light in place. Disconnect the two screws on the front of the tire carrier and remove the wiring harness clip.
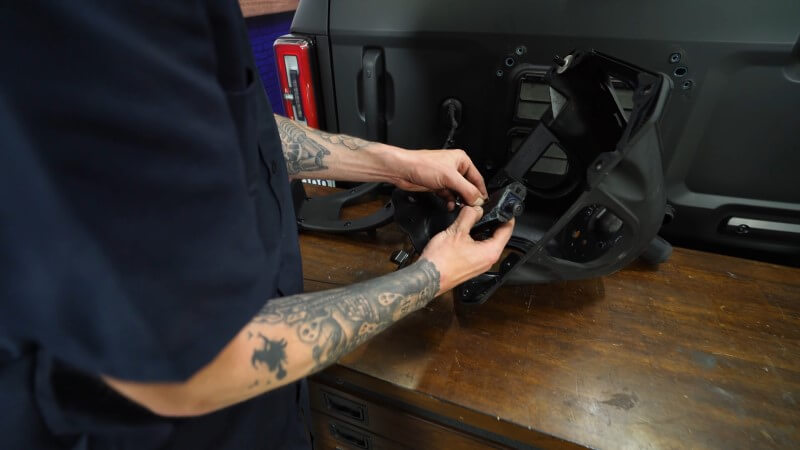
Step 3: Disconnect Factory Rear Camera
Remove the metal bracket holding the rear camera assembly and carefully disconnect the camera wiring. If your camera is stuck, carefully work it out, as it may be tight. Set the camera aside for reinstallation later.
Step 4: Separate Rear Brake Light
Remove the T-25 Torx screws on the brake light assembly. Separate the two halves and disconnect the wiring harness going to the brake light. Next, remove the hardware holding the the brake light and set the light aside.

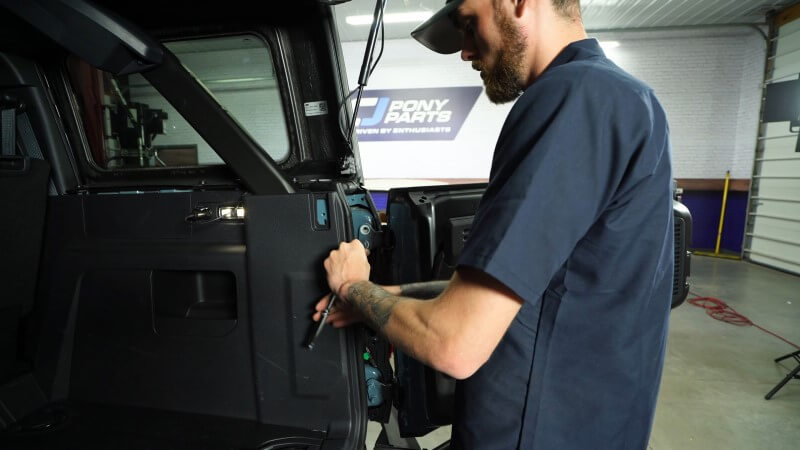
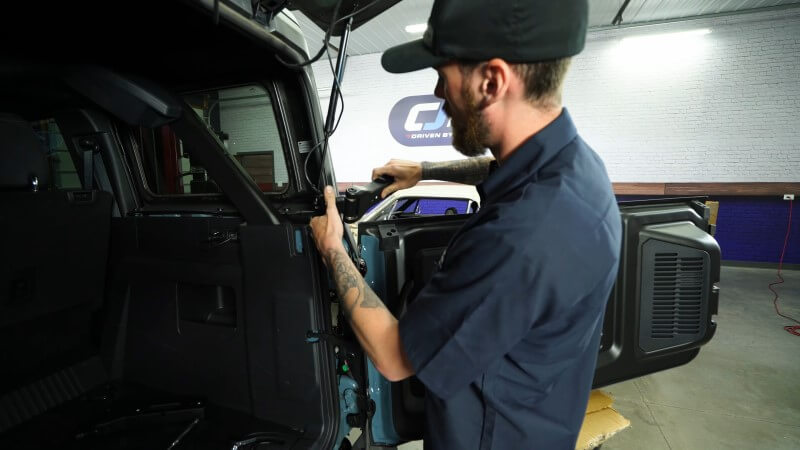
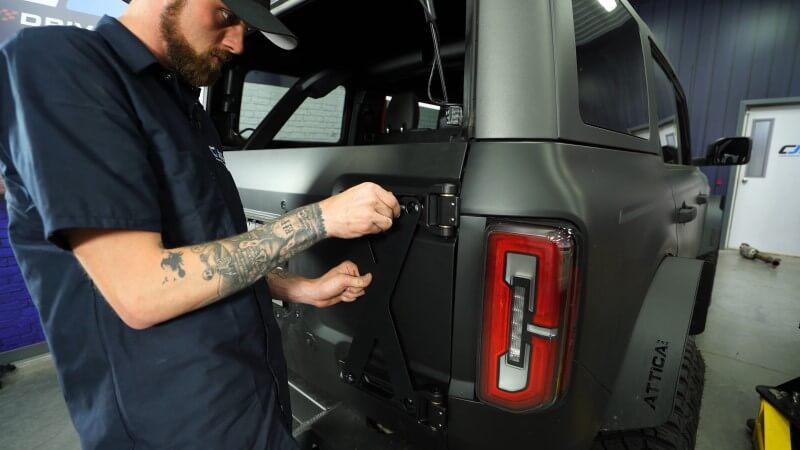
Step 5: Replace Factory Tailgate Hinge
Open the tailgate and secure it with a stool or block of wood to prevent movement. Remove the panel covering the tailgate hinges using a screwdriver. Next, remove the hinges. Start with the top hinge and remove both the inner and outer bolts. Carefully remove the factory hinge, as it will no longer support the tailgate once unbolted.
Step 6: Install the RTR Hinges
With the factory hinges removed, install the new RTR upper hinge using the provided hardware. Snug the inner bolts without fully tightening them. Adjustments will be made later to ensure alignment.
Install the M8 hardware on the outer side of the tailgate hinge, leaving it loose for final adjustment. Repeat steps 5 and 6 for the lower hinge.
Step 7: Align the Tailgate
Carefully close the tailgate and check the alignment, ensuring an even gap on all sides. If everything lines up correctly, proceed to tighten the inner and outer hinge bolts fully.
Step 8: Install the Spare Tire Carrier Alignment Plate
Remove the two small stoppers at the base of the factory carrier and replace them with the clips from the RTR kit. Use the factory bolts removed from the old hinges to attach the RTR alignment plate. Make any necessary adjustments to ensure proper alignment of the plate and hinges. Once aligned, remove the alignment plate, but keep it for future use.
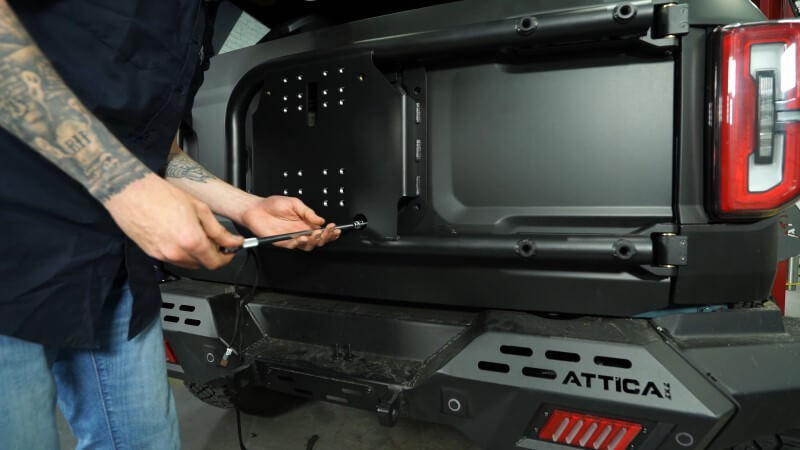
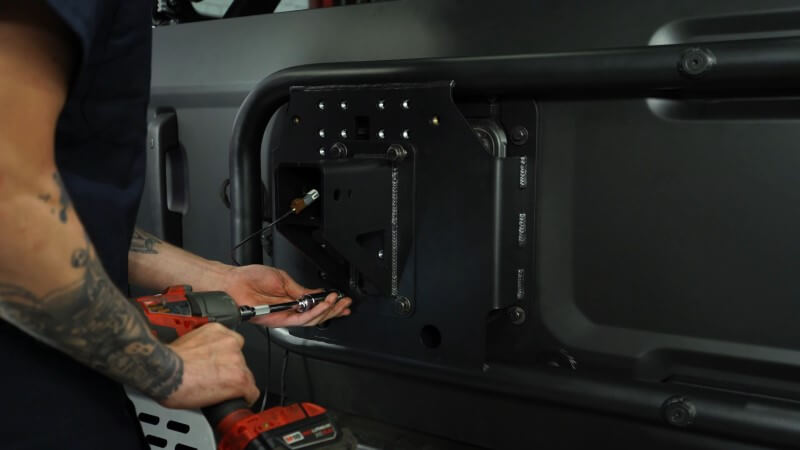
Step 9: Install the Tire Carrier
Thread the provided hardware into the top two holes of the carrier, leaving them slightly loose. Hang the RTR spare tire carrier on the bolts and loosely install the remaining hardware. Ensure all bolts are snug but not fully tightened until final adjustments are made. Then, install the 5mm allen bolts onto the RTR hinges and tighten them down.
Step 10: Install the RTR Camera and Wiring Harness
Route the camera harness through the rectangular hole in the tire carrier. Connect the appropriate wiring harness extension (provided in the kit) based on your Bronco’s wiring setup.

Step 11: Adjust Tire Mount Support
Adjust the position of the tire mount support based on the size of your tires. Once the support is in position secure it with the four supplied bolts and tighten them down.
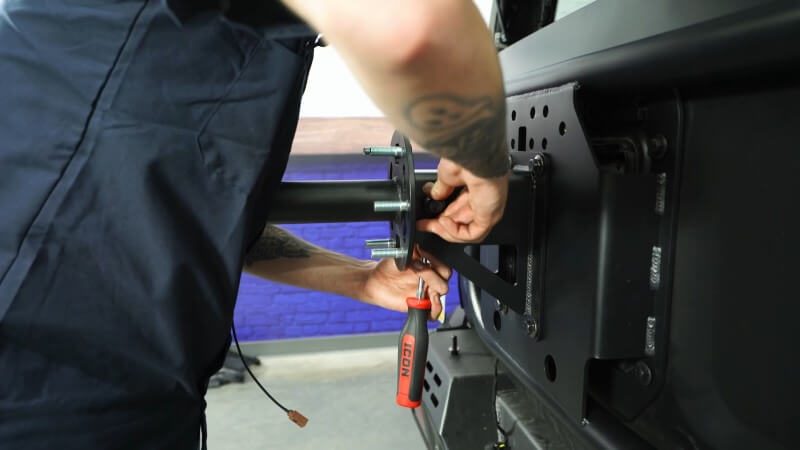
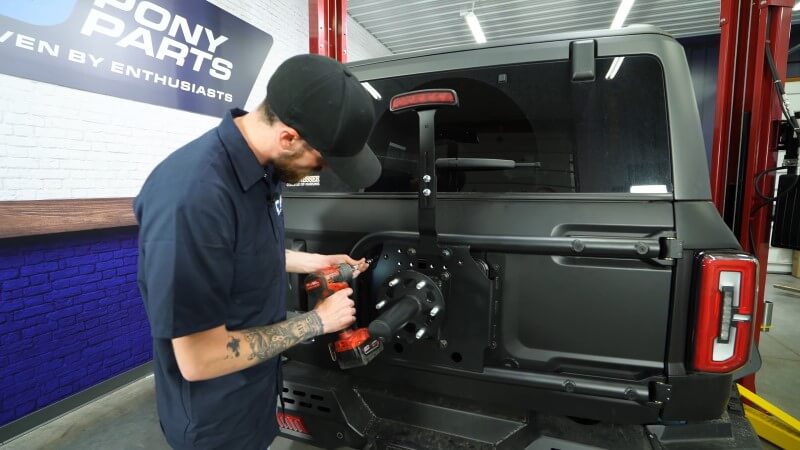
Step 12: Install Tire Carrier Hub
Slide the rear camera wiring harness through the carrier-provided hub and install the L-shaped bracket into the hub, making sure not to pinch the wire. Slide the hub onto the carrier support and install the provided side and bottom carrier bolts to connect the two pieces. Then, tighten down the bolts.
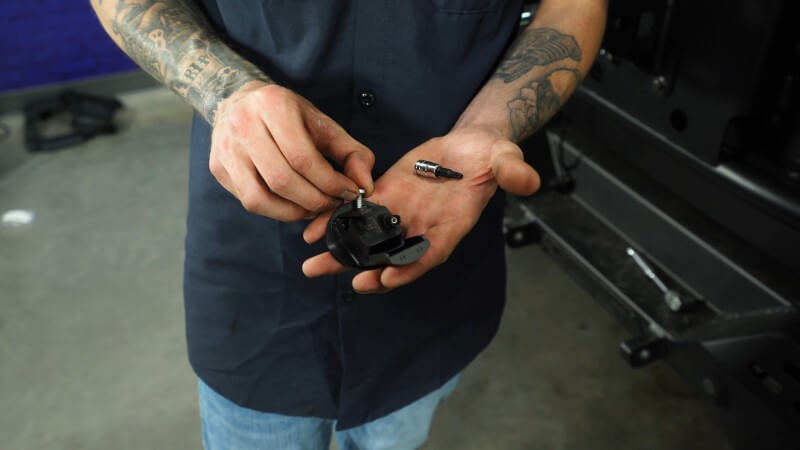
Step 13: Mount Factory Camera
Remove the T-20 bolt from the factory camera mount and disconnect the camera. Then, stick the camera into the RTR bracket and mount it using the provided hardware. Connect the extended wiring harness to the camera, slide it into the carrier hub, and secure it with the provided hardware.
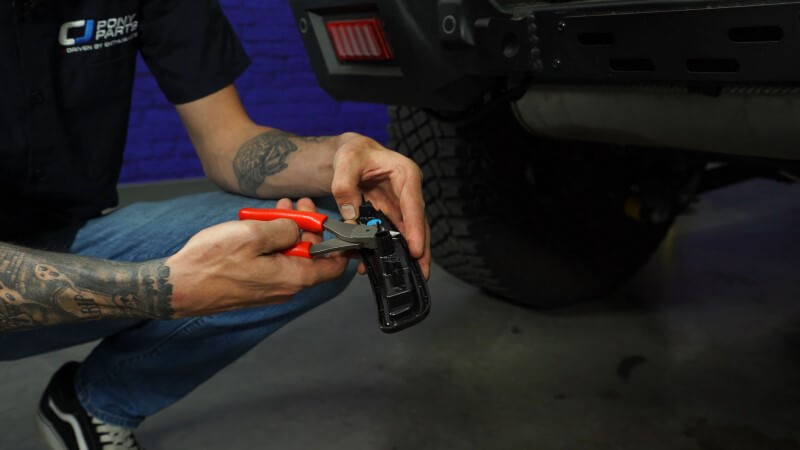
Step 14: Prep Factory Brake light
Grab the factory brake light and snip the plastic post in the middle of the rear side of the light. Slide the RTR light cover onto the light and attach it to the RTR brake light bracket using the provided hardware.
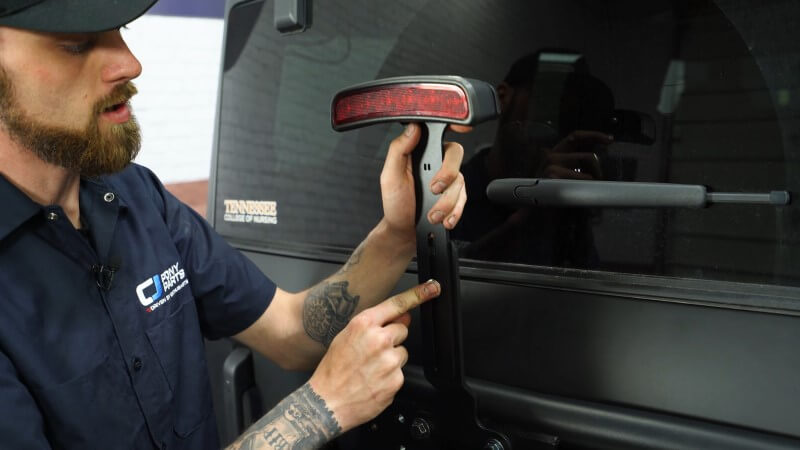
Step 15: Mount and Adjust the Brake Light
Reinstall the factory brake light onto the RTR carrier. The brake light mount is adjustable, so line it up with the top bolt holes for now. You can adjust it higher or lower based on your tire size. Install the two provided bolts to connect the light mount to the carrier.
Slide two bolts through the brake light bracket and mount and adjust the height based on your tire size. Then, tighten down the bolts and reconnect the brake light wiring harness. You may need to use a cable tie to ensure the wire is connected to the harness.
Step 16: Tighten All Bolts
Go over all bolts, ensuring everything is aligned and tightened to specifications. Close and open the tailgate to confirm proper operation without any interference from the spare tire carrier. If the tailgate aligns well, tighten the hinge bolts and reinstall the hinge bolt cover.
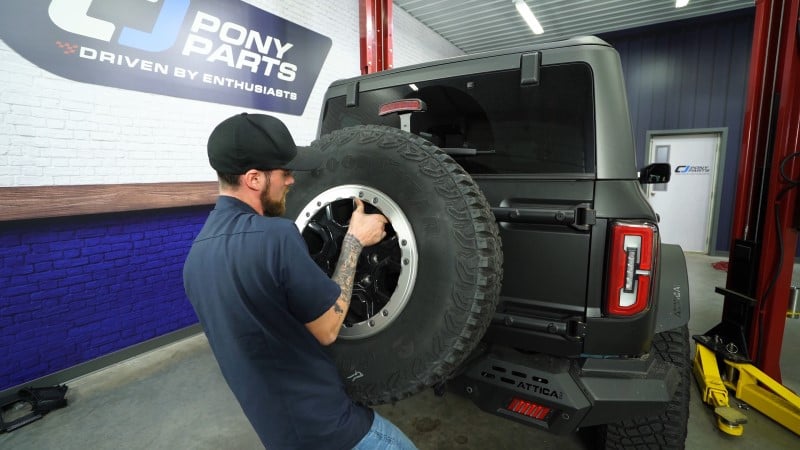
Step 17: Install the Wheel
Attach the spare tire to the RTR carrier using the provided RTR lug nuts. Ensure everything is secure and properly tightened.
Equip Your Bronco with New Wheels and Tires
Now that you have a new RTR spare tire carrier installed on your Ford Bronco, you’ll have improved adjustability for larger tire and wheel combinations. This carrier is designed to handle heavier loads without compromising your tailgate and provide a platform for mounting additional accessories.
If you’re looking to add larger wheels and tires to your Bronco, there are tons of aftermarket options. We offer aftermarket Bronco wheels and tires in a wide variety of styles, sizes, and materials so you can find the perfect match for your ride.


