
Fox Body Mustang Headlight Kit Installation Guide
Last Updated October 24, 2024 | Nate MoonisIf the headlights on your Fox Body Mustang are looking cloudy or yellowed, it's more than just an eyesore. Foggy headlights can be a major safety issue due to reduced light output. Replacing them with a modern, ultra-clear headlight kit can give your car a fresh look while dramatically improving nighttime visibility. Check out this helpful guide to help you replace the foggy headlights on your Fox Body with new, clear replacements.
How to Replace the Headlights on a 1987-1993 Mustang
This step-by-step installation guide will walk you through the removal of the old headlights and the installation of the new units. While this video and guide were made for the 1987-1993 Fox Body Mustangs, the process is similar for the 1979-1986 Mustangs as well. In the video above, we used an ultra clear headlight kit with amber reflectors that comes with the necessary hardware for the installation.

Tools and Supplies Needed:
- 3/8" Ratchet
- 15mm Socket
- 11mm Wrench
- Safety Glasses
- Jack Stands
- Floor Jack
Step 1: Jack Up Your Mustang
While this isn't required, it makes accessing the fog lights much easier. Slide the floor jack under the front K-member and start pumping the jack. Then, place jack stands under the designated spots on the frame rails.
Then, repeat this process in the rear. Remember to jack the rear up by the differential. After you've jacked up your Fox Body Mustang, gently shake the car to make sure it's secure on the jack stands.
Step 2: Disconnect Wiring Harness
Pop the hood and disconnect the wiring harness from the headlight you want to remove. This gives you more room to work.

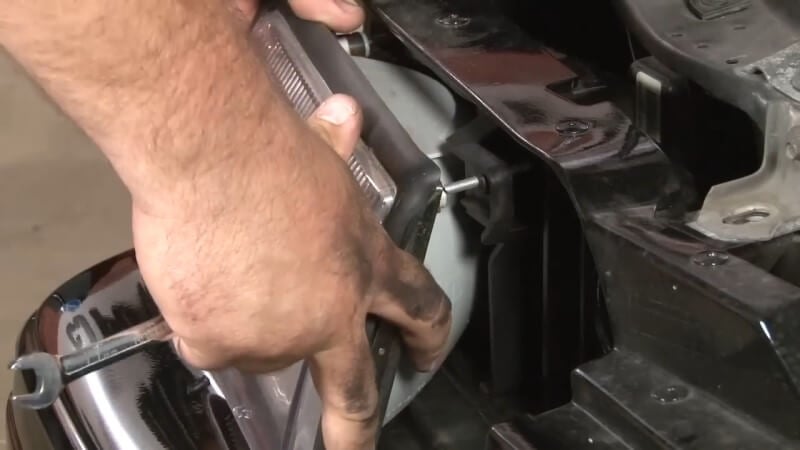
Step 3: Remove Headlight Retaining Nuts
Use your 11 mm wrench to remove the three nuts that hold the headlight in place. Then, remove the two nuts for the marker light and two for the corner light.

Hold onto the retaining nuts for reuse when installing the new headlight.
Step 4: Remove Headlight, Marker Light, and Corner Light
After you've removed the retaining nuts, gently wiggle the headlight, marker light, and corner light loose. Then, remove them.
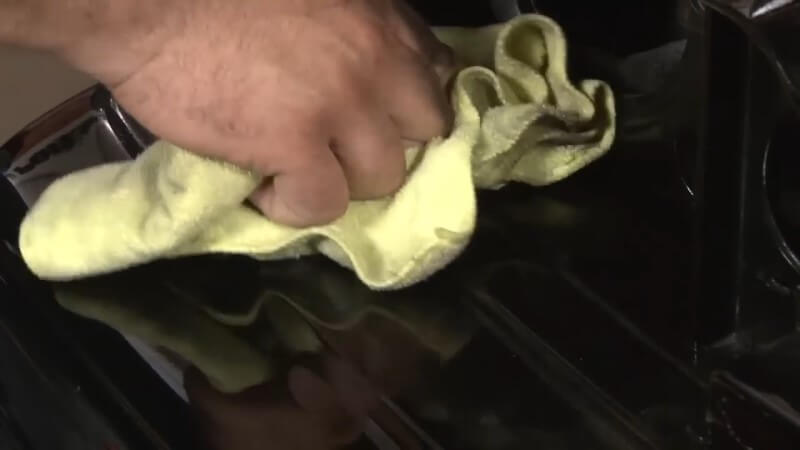
Step 5: Clean Headlight Area
While the headlights are off, clean any dirt or debris from the headlight housing area for a cleaner installation.
Step 6: Install New Parking Light
Feed the new bulbs and sockets into place through the headlight openings.
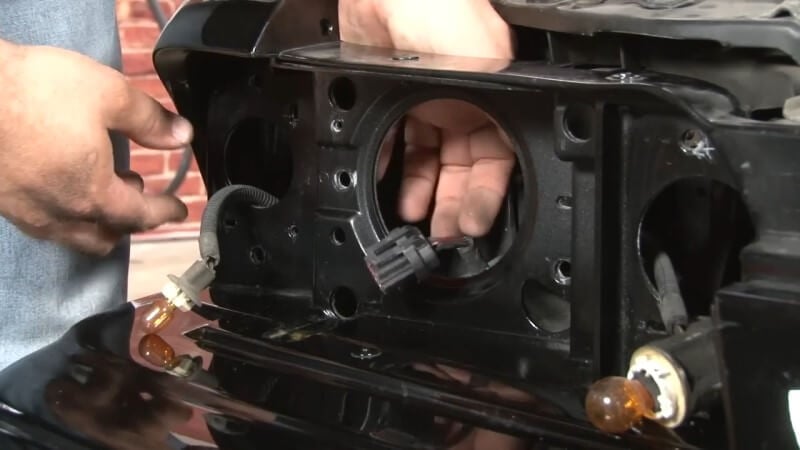
Then, position the new parking light properly and secure it using the retaining nuts you saved earlier.

Step 7: Install New Corner Light
Slide the new corner light into position and ensure it's properly aligned with the factory mounting points.

Then, tighten down the retaining nuts you saved earlier to secure the new corner light.
Step 8: Check Headlight Seals
Ensure the new headlight seals are correctly seated and tight. If they aren't, adjust them until they seal the headlight properly.

Step 9: Insert New Headlight
Gently push the new headlight into place between the corner and parking lights. Once it's properly aligned, reinstall the retaining nuts to lock it into place.

Step 10: Reconnect Wiring Harness
After your new headlight is in place, plug the wiring harness into the back of the new headlight.
Step 11: Repeat on Opposite Side
Once you've completed the installation on one side, repeat the same process on the other side of the car. This includes removing the old lights, cleaning the area, and installing the new ones in the same order.

Step 12: Test New Headlights
After both headlights are installed, turn your car on and ensure the new headlights work properly.

Congratulations, you're all done!
Improve Nighttime Visibility with New Headlights
Replacing the headlights and fog lights on your Fox Body Mustang with a six-piece ultra-clear kit not only modernizes the look but also enhances safety by improving light output. Also, remember to aim your headlights for the best results possible. The entire installation process takes about an hour and a half, and you'll be back on the road with brighter, clearer headlights in no time.
Check out our selection of replacement headlight kits and get started on your installation today.


