COBB Front Mount Intercooler Mustang EcoBoost 2015-2023
Highlights
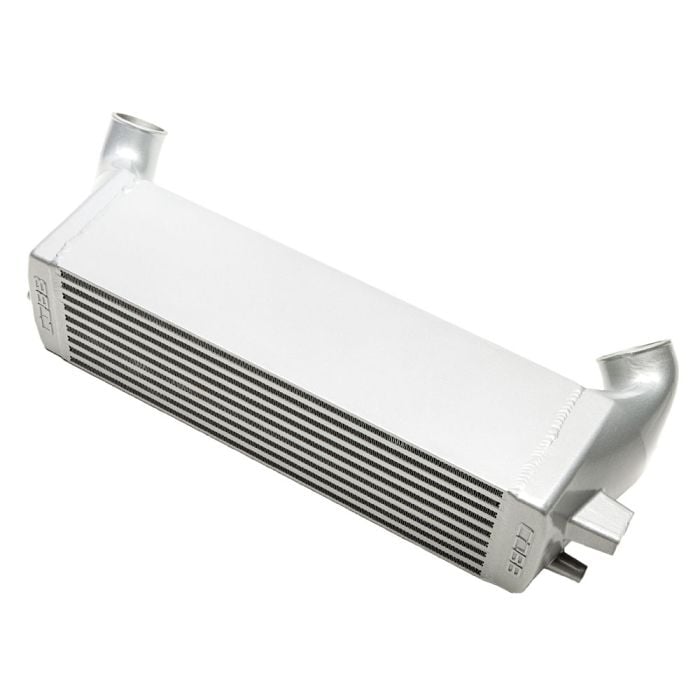
- Core Size: 20 X 5.9"" X 5.9"""
- 2.5" Inlet And 3" Outlet
- Cast End tanks With Cobb Logo
- Factory-Like Fitment

COBB Front Mount Intercooler for 2015, 2016, 2017, 2018, 2019, 2020, 2021, 2022, and 2023 EcoBoost Mustangs.
The factory intercooler on the EcoBoost Mustang is great if you’re cruising down the highway, but seriously robs your engine of power when amping up the boost. That's where COBB steps in with their new Front Mount Intercooler designed specifically for your 2015-2023 EcoBoost Mustang. Due to the massive bar and plate core design, you can expect much cooler charge air temperatures, even when you’re pushing your EcoBoost Mustang to the limit.
Features and Benefits:
- Core Size: 20” x 5.9" x 5.9"
- Massive Bar and Plate Core Design For Increased Cooling Efficiency
- Cast Endtanks With COBB Logo
- 2.5” Inlet and 3” Outlet
- Air Diverting Fins Located On Endtanks Designed with CFD Analysis
- Retains Factory Shutter System If Desired
- Works With Stock or COBB Piping
- No Cutting Or Drilling Required
- Factory-Like Fitment
- CARB EO: D-660-5
*CARB Approval is ONLY for 2015-2016 EcoBoost Mustangs. This product is NOT CARB approved when used with 2017+ EcoBoost Mustangs.
Manufactured with custom cast aluminum end tanks and an engraved COBB logo, this intercooler’s core size is a massive 20” x 5.9" x 5.9" versus the factory core size of 20.6” x 5.75” x 3.25”. With a much larger volume, you can expect your charge air to be cooler and denser allowing for much more performance across the board. This intercooler upgrade even allows you to retain your factory shutter system if you desire! With an easy and straightforward installation requiring no cutting or drilling, this intercooler is a no-brainer for your EcoBoost Mustang build!
Vehicle Fitment:
- 2015-2023 EcoBoost Mustang
California Residents: Proposition 65 Warning
Related Categories: Mustang Parts, Mustang Engine, Mustang Intercoolers, Mustang EcoBoost Engine Parts
This item is 50-state legal (CARB E.O. Number D-660-5)
Installation Difficulty

Intermediate skill is required for this installation.
Installation Videos
Video Transcript
This Cobb front mounted intercooler will be a direct replacement for the factory intercooler on all 2015 through 2017 EcoBoost Mustangs. It's over twice the size of the factory intercooler and features cast tanks which will be much stronger and better for higher boost levels that we are running on this car. Again it is a direct replacement. It requires no permanent modifications. They do suggest the removal of the factory shutter system.
First what we got to do is remove the bumper cover. We'll start by taking off the splash shield first, get that out of the way and then we can work on the hardware for the cover. The splash shield is held on by some screws and some push pin clips. We're going to start with the push pins, we pull down the center. You can use a screwdriver for this as well. Then we'll release this clip here, and simply push in the center. Just pop it out. Do the same on the other side. Then we're going to move. Now we can slide the splitter back and off the car.
Now with the splash shield off while we have access to them, unplug your fog lights and lights. It'll make it a lot easier to take the bumper cover off. With the splash pin out of the way we're going to move up under the wheel well. There's two more of those push pin clips. One here, one kind of hard to see up here. We're going to move these two next and then access the one screw for the bumper cover. Simply push the center in and pry it right out. We're going to push the splash shield back. There's one more small screw right on top here. Make sure you get this one off or you will damage the cover trying to remove it.
Then repeat the process on the other side. Now moving up top, we're going to move the eight clips that hold the radiator cover on. With the cover off now there's hardware underneath that we have to get to. The first one, I'm going to pull this seal back, two tiny little screws on the outside edges. Then six more larger ones across the front. Now we're just about ready to remove our bumper cover. You want to start over here on the sides. You just hold them by clips, so you get your hands behind it and just pull to release. Okay with those released on the sides, you're going to lift up on the cover to get it off the studs in the front. Just slide it away from the car.
The front bumper off, now we're going to remove the shutter system. This is optional. Leave it if you don't need it. We definitely don't need it for this car so we're going to remove it to give us more room and also get more air to the intercooler and our radiator. The shutter is held on by two clips at the top and then four screws. Once you get everything apart there's one more five millimeter bolt on the back. Don't forget as you're removing the shutter system, reach up and disconnect the plug. With that out of the way we can remove the four bolts on the bottom of the radiator support where the crossbar goes and then we're going to move up top. There's four bolts up there as well.
Now we're going to remove both the trim panels on each side of the radiator. Press there. Okay, that's up out of the way now. We can actually work on removing the front mount intercooler itself and we're going to start by disconnecting both the charge pipe for the passenger side and the one on the driver side. On the passenger side the hose just has to be out of the way. The driver's side where you disconnect it at the intercooler and then also disconnect the throttle body and get rid of it as it's not used with our new COBB intercooler.
To remove the intercooler there's just one bolt that has to come off. It's a bolt on this side. Everything else including the other side is just going to be clips. Now clip the other side. You need to lift it up. There's two brackets in the way. Yep, and pull it out. Unplug your map sensor and then you can slowly work its way out. With everything off now we can remove these clips. We're not going to need them with our COBB intercooler.
Now for the next step, we're going to transfer the map sensor from our stock intercooler to our COBB intercooler. I mean, no surprise here. Obviously the COBB intercooler is much larger, much higher build quality than our stock intercooler. We remove the factory screw to remove the map sensor from the factory intercooler. Now we'll install the COBB intercooler using the COBB supplied hardware. With that system installed, now we can carefully put the COBB intercooler up into place. Then connect it to the factory plate. The cooler in place, we can now work on the brackets. COBB provides this unique tool that will allow you to hold the bracket in the frame rail before you bolt it on.
Then begin the same process over on the other side. Now to get it to line up with the brackets and the intercooler, you do have to push up pretty hard against the radiator. Make sure you don't damage everything. There is plenty of room, you just got to give it a good push. Now we're going to connect the coupler over on the driver side. It's going to fit only this way. You want the COBB facing forward towards the intercooler. There's no way it's going to fit on the pipe. With the coupler installed on the intercooler, now you connect the pipe up to the throttle body.
Now you can move back down under the car and adjust and tighten both lower clamps. Now we're going to tighten down the brackets. You want to push the intercooler as far back on the bracket as possible when you tighten everything down. Now the last step in the actual installation is to reconnect the map sensor, then we'll just install all the parts that we removed. Since we're building a car for Ford performance, we're going to finish off our under hood modifications with a Ford performance radiator cover. Before we install the splash panels underneath here let's reconnect all the lights.
It was truly an honor for Ford to choose CJ Pony Parts to build this car for their Ford performance display at this year's SEMA show. With high quality Ford performance parts, along with high quality parts from Anderson composites and COBB, we built a Mustang that we are truly proud of. If you are lucky enough to be attending this year's SEMA show make sure you check out the Ford display and come check out our Mustang.


