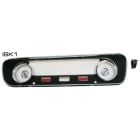
Ford Tooling Dash Pad Mustang 1965


Ford Tooling Dash Pad for all 1965 Mustangs.
Don't let a faded or cracked dash pad mar the interior of your 1965 Mustang! You can easily replace this piece with this new Ford Tooling Dash Pad, available from CJ Pony Parts!
Features and Benefits:
- Made from Original Ford Tooling
- Superior Quality, Shape and Fitment
- Made Out of High-Quality Materials
- Factory-Style Texture
- Available in Six Different Factory-Style Interior Colors
- Direct Fit Replacement
- Includes Mounting Hardware
This Dash Pad is made out of high-quality materials using original Ford tooling! It offers superior quality, shape and fitment, and it even retains the original's nice-looking factory-style texture! You'll find that this direct fit replacement isn't too difficult to install, and you'll love how nice your Mustang's interior looks after you're done putting it in. It comes in many different factory-style interior colors so it'll be easy for you to find the perfect color to match your Mustang's interior!
In your Mustang, what kind of condition is the dash pad and its trim in? If it is typical of other Mustang dash pads and trim from many Mustangs, it might look rather faded or cracked. CJ Pony Parts stocks plenty of dash pads, trim and accessories for your Mustang, so you can give this area a major appearance upgrade.
Order a Ford Tooling Dash Pad for your 1965 Mustang from CJ Pony Parts today!
Related Categories: Mustang Dash Pads & Trim

Installation Difficulty

Intermediate skill is required for this installation.
Installation Videos
Video Transcript
This dash pad was made from original Ford Tooling, so it's going to be an exact copy of our original pad, right down to the grain inside the vinyl. Flipping it over, it has the correct studs for installation. It even has the Ford logo embossed on the inside. For this installation, you'll need a phillips- head screwdriver, a short or right angle phillips-head screwdriver, 1/4" ratchet, short extension, 3/8" socket, panel removal tool, pick, plastic pry bar, flashlight, and a razor blade.
We're ready to install our new dash pad. The dash pad in our 1965 is actually not in that bad of shape, but it's an aftermarket reproduction, so we want to upgrade to the Ford Tooling piece. The dash pad is held in by these brackets above your glove box, and above the cluster, and two more brackets on the windshield. You'll also have to remove your speaker grill, and your speaker, to pull out the dash pad. I'm going to remove the two screws holding our dash speaker grill in. A short or right hand screwdriver will make this a lot easier. Now I'll remove the four screws holding in our speaker. Since our speaker is soldered to our terminal here, we're going to slide it through the dash, and rest it on top of the stereo. That will allow us to pull our dash pad out.
Now we're going to pull out the brackets between the and the windshield. I'll remove the trim around our gauge cluster. Once you have the screws off, your two door panel screw clips in the middle have to be removed as well. That will leave the pieces above our glove box. The clips are a little tighter on this side, so we're going to use our door panel removal tool to get them off. The last hardware holding in our dash pad, is going to be these two studs. There's one on each side. Now we're going to remove the clips that hold in our defroster vents. Simply push up from underneath and they'll pop right out. On the outside one here, you can use a pick to give you a hand. Defroster ducts are normally going to be clamped on. At some point in time, ours were taped, so we're going to remove the tape so we can get them off. Now we're going to pull down on the center here to release the two studs from the dash, and remove our old dash pad. Since we found our defroster hoses were taped to the top, we checked the bottom, they're also taped up down here. While we have our dash pad apart, we're going to put a new set in from Scott Drake.
Now we're ready to begin the installation of our new dash pad. We're going to start by laying the pad on top. Get these two studs aligned with the bottom of the dash, and use them as anchors to install everything else. We're going to install some quad washers and nuts on the back of the studs. You want to tighten these down snug. Be careful not to over tighten them, since the stud is in the vinyl it can strip easily. The bottom of the dash pad is pre-drilled for four of the five holes to put our molding on. We're going to start with the clips in the center. You want to kind of push down and in on the pad, to line up the holes with the metal hole in the dash. You want to get everything lined up here, again, the hole in the dash with the hole in the pad. Again, these molding are fairly thin, get them snug, no reason to over crank them.
Now we can install our new defroster vents. We're going to push the vinyl as far forward as possible to make the holes accessible for the ducts. In this case, we're going to trim it out just a little bit to make it easier to get to. Since our original vents were all taped up, we ordered a new set of hoses and a new set of vents. Fit that into place and use the supplied clips. Now we're going to bring our speaker back up so it's sitting flat here. Now put our speaker grill back into place here. Poke holes through the vinyl to find the mounting holes. Now we're going to make sure the vinyl from our dash pad is going to be underneath the window weather stripping. Using a flat-head screw driver, or a plastic pry bar, push straight across and make sure it's underneath. Usually the middle's not a problem, but sometimes on the edges it will get hung up just a little bit.
Now we're going to lay our window molding in place. We're going to start with the center hole, it's usually the easiest one to see. You don't want to tighten this down all the way. Tighten just enough so it doesn't move, so you've got a little play to get the other holes lined up. Once we get the ends in, then we're going to go back and tighten up our center screw. And we're finished with our dash pad. Getting the screws in this dash pad is going to be probably one of the most time consuming parts of the installation. Getting the lineup just right can take a little bit of time, but if you use a pick to find the hole, it will make it a lot easier. For the last step, we're going to connect our new hoses. Fish them down under the dash, and connect them to our pipe, and our installation is finished.
Even though the dash pad we removed from our Weekend Wrench wasn't really in bad shape, our Ford Tooling dash pad is still a huge improvement. If you have a typically damaged, warped dash pad in your 1960s Mustang, this is going to me a night and day difference when you're finished. Figure installation is going to take you about an hour and a half to two hours, you'll be back on the road in no time.