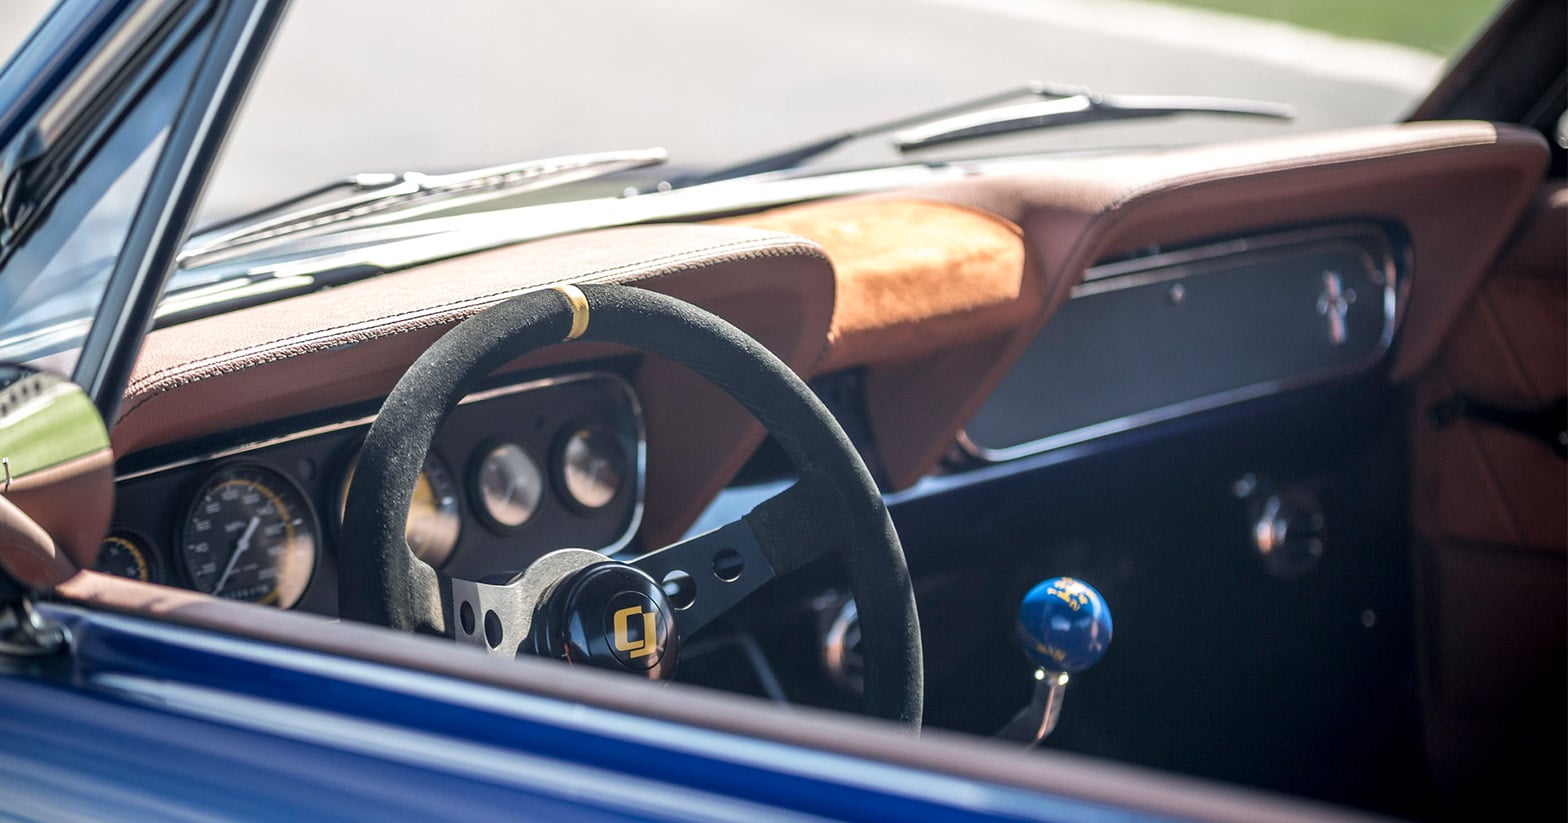
Mustang Restoration Chapter 10: Interior Restoration
Last Updated November 25, 2025 | Meghan DrummondBy the time you've reached the interior restoration stage, you're almost ready to hit the open road. You've got a running engine and transmission. Your suspension feels springy and responsive. Your brakes can stop at a moment's notice, and you've got a fresh coat of paint.
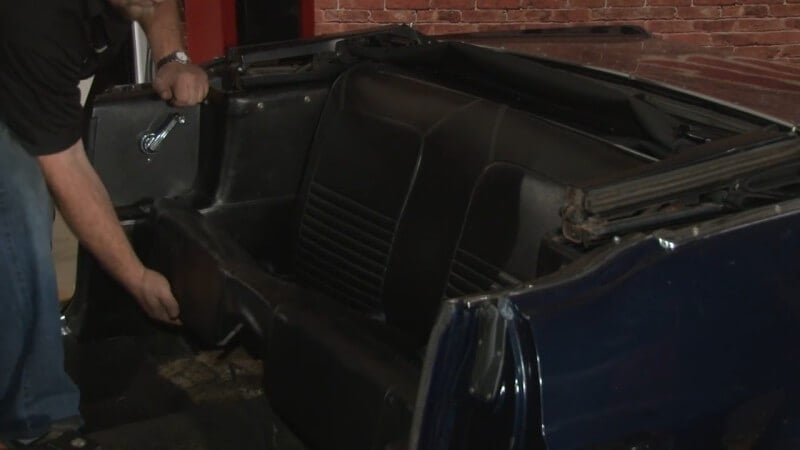
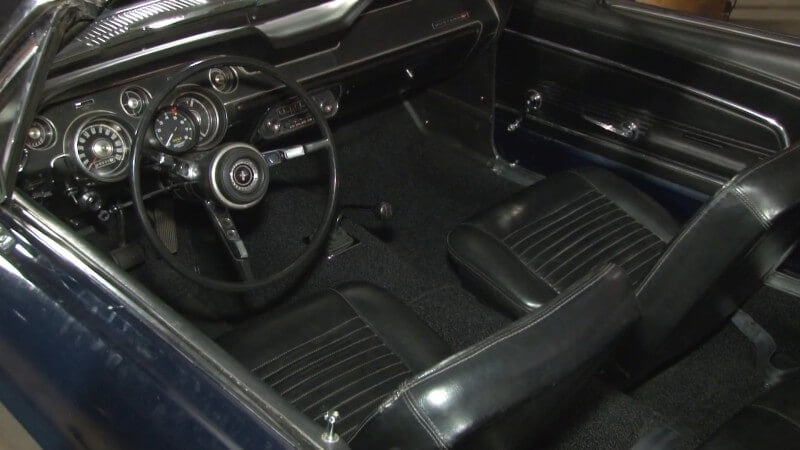
Unfortunately, it's likely that your Mustang doesn't look quite so daisy fresh on the inside. If that's the case for your Mustang, it's time for some interior restoration.
There are a few interior items that almost every classic Mustang needs.
After these items are complete, all that's left is a good interior detailing to remove any dirt. With a clean and restored interior, your Mustang will be a joy to drive.
Covered In This Chapter:
- Interior Painting and Dying - How to give your interior a color refresh
- Dash Repair - Fix up your dash
- Carpet Restoration or Replacement - Refresh your carpeted floors
- Headliner Repair or Replacement - Get a headliner free of snags and sags
Interior Painting and Dying
If you're getting a full auto body paint job done, this will likely already be finished. It's often included. You can also choose to try to touch up the existing paint if it's in mostly good condition. Matching the paint exactly can be challenging, but not as challenging as dismantling your dash.
Most people recommend a thin lacquer paint for the plastic and metal parts of your Mustang's interior. Interior lacquer often comes in spray cans, which makes it easy to apply in thin layers. The color of lacquer you'll need is determined by your interior trim code.
It typically takes four spray cans to finish the interior of a Mustang.
The interior parts that most commonly need to be painted are:
- Instrument Panel
- Radio and Heater Opening Plates
- Radio Speaker and Defroster Grilles
- Lower Windshield and Crash Pad Retainer Moldings
- Back Window Moldings
- Belt Moldings
- Quarter Trim Panels (Front and Rear)
- Back Window Lower Trim Panel
- Front Door Inner Panels
For soft surfaces, like vinyl, you'll want to use a dye instead. This includes the seats, carpet, and many of the other “large” interior pieces. Dying vinyl can be time-consuming and deliver inconsistent results. For that reason, if the interior is in poor enough condition to warrant it, many people opt to simply replace it. This also gives you the freedom to select the colors you want.
The original color will be impossible to match exactly, but these are the interior trim colors for first-gen Mustangs.
| Color | Years Available |
|---|---|
| Medium Ivy Gold Metallic | 1964-1966 |
| White | 1964-1966 |
| Light Palomino | 1964-1965 |
| Turquoise Metallic | 1964-1966 |
| Semi-Gloss Black | 1964-1966 |
| Parchment | 1964-1966 |
| Bright Red | 1964-1965 |
| Medium Palomino | 1964-1966 |
| Light Blue Metallic | 1964-1969 |
| Medium Blue Metallic | 1965-1966/1969-1970 |
| Red Metallic | 1966-1967 |
| Light Parchment | 1967-1968 |
| Semi-Gloss Charcoal Black Metallic | 1967-1973 |
| White | 1969-1973 |
Applying Paint or Dye
Before applying paint or dye, you'll want to be sure that you're applying to a completely cleaned surface. In particular, oils can create an uneven finish. Using a degreasing cleaner (like dish soap or Simple Green) will help to remove those oils. Spray a decent coat of adhesion promoter on soft surfaces, and primer on hard surfaces, and you are ready to paint.
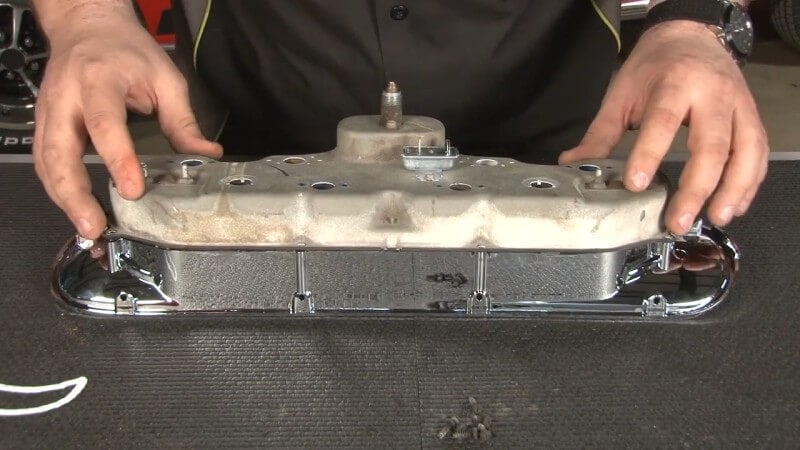
Dash Pad Replacement
The dash pad on a classic Mustang often needs to be replaced. Half a century of sun exposure tends to cause cracks and discoloration. Here's a list of everything you need to do it.
- Phillips Head Screwdriver
- Short or Right Angle Phillips Screwdriver
- 1/4" Ratchet
- Short Extension
- 3/8 Socket
- Panel Removal Tool
- Pick
- Plastic Pry Bar
- Flashlight
- Razor Blade
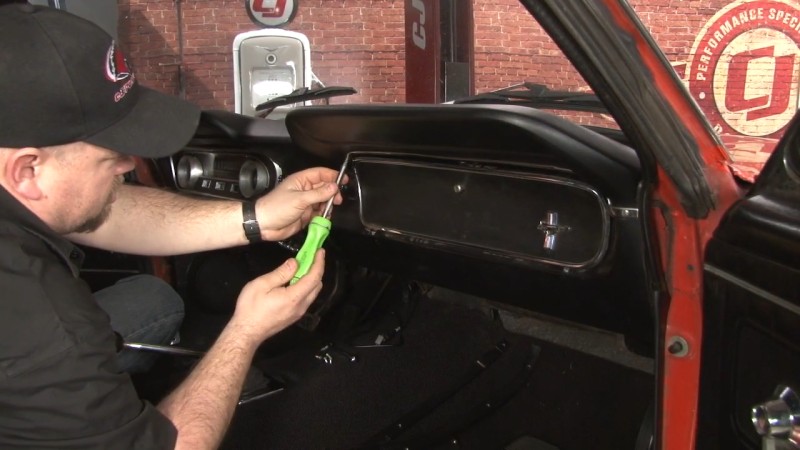
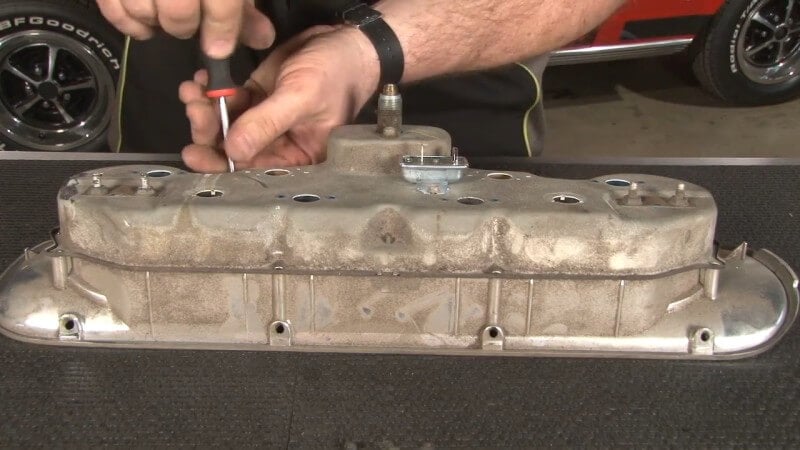
Step 1: Remove Dash Speaker Grille
Locate the two screws holding the dash speaker grille in place and loosen then with your short or right angle Phillips Head screwdriver. Then, pop the grille out.
Step 2: Remove Speaker Screws
After you've removed the dash speaker grille, use your short or right angle Phillips Head screwdriver to remove the four screws holding your speaker in place. Then, rest the speaker on top of the stereo and out of the way of the dash pad.
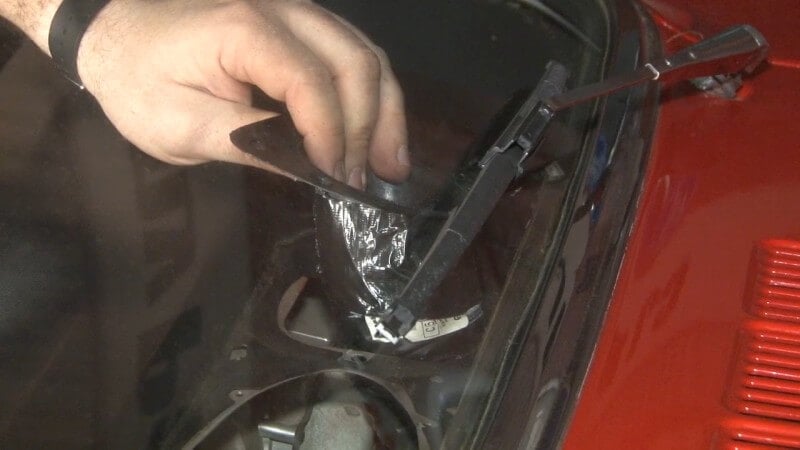
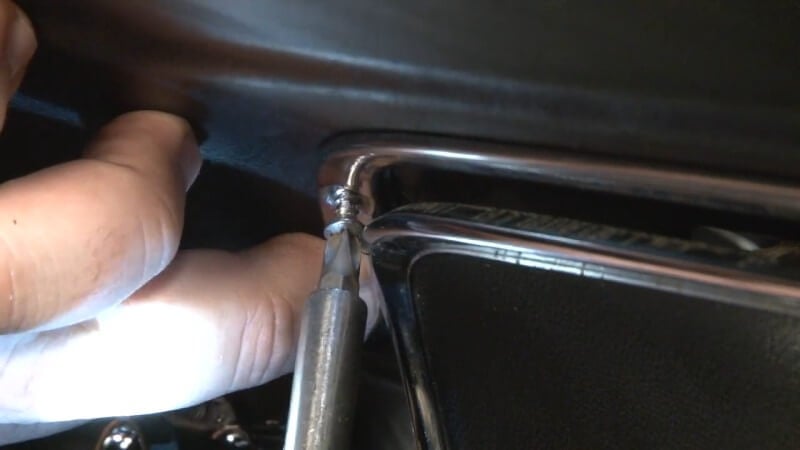
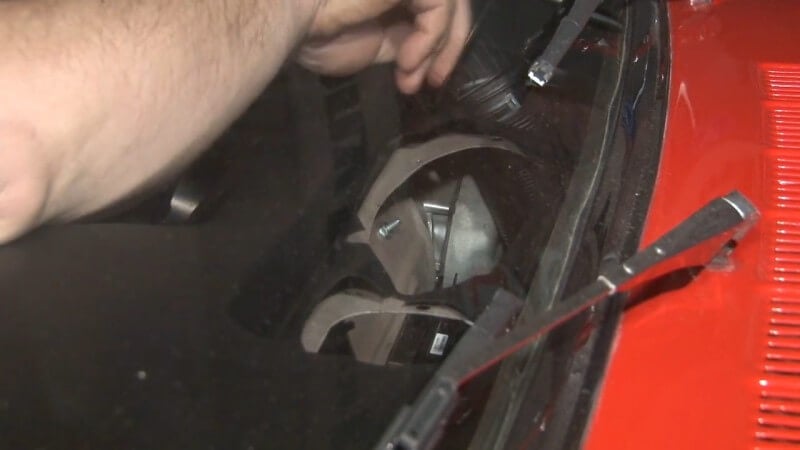
Step 3: Remove Windshield Brackets
Locate the brackets connecting the dash pad to the windshield. Then, use your Phillips Head screwdriver to remove the screws holding those brackets in place. After you've done that, grab the windshield brackets and remove them.
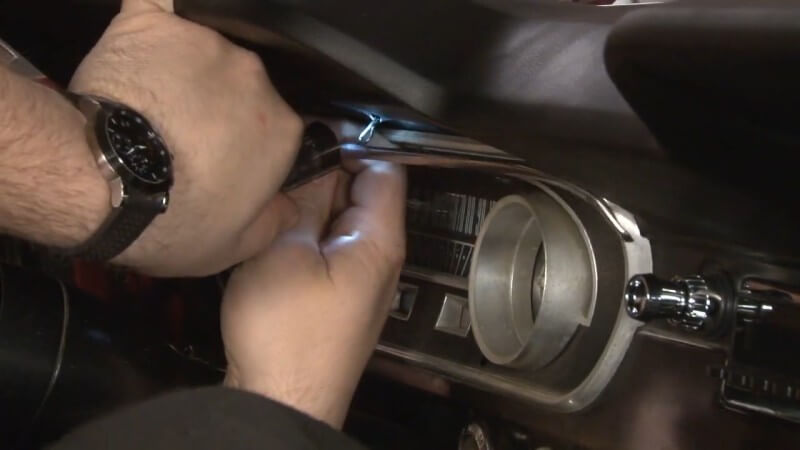
Step 4: Take Off Gauge Cluster Trim
Using your Phillips Head screwdriver, carefully unscrew and remove the screws holding trim around the edge of your gauge cluster in place. Then, pop the trim off with your hands.
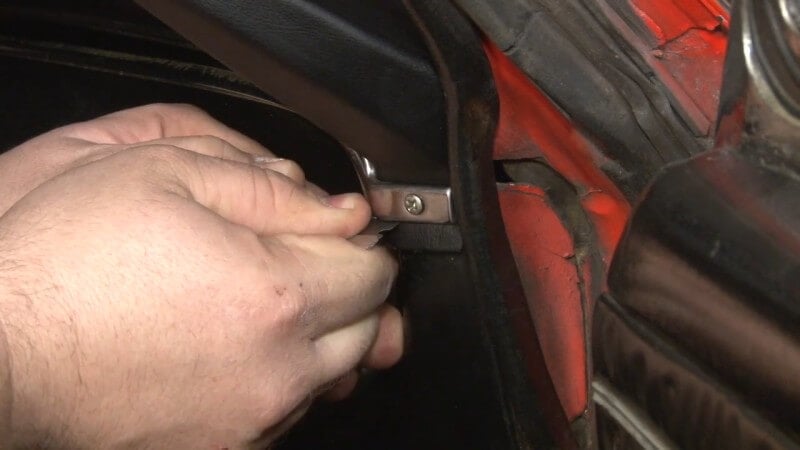
Step 5: Take Off Glove Box Trim
Use your Phillips Head screwdriver to carefully loosen and remove the screws holding the glove box trim in place. Then pop the trim off with the help of your panel removal tool.
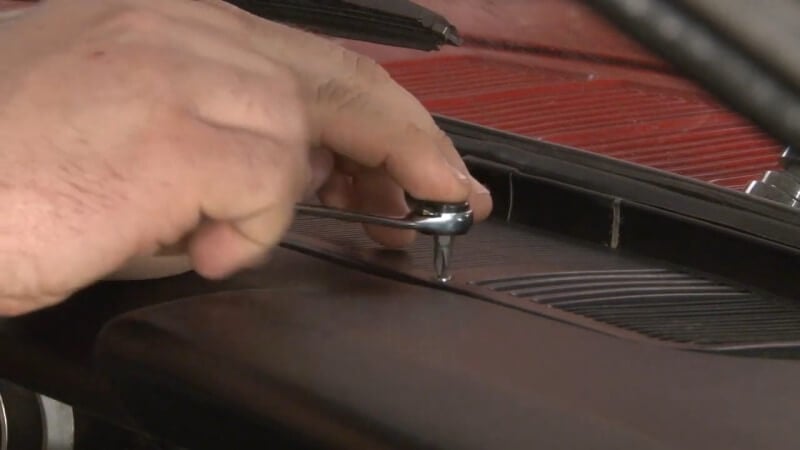
Step 6: Remove Dash Pad Studs
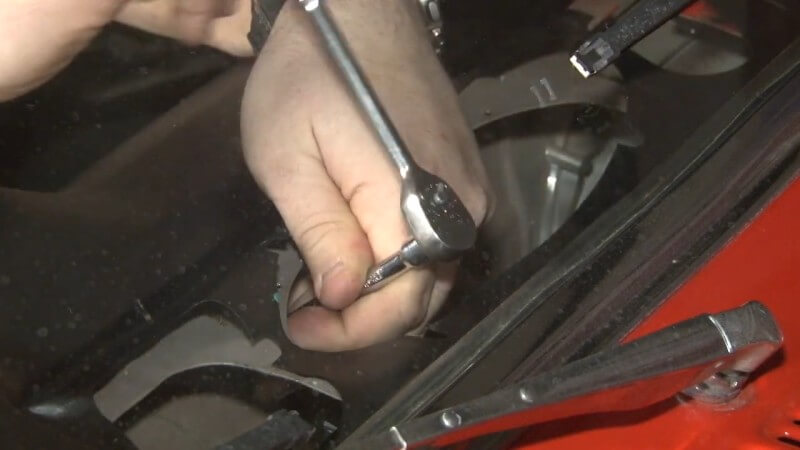
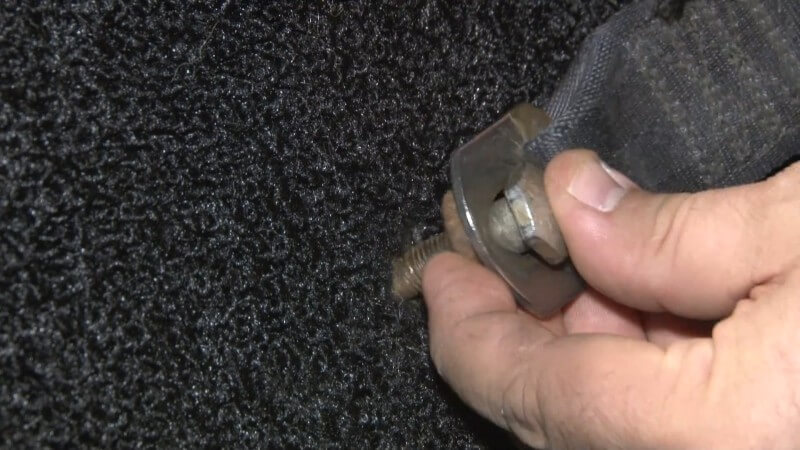
Find the two dash pad studs on the inside of the dash speaker housing. Then, carefully remove them with your 1/4" ratchet and 3/8" socket.
Step 7: Remove Defroster Vent Clips
Carefully push up from underneath of the defroster vent clips until they detach. Then, set them aside.
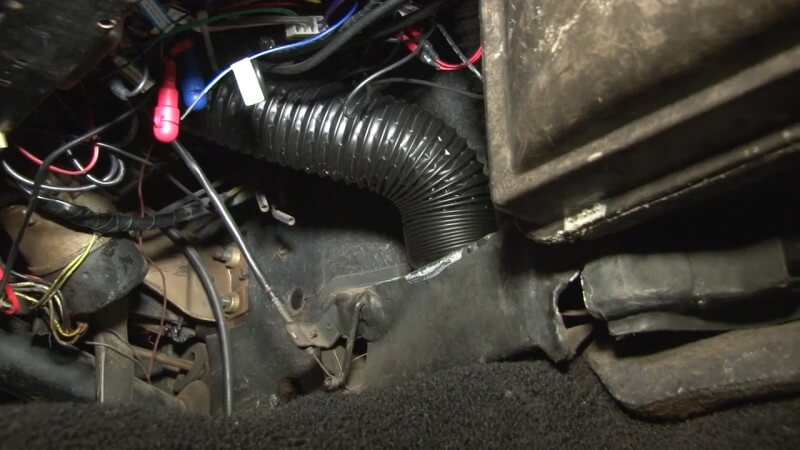
Step 8: Separate Defroster Ducts
Use the panel removal tool to pop the defroster ducts out from the dash panel. Then, disconnect the defroster ducts from the defroster tubes and set them aside.
Ours were taped together at some point, but yours are likely connected with a clamp.
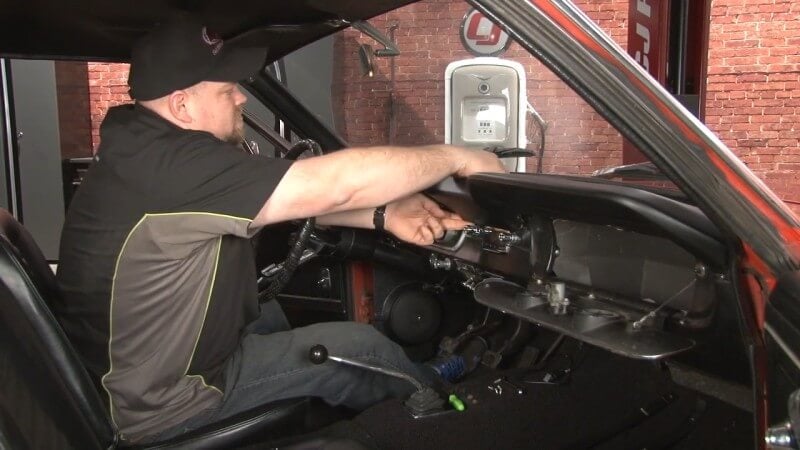
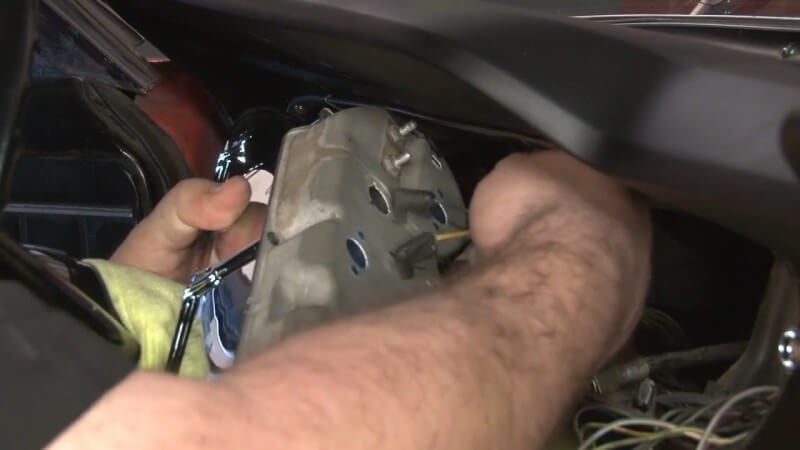
Step 9: Remove Dash Pad
Pull down on the center of the dash pad gently to release the two studs from the dash, then pop the dash pad out of place and remove it from the car.
Step 10: Align New Dash Pad
Slide your new dash pad into place on the top of the dash. Use the two studs underneath the center of the dash pad to anchor the dash pad during the rest of the installation.
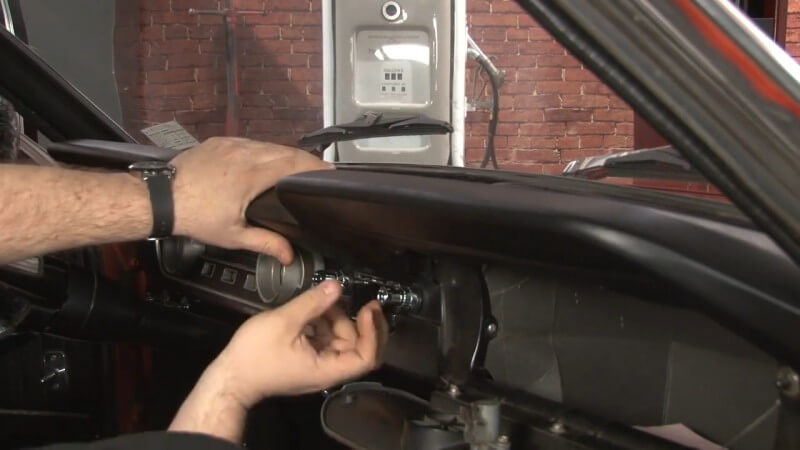
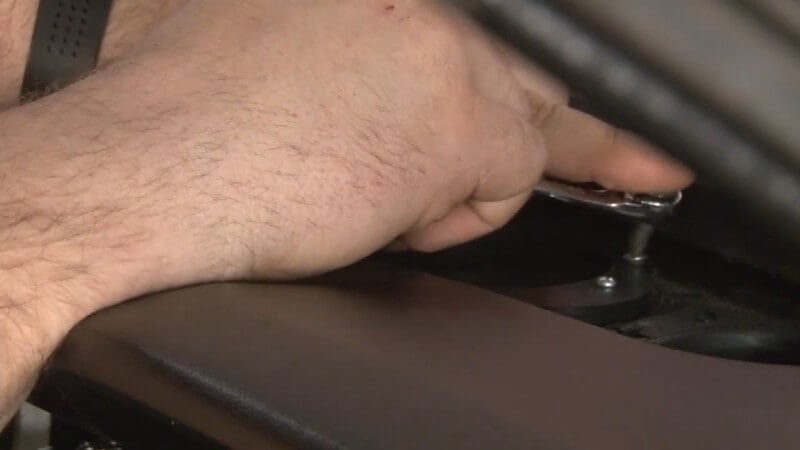
Step 11: Install Dash Pad Nuts and Washers
Locate the two studs on the inside of the dash pad. Then, install the required washers and nuts to secure it in place.
Be careful not to overtighten the studs. Because they're seated in vinyl, they can easily strip if overtightened.
Step 12: Reinstall Glove Box Molding
Push down and in on the dash pad to line up the holes with the metal holes on the dash. Then, carefully push your molding into place before reinstalling the necessary screws.
Then, use a razor blade to remove any excess vinyl around the edges of the glove box molding.
Step 13: Reinstall Gauge Cluster Trim
Line up the two clips on the gauge cluster trim with the two holes on the dash pad. Then, gently push it into place.
After you've done that, reinstall the required screws to lock the gauge cluster trim into place.
Then, use a razor blade to remove any excess vinyl around the edges of the gauge cluster trim.
Step 14: Install Defroster Vents
Push the dash pad vinyl as far forward as possible to make the mounting holes accessible for the duct. Use a razor blade to trim any excess vinyl getting in the way.

Then, slide your hoses and vents into place in the corresponding holes in the dash pad. Use the supplied clips to secure the vents in place.
Step 15: Reinstall Dash Speaker
Grab your dash speaker off of the stereo and manuever it into place on the dash pad. Then, tighten it into place with the factory hardware.
Then, slot the speaker grille into place on top of the dash speaker and poke holes in the dash pad vinyl to allow for the factory hardware to be inserted and tightened down.
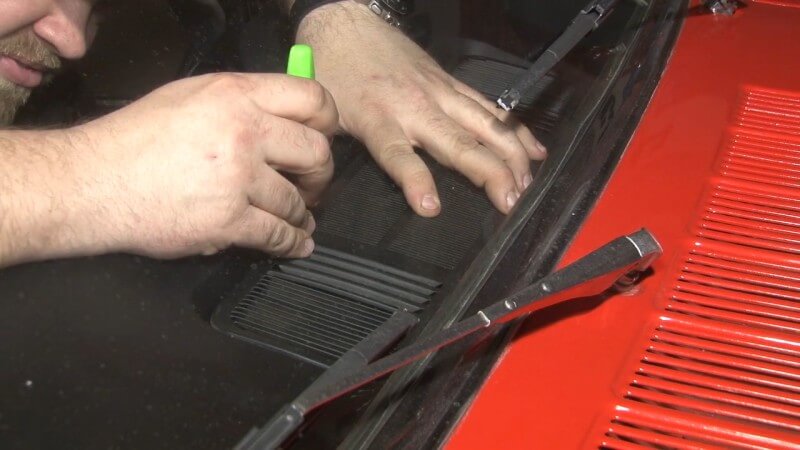
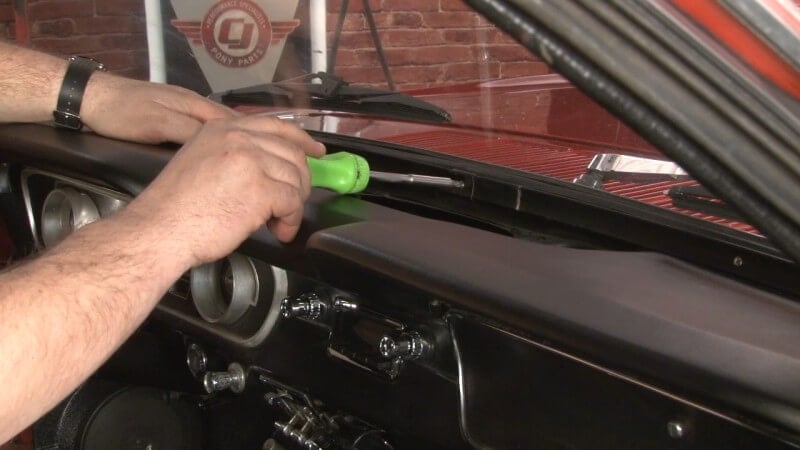
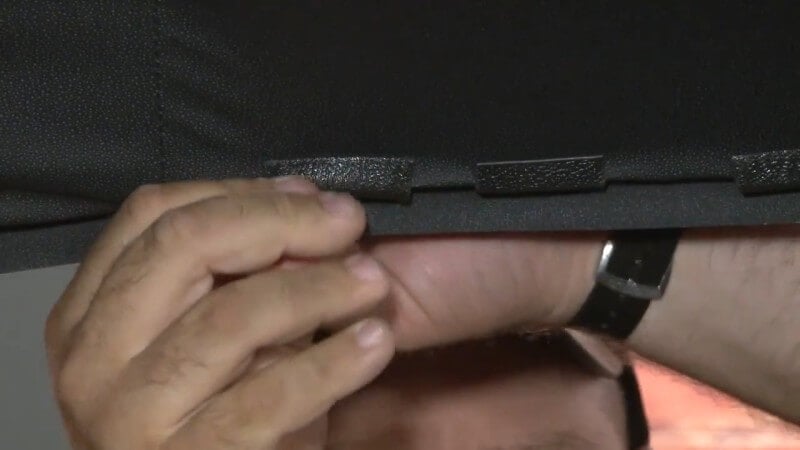
Step 16: Tuck Dash Pad Under Windshield Weatherstripping
Use a plastic pry bar or flat head screwdriver to gently push down on the dash pad where it meets the windshield and tuck it underneath the windshield weatherstripping.
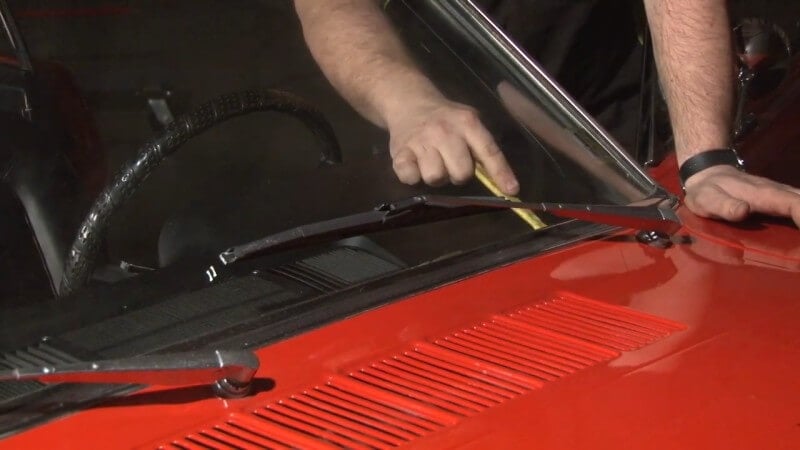
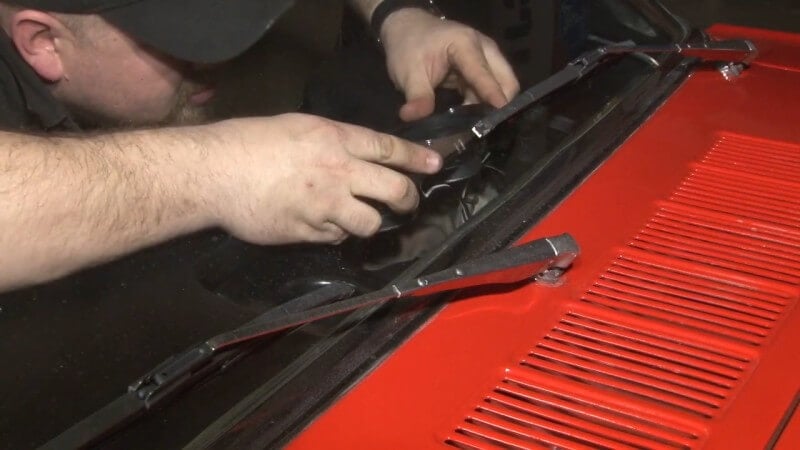
Step 17: Reinstall Windshield Molding
Slide your factory or replacement windshield molding into place on the new dash pad. Then, use the factory hardware to tighten the windshield molding down, starting from the middle and working outwards.

Step 18: Reconnect Defroster Vent Hoses
Slide your hand underneath the dash and connect your defroster vent hoses to the plenum.
Congratulations, you're done installing your new dash pad!
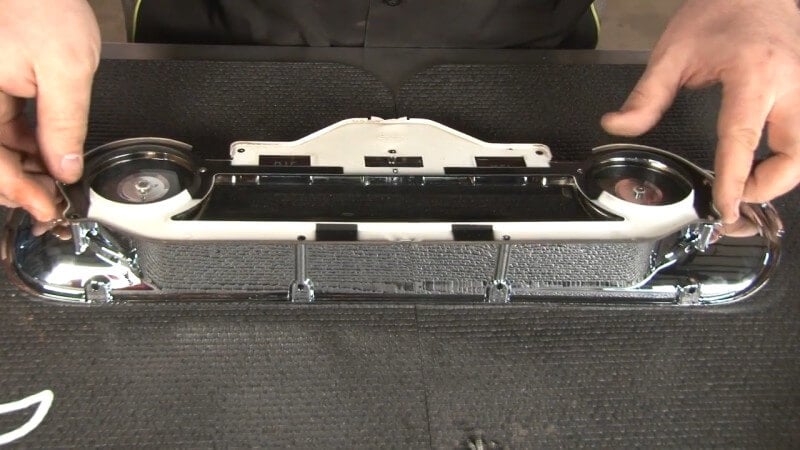
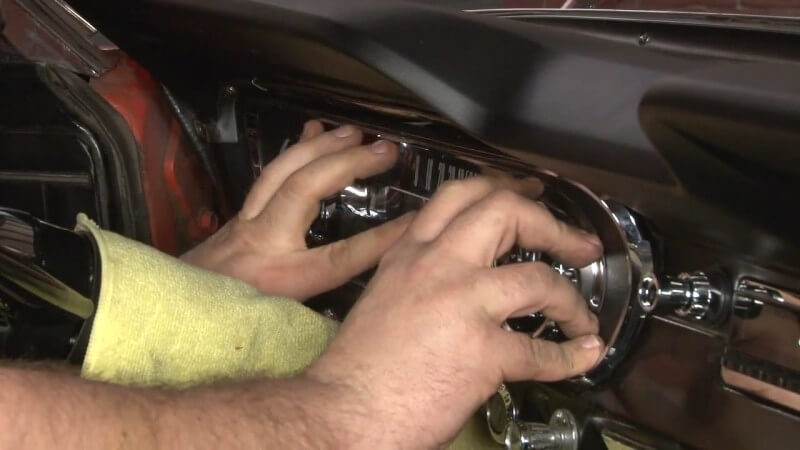
Instrument Bezel and Lens Installation
The instrument panel is usually fine, but the bezel may have faded, and the lenses may have yellowed. To replace the lenses or the instrument bezel, you'll need to remove it. If you've just replaced your dash pad, then it's already conveniently removed.
Replacement specifics may vary based on your Mustang's year and what interior options you have. The basics should be the same, though.
Classic Mustang instrument bezels have a texture that tends to accumulate dirt that's almost impossible to get out. The silver rings can also become pitted and discolored. If your instrument bezel and lens still looks good, feel free to reuse them. If they're looking worn out, we'll show you how to replace them.
Before you start, you're going to need to grab a few things.
- Phillips Head Screwdriver
- 1/4" Ratchet (Optional)
- 1/4" Socket (Optional)
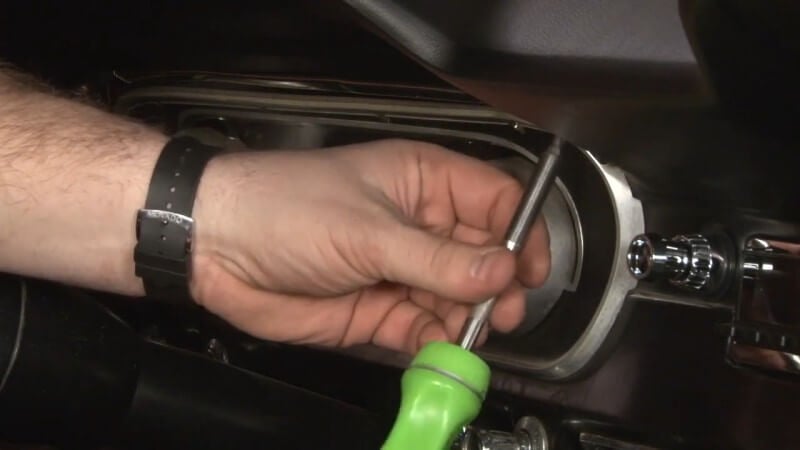
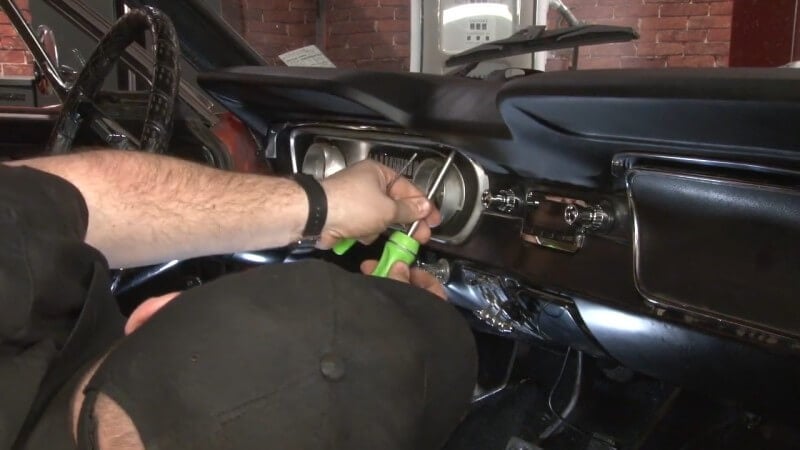
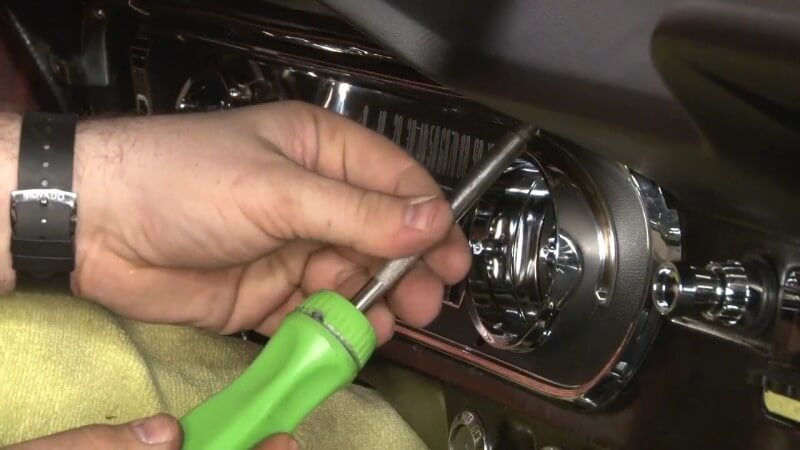
Step 1: Remove Gauge Cluster Mounting Screws
Use the Phillips Head screwdriver to unscrew and remove the six screws holding your gauge cluster in place on your dash.
Then, pop the gauge cluster out of the dash.
Step 2: Unscrew Speedometer
Locate the nut attached to the speedometer on the back of the gauge cluster. Then, carefully loosen it until it's disconnected.
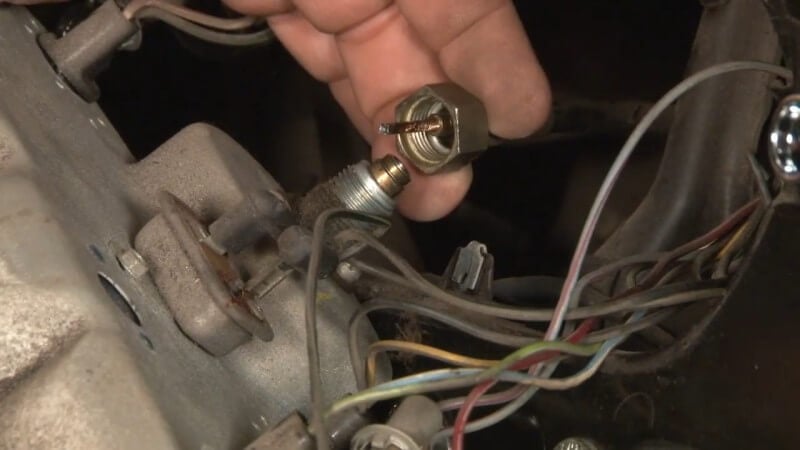
You should be able to do it by hand, but feel free to use a small wrench if necessary.
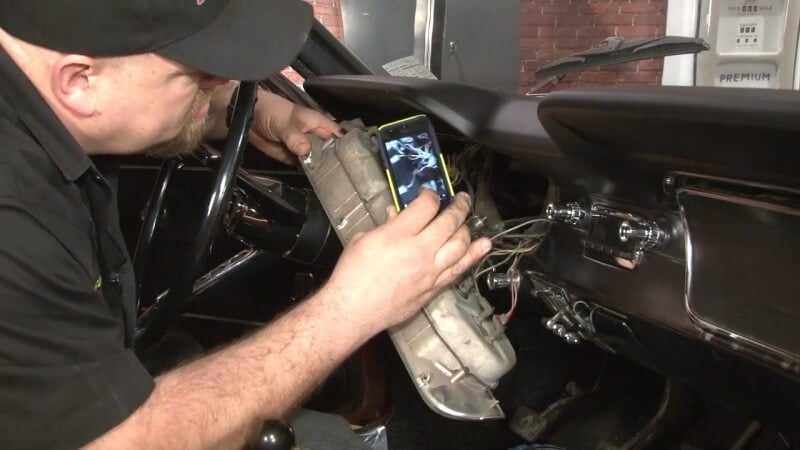
Step 3: Disconnect Gauge Cluster Wires
Flip the gauge cluster around and disconnect all of the wires connecting it to the car.
Before you do this, it's a good idea to take a few pictures of how everything is connected so you're able to easily reconnect everything later.
Step 4: Remove Gauge Cluster Backplate
Unscrew the six screws on the back of the gauge cluster. Then, pull the backplate off to access the gauge cluster's internals.
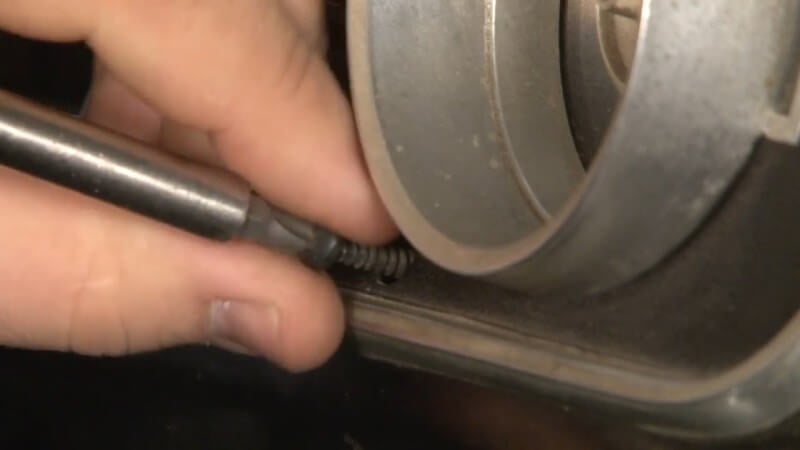
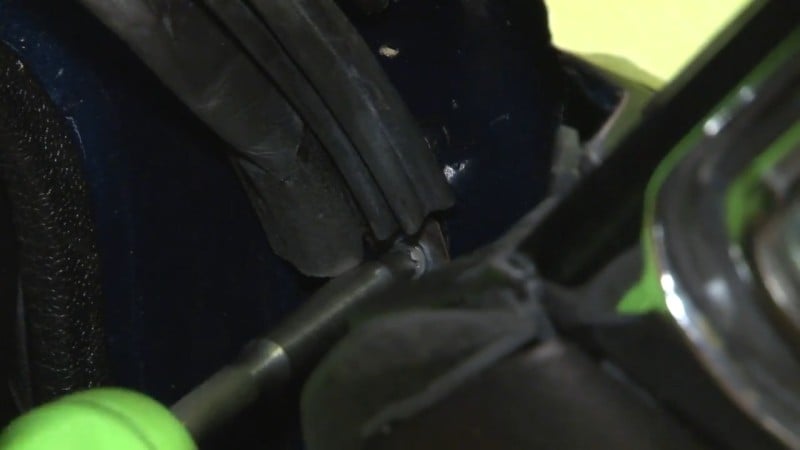
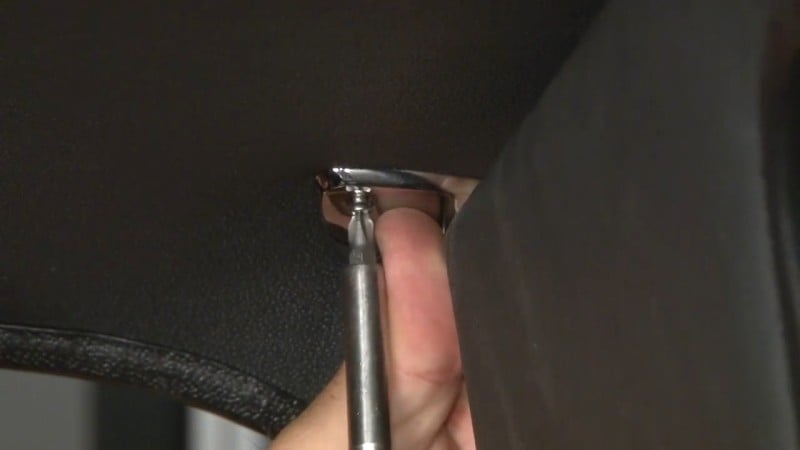
Step 5: Remove Retaining Plate Screw
Locate the retaining plate screw as seen in the picture below. Then, unscrew it and pop the retaining plate off.
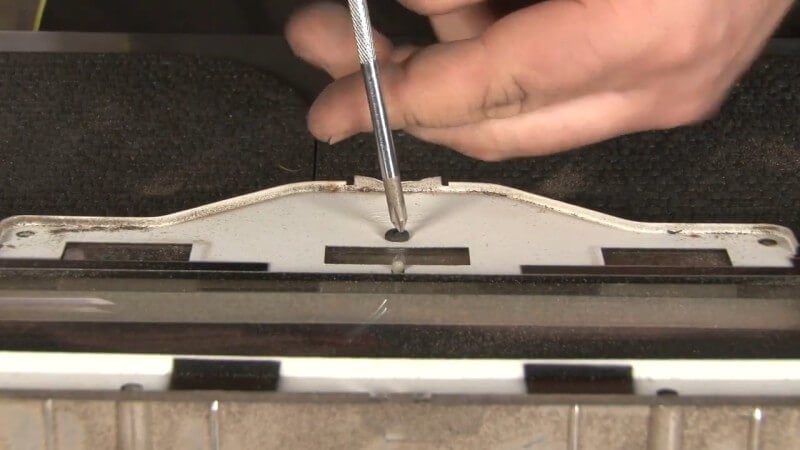
Wipe it down with a microfiber towel then set it aside for use later when we reassemble the gauge cluster
Step 6: Clean Gauge Cluster Components
Now that you've taken the gauge cluster apart and revealed the gauges themselves, take this time to wipe any dirt or debris off with a microfiber towel.
Step 7: Install Anti-Rattle Pads
Before installing the new lens on the bezel, place a few anti-rattle pads on places you think the lens will vibrate against the bezel. This helps prevent rattling and noise when you're driving.
Step 8: Install New Lens
Slide the new lens into place on top of the bezel, being sure to line up the two mounting tabs.
Then, place the retaining plate you saved from earlier over the bezel and tighten down the retaining plate screw to anchor it in place.
Step 9: Reinstall the Cluster
Line up the six holes on the bezel with the six holes on the cluster itself and then push the two halves together.
Then, reinstall the six screws.
Step 10: Insert Gauge Cluster Into Dash
Back in the cabin of the car, plug back in all of the connections that you took pictures of earlier.
After you've done that, push the gauge cluster back into place in the dash.
Step 11: Reinstall Gauge Cluster Mounting Hardware
After the gauge cluster is in place on the dash and everything is reconnected, reinsert and tighten the mounting screws you removed earlier.
Constant Voltage Regulator
While the instrument panel is disassembled, it would be worthwhile to install a constant voltage regulator.
A constant voltage regulator does exactly what it sounds like: It regulates voltage. This means a more consistent current comes to your gauges and helps them operate correctly.
If you've noticed your gauges fluctuating or not operating at all, it could be due to this tiny part.
Before removing your existing voltage regulator, make sure the wiring locations match the new ones, or it won't work. After that, it's a simple swap. The wires connect to the new regulator, and you can use the same bolt.
Make sure to check all your lights and gauges on your instrument panel before taking off. If they all work, then you've successfully fixed your instrument panel and installed a dash pad.
Modern Replacement Gauge Clusters
If all of this sounds like too much of a hassle, or your gauge cluster is too far gone, there's no shame in getting a modern replacement. Modern replacement gauge clusters often give you more information while still looking like they belong in your classic's interior. Plus, if you're going for more of a restomod approach, you're going to want to monitor your pressures and levels more closely.
Carpet Care and Replacement
From 1964 to 1968, the Mustang's original carpet was 80% rayon and 20% nylon. You'll often see this written as simply “80/20.” After '69, the carpet was 100% nylon.
Rayon and nylon are both synthetic fabrics. Understanding them chemically helps with cleaning them correctly. Bleach or bleach-based solutions weaken rayon fibers. This can lead to strange bald patches. Rayon also reacts poorly to hot water.
Cleaning Carpet
If your original carpet is in okay condition but needs help with a few spots, there are ways to clean it. A cold-water solution with an oxygen-based cleaner is the best option.
Use a vacuum to get the carpet as clean as you can. Then, use a brush to work the dirt loose. Use a soft brush, since a stiff brush can pull the fibers loose and cause damage.
Once you've removed as much dry dirt as possible, apply your cold water solution. All good cleaning tips rely on foam and agitation, and it's no different with carpet.
Use a soft detailing brush to agitate the cleaner until it foams up. The foam will lift the dirt and stains from the carpet. Wipe away the foam with a microfiber cloth.
Repeat the process until you're no longer wiping up fresh dirt, and then give the carpet time to dry.
Low PH solutions are also available that promise better stain-fighting power without damaging fibers. Many of these have stellar reviews, but because it's hard to account for individual dye reactions, a spot test is still a great idea.
For a spot test, pick a small area of carpet unlikely to be seen and apply the cleaning product. Then wait for it to dry to ensure color-fastness.
Installing a New Carpet
If you have a lot of holes, your carpet is overly stained, or it is otherwise unable to be salvaged, you may need to replace it.
There are a few options for replacement carpets. You can replace your carpet with one that has the original nylon backing or a mass backing. Either way, the process will be the same. You can also choose between the original loop carpeting or a more modern cut-pile.
Mass-backed carpet will be more rigid than the original. This makes it easier to get a clean fit when you install it.
Installing new carpet isn't a trivial task. These aren't floor mats we're talking about, but true carpeting. But, we'll show you how to do it here if you want to tackle it yourself.
Here's what you'll need to get the job done.
- Jack and Jack Stands
- Razor Blades (Lots)
- Phillips Head Screwdriver
- Flat Head Screwdriver
- 3/32" Allen Key
- 3/8" Drive Ratchet
- 1/2" Socket
- 3/8" Socket
- 13/16" Socket
- Punch or Awl
- Small Flashlight
- Scraper
- Brush
- Vacuum
Step 1: Jack Your Car Up
Use a jack and set of jack stands to get your car securely off the ground.
While this might sound weird, it's an essential first step to replacing the carpet in your classic Mustang.
Step 2: Remove Seat Mounting Grommets
After you've jacked your car up, slide underneath it and locate the grommets hiding the seat mounting nuts.
Then, use a flat head screwdriver and your hands to pop the grommets out.
Step 3: Remove Seat Mounting Nuts
Take your 1/2" socket, ratchet, and an extension if necessary and carefully remove the nuts inside of the grommet holes.
The nuts are fairly far up inside of the holes, so a flashlight might be helpful when trying to line up your socket.
Step 4: Lower Your Car
After you've removed the seat mounting nuts, you can lower you car and take it off of the jack stands.
Step 5: Remove the Seats
Once your car is back on the ground, pull up on your seats and remove them from the cabin. Put them aside for later.
Step 6: Remove Back Seat Cushion
Slide your hand underneath the cushion in the back seat and pull up and out. Then, put the back seat cushion aside for later.
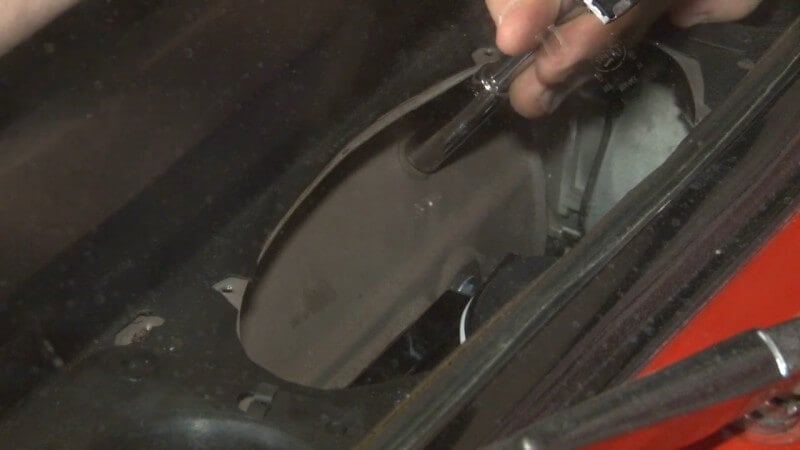
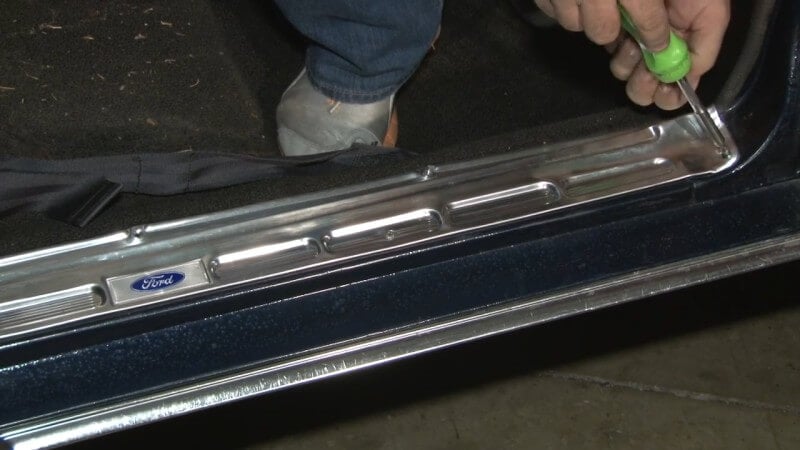
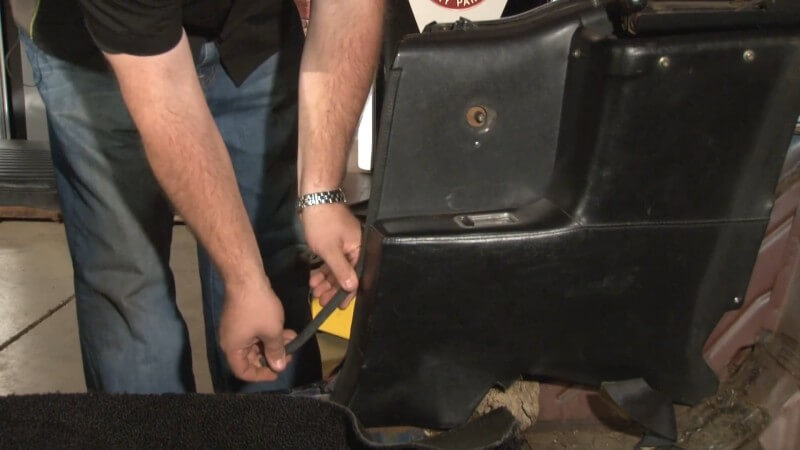
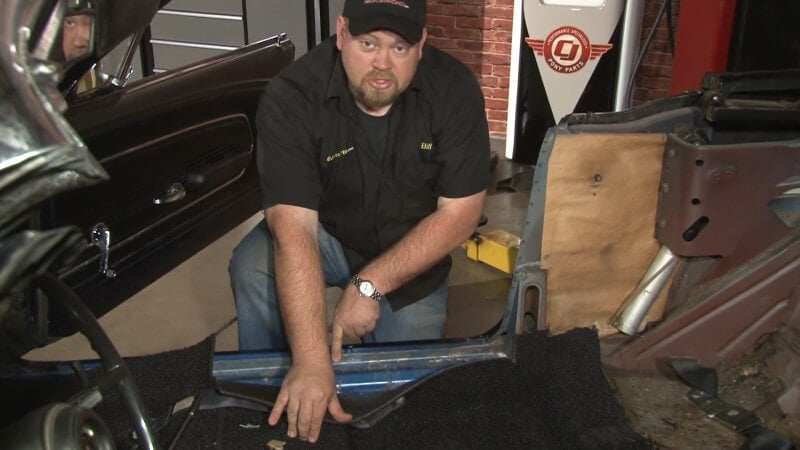
Step 7: Remove Door Sill Plate
Use a screwdriver to remove the nine screws holding the door sill plate in place. Then, remove the door sill plate and set it aside.
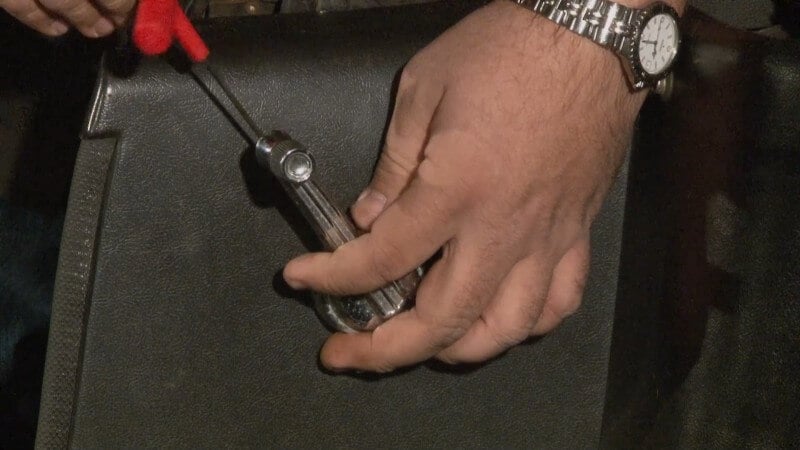
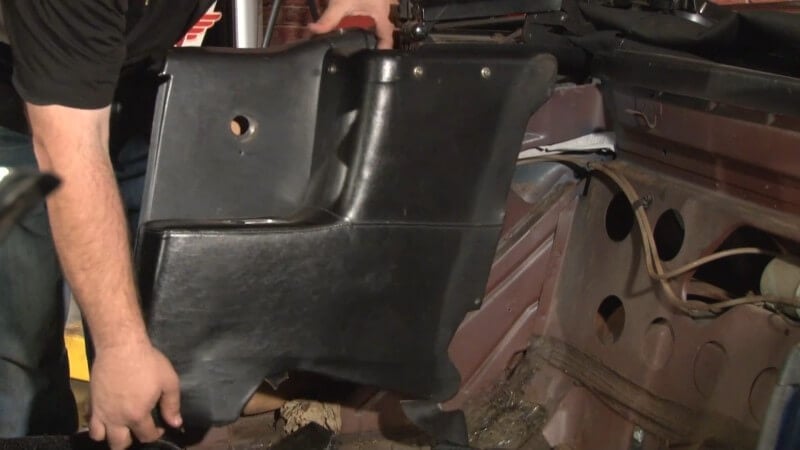
Step 8: Remove Kick Panels
Locate the two screws on the kick panel and unscrew them with a screwdriver. Then, slide the kick panel out and set it aside.
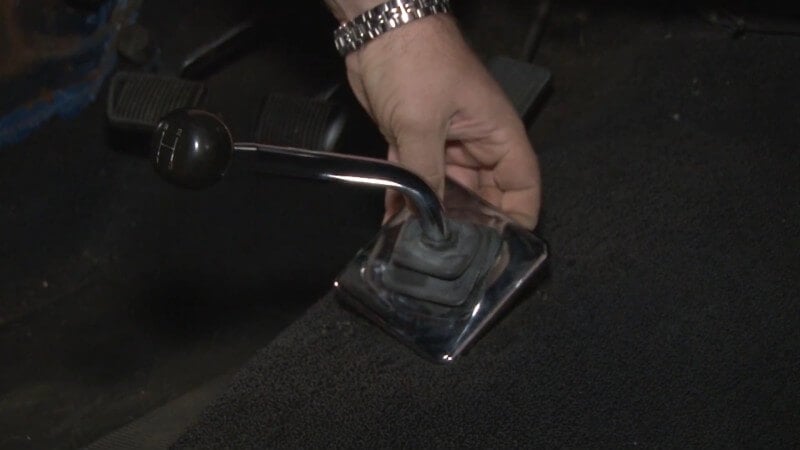
Step 9: Remove Shifter Bezel
Pull up on the chrome bezel surrounding your shifter until it slides up and off. The rubber boot doesn't need to be removed.
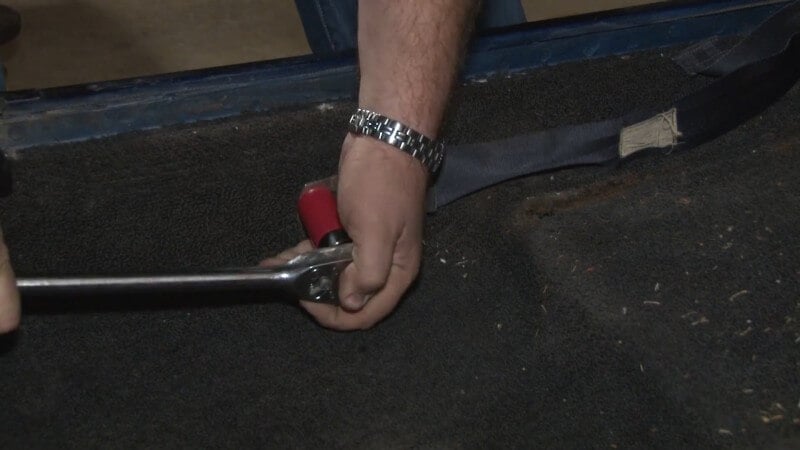
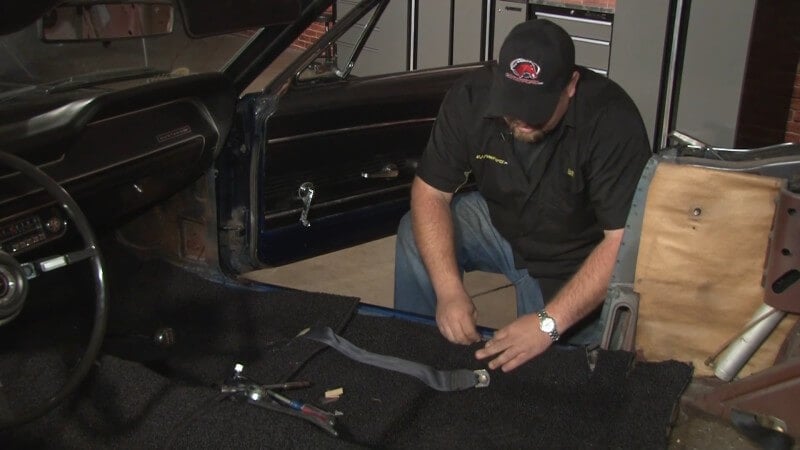
Step 10: Remove Seatbelts
Break the seatbelt mounting bolts loose with a breaker bar and a 13/16" socket. Then, unscrew them and remove the seatbelts.
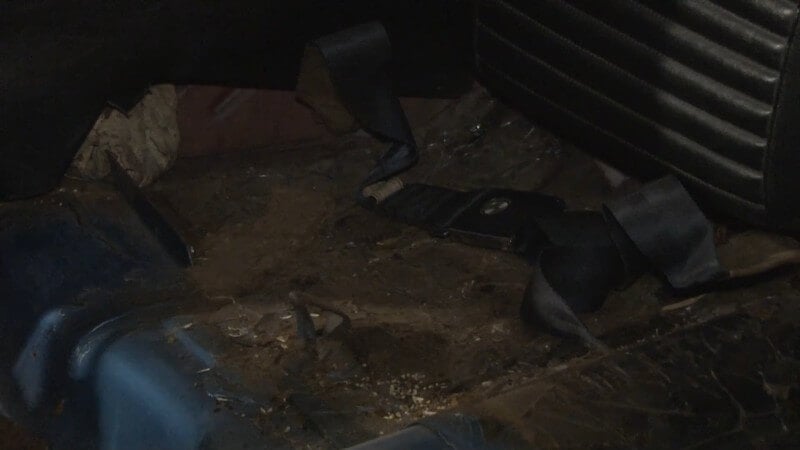
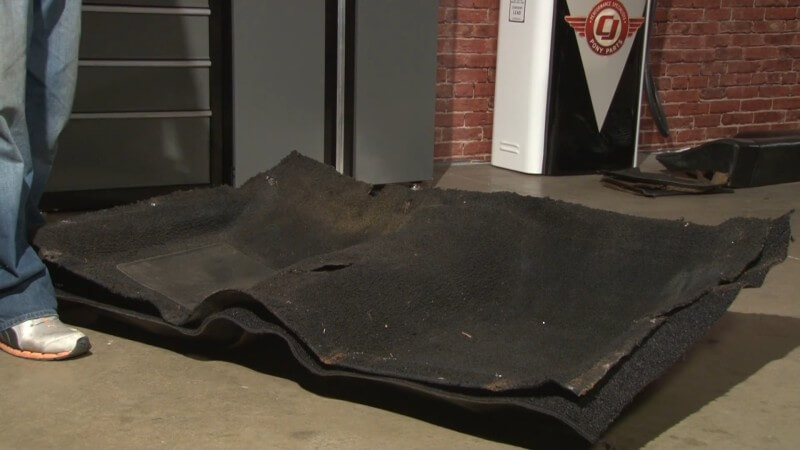
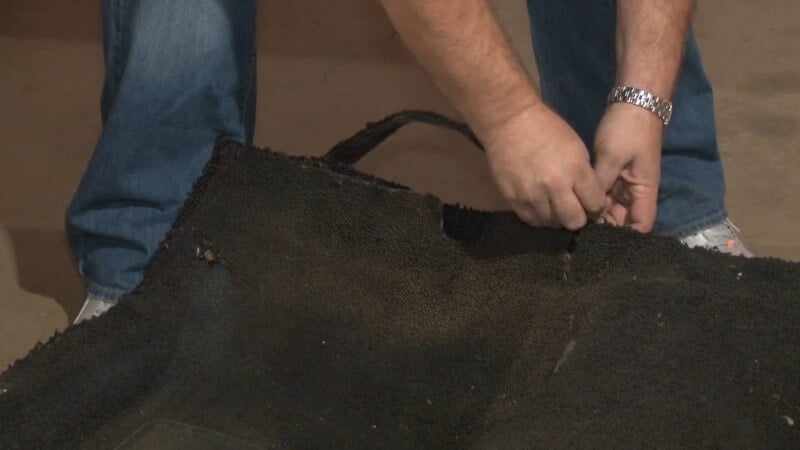
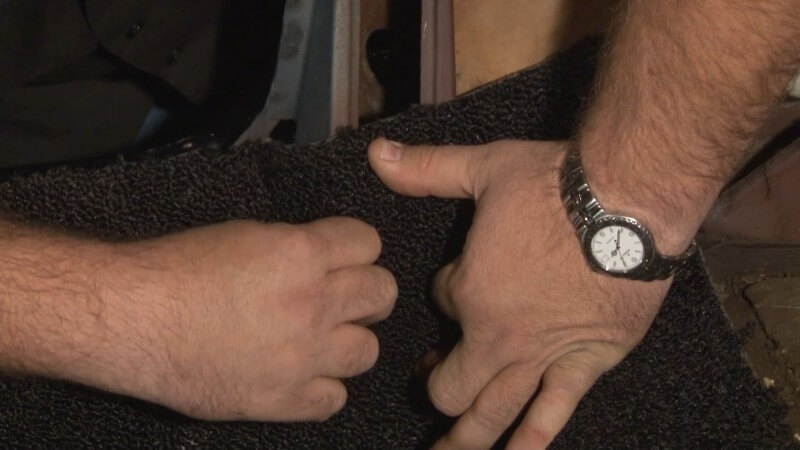
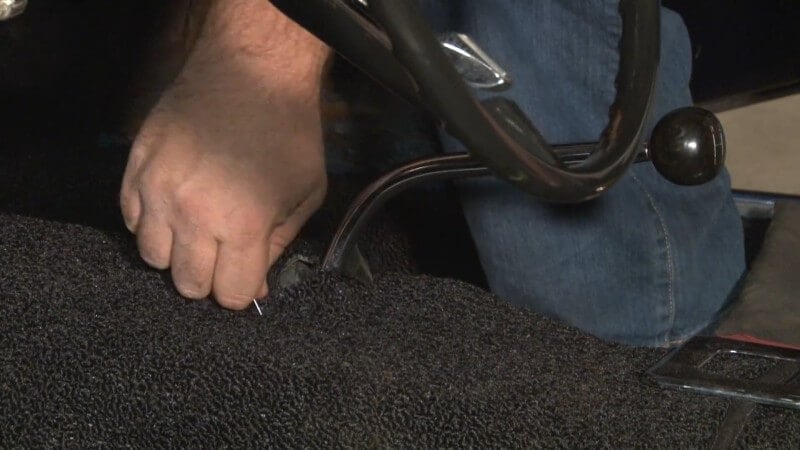
Step 11: Remove Factory Carpet
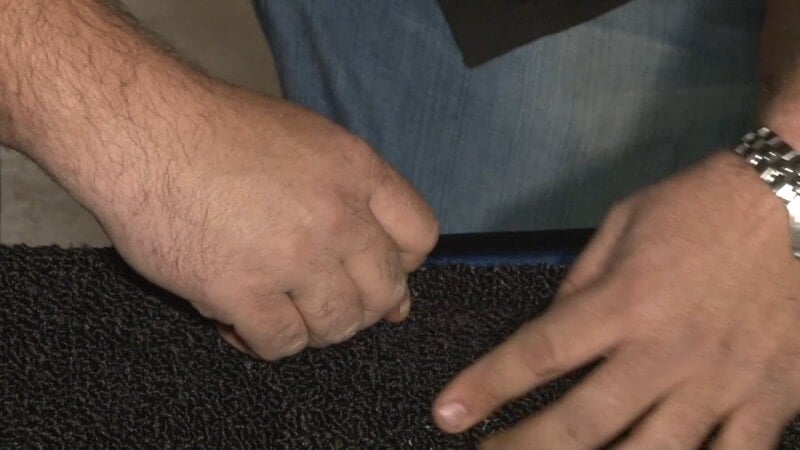
Now that the carpet is free and ready to be removed, simply pull up on it and remove it from the car.

Step 12: Clean Your Mustang's Floor
Once you've removed the carpet, use a vacuum to suck up and dirty or debris left behind on the floor of your Mustang.
This is also a good time to determine if you can reuse the current underlayment, or if you'll need to upgrade to something like Dynamat.
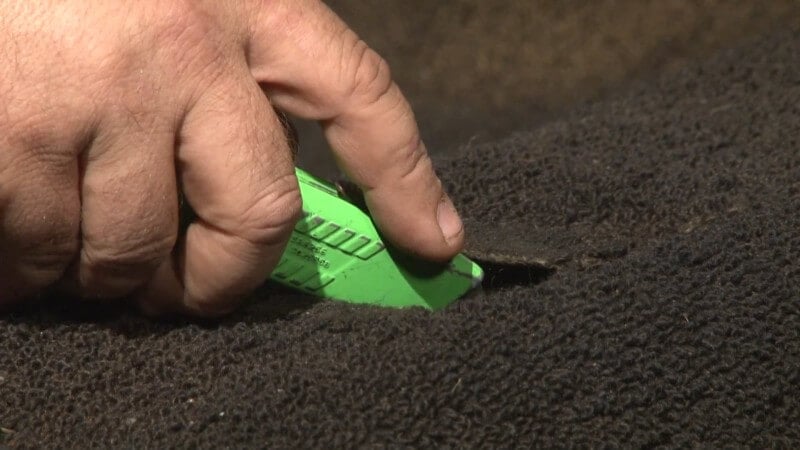
Step 13: Mark Your New Carpet
Lay your factory carpet overtop of the new carpet as a template to help you figure out where holes need to be made.
Then, cut an X into the new carpet to mark the location of the shifter. You'll cut it out fully later.
Step 14: Trim Your New Carpet
While you still have the two carpets overlaid, use a razor blade to cut off excess on the new carpet to match the dimensions of the old carpet.
Step 15: Place New Carpet in Mustang
After everything is cut out, take the new carpet and lay it down in place on the floor of the car.
Step 16: Mount Seatbelts
Find the general area of the seatbelt mounting holes and press around it with your finger until you feel the holes themselves. Then, poke a hole with an awl to mark its place.
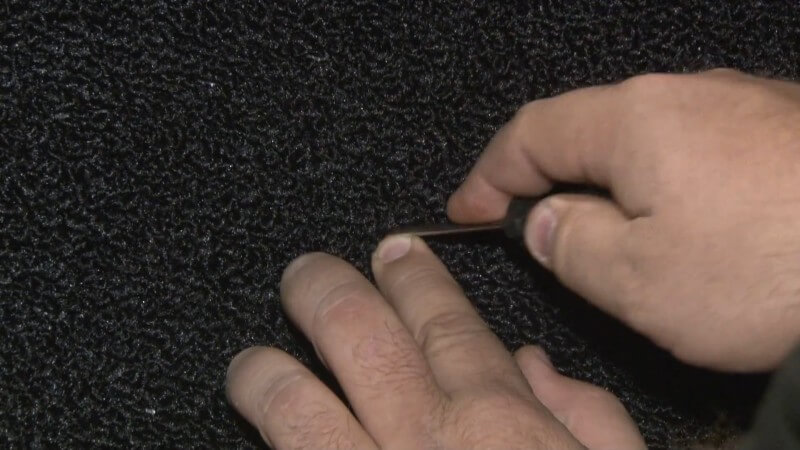
Then, use a razor blade to cut a small square around the area you marked previously.
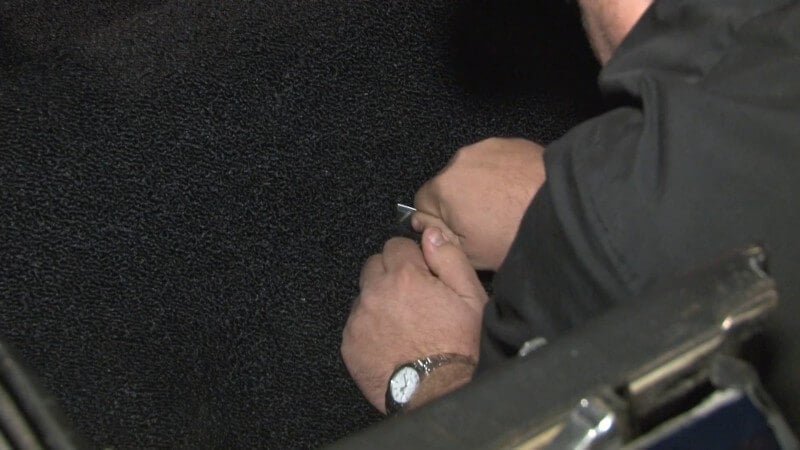
After you've done that, reinstall the seatbelt with the supplied washer and repeat this process on the other side.
Step 17: Cut Holes to Mount Seats
Be sure to keep the carpet tight against the floor and transmission tunnel when cutting these holes, otherwise you'll end up with a fold in the carpet when you mount the seats.
Find the holes using a similar method to the last step, then use an awl to punch a hole in the carpet to mark where you'll need to cut.

Then, use a razor blade to cut small squares around the holes you've marked.
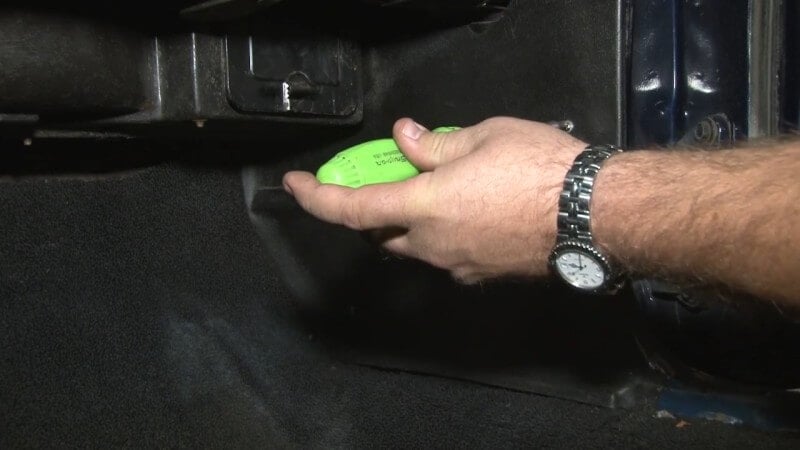
Step 18: Install Dimmer Switch Grommet (Optional)
Cut a small hole where the dimmer switch mounts in the foot well of the driver's side. Then, push the grommet through the carpet and put the carpet back over the dimmer.
Step 19: Remove Backseat
Remove the two bolts on the bottom of the backseat where it meets the floor. Then, lift up on the backseat and set it aside.
Step 20: Remove Window Crank
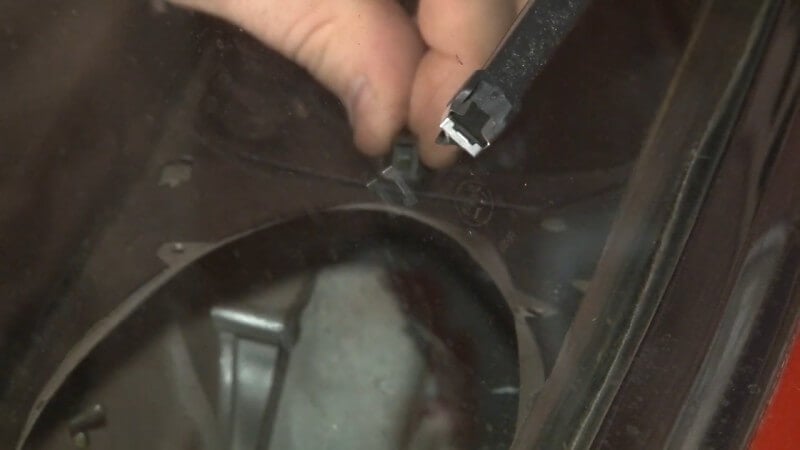
Slide a screwdriver under the window crank and unscrew the retaining screw. Then, pull the window crank off.
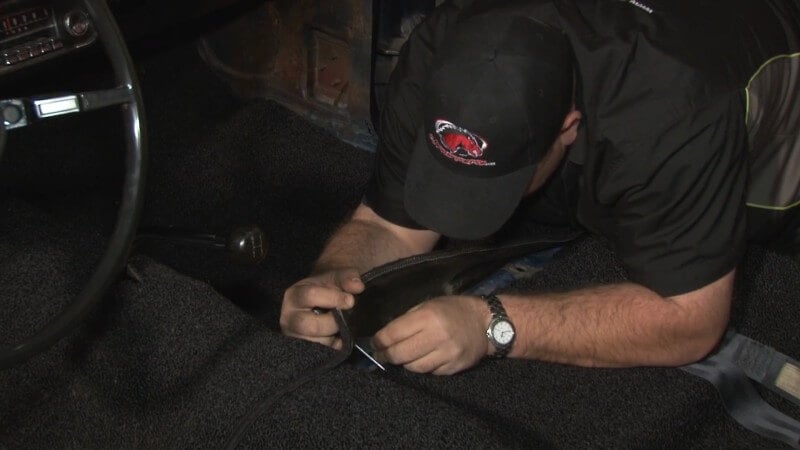
Step 21: Remove Windlace
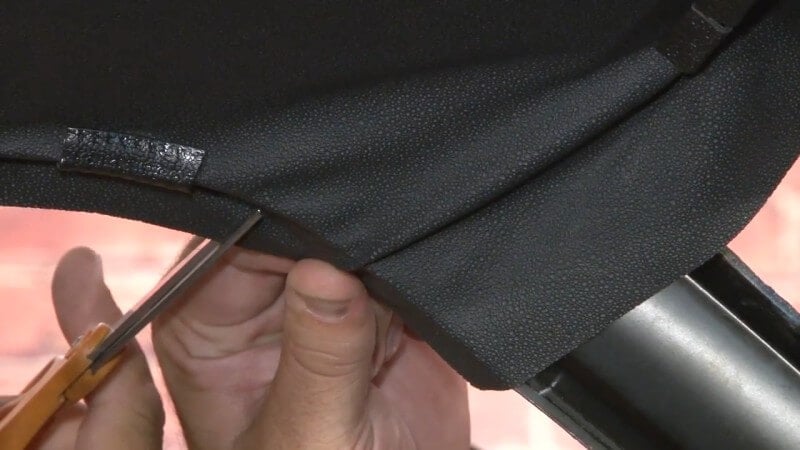
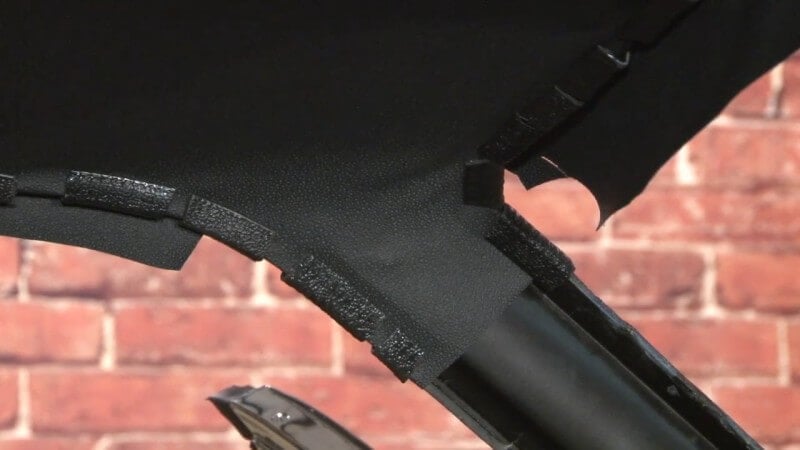
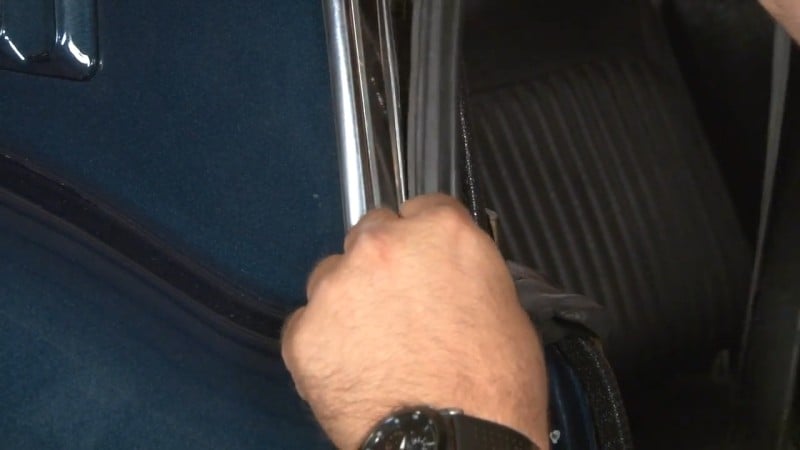
Grab the edge of the windlace on the quarter trim panel and gently pull up until it slides fully off.
Step 22: Remove Quarter Trim Panels
Unscrew the three screws holding the quarter trim panel in place.

Then, remove the quarter trim panel from the car and put it aside.
Step 23: Cut Carpet to Fit Underneath Quarter Trim Panel
After you've removed the quarter trim panels on both sides, cut the new carpet to fit underneath the panels. Keep the carpet pressed tightly against the corner when cutting to get the best fit possible.
Step 24: Cut Carpet to Fit Underneath Door Sill Plate
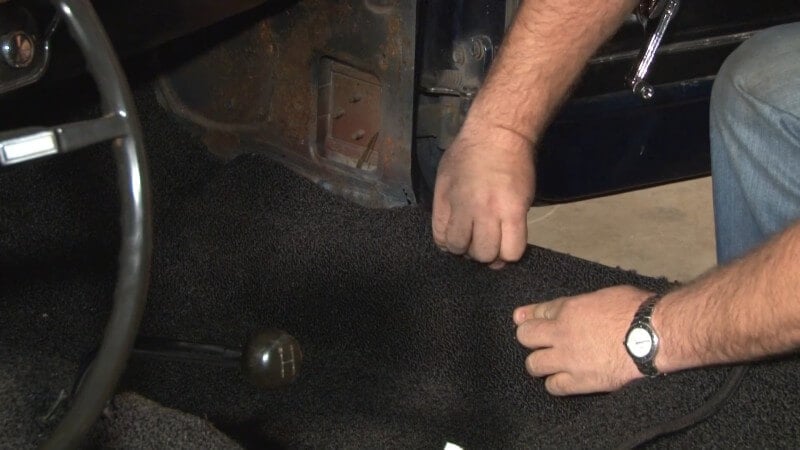
Fold the carpet back and note the mounting holes for the door sill panels on either side.
Then, fold the carpet over those holes and cut along the seam where the door sill panel mounts to ensure you have proper coverage when reinstalling the door sill panels. Do this on both sides.
Step 25: Poke Holes for Door Sill Plate Screws
Find the three door sill plate screw holes on either side of the car and use an awl to punch a hole where each should be.
Step 26: Clean Up Front Carpet
Cut along the seams of the front carpet with a razor blade, like you did in the rear, to ensure they fit properly when reassembling the interior.
Step 27: Trim Around Shifter
Trim the excess carpet around the shifter to allow for the shifter bezel to easily slide into place.
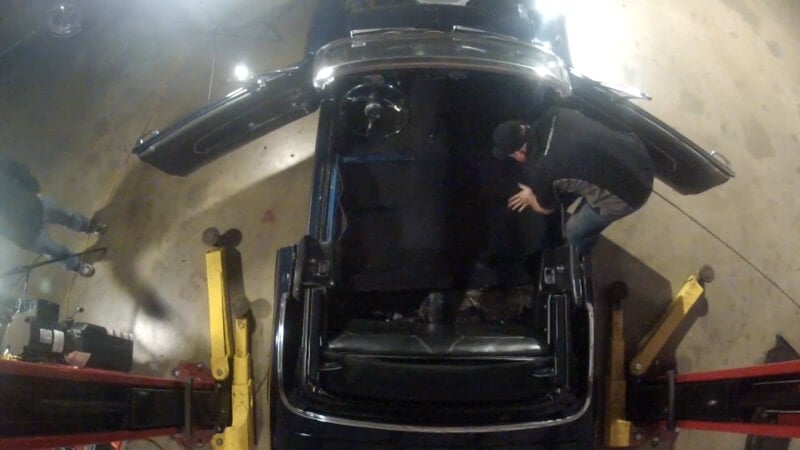
Step 28: Reassemble Interior
After you've finished trimming, it's time to put it all back together. Do it in the opposite order you took it apart. Start with the quarter trim panels and end with the seats.
If everything looks good after reassembly, you've finished installing a new carpet in your Mustang.
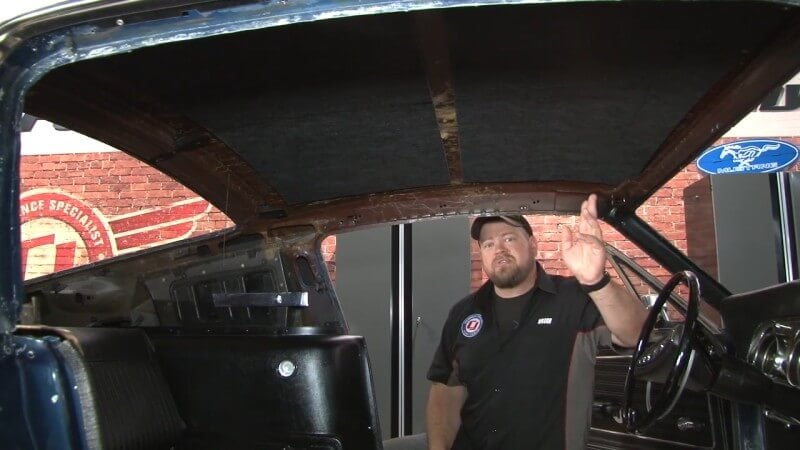
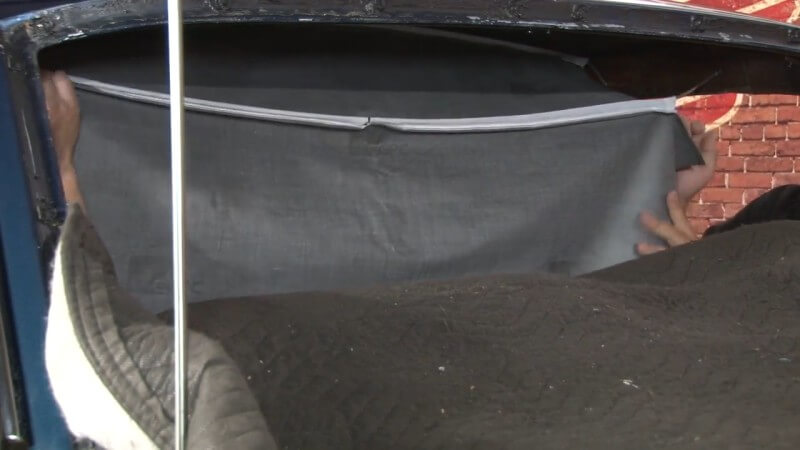
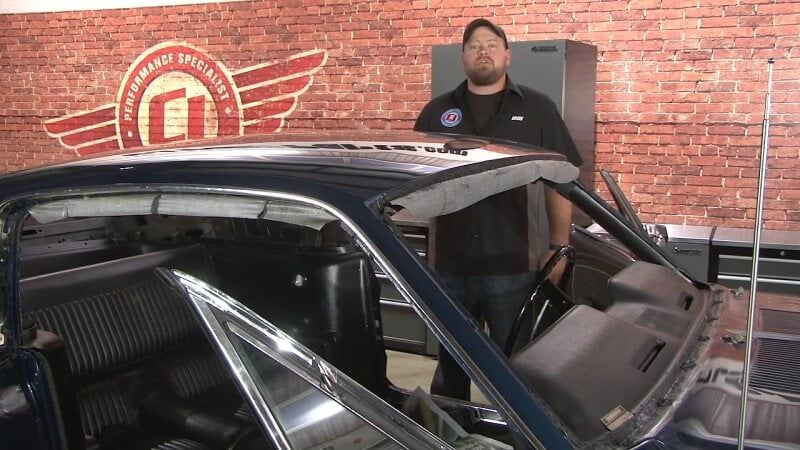
Headliner Replacement
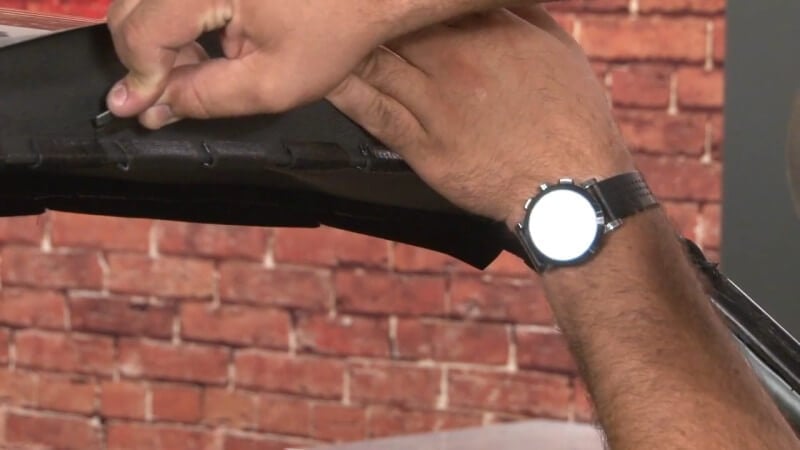
Replacing your Mustang's headliner might seem easy, but it's a little more complicated than it looks. To get a true OEM look, you need to remove the windshield and windows. If you haven't done that yet, or you're working in a different order than we are, you can learn about glass removal in Chapter 8.
If you're only focused on an interior restoration or just don't want to deal with glass, then one-piece headliners are available. These require most of the same installation steps, with one key difference. You don't need to remove the glass. They're designed to fit under the seal.
Regardless, here's how you replace the headliner in a classic Mustang.
How to Replace the Headliner in Your Classic Mustang
Besides the new headliner itself, you'll need a few more parts to complete the installation.
- New Windshield Weatherstripping
- New Rear Window Weatherstripping
- Glass Sealant
- Headliner Glue
- Two Rolls of Windlace
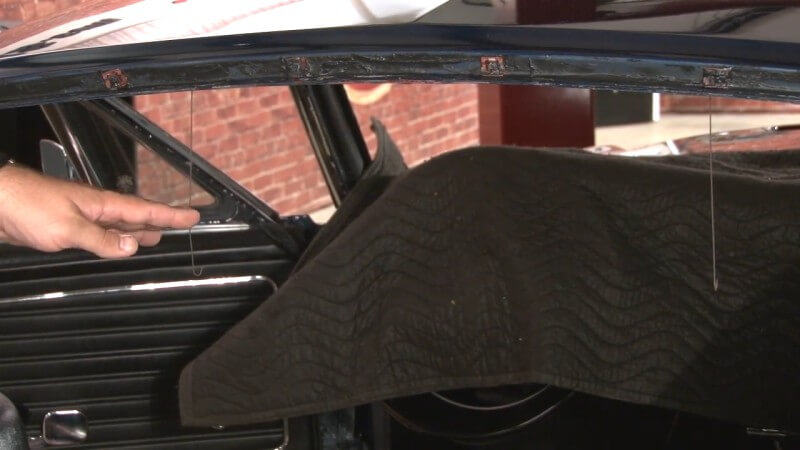
Step 1: Remove Glass
Before you're able to remove the headliner, the windshield glass, rear window glass, and door runs need to be removed.
Step 2: Remove Factory Headliner
Cut out or otherwise remove the factory headliner. Don't worry about ruining it as you probably wouldn't be replacing it if it was in good enough condition to save.
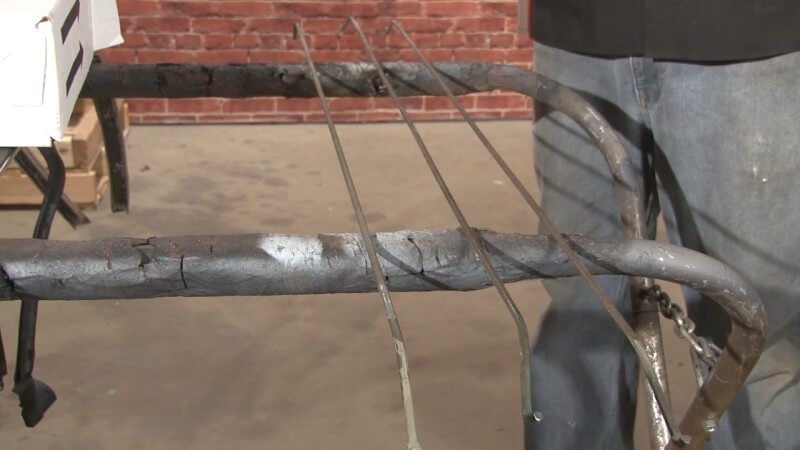
However, you do need to save the rods that run along your headliner. It's also a good idea to lay them out in the order you removed them for later in the installation.
Step 3: Install Headliner Insulation
If you have it, stick the headliner insulation to the roof of your car.
Then, take all of the screws you removed for things like the sun visors, rear view mirror, and seatbelts and place them back in their corresponding holes. This will help you later when cutting holes after the headliner has been set in place.
Step 4: Mark the Centerline
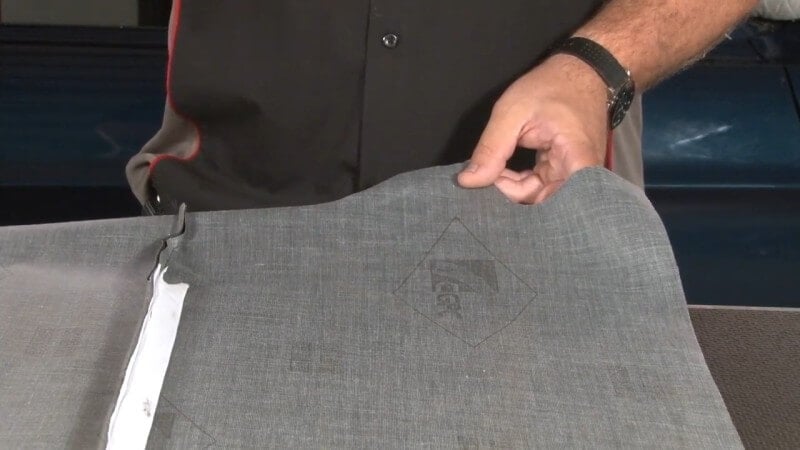
Lay your headliner out flat on a table or other flat surface. Then, measure to the center of the headliner and mark it.
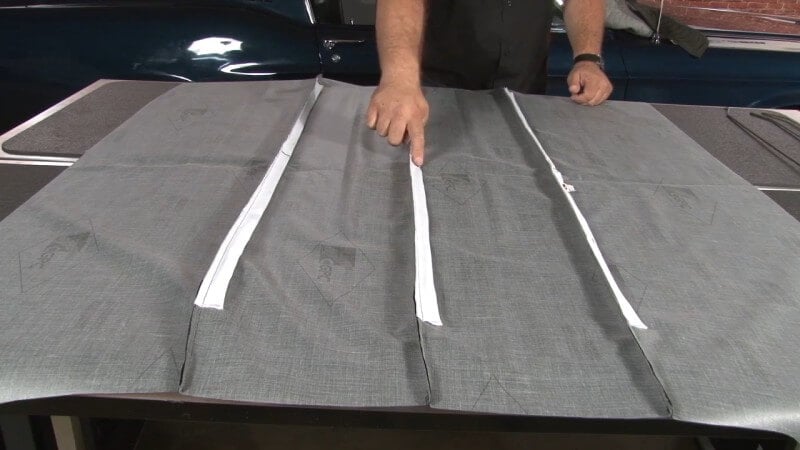
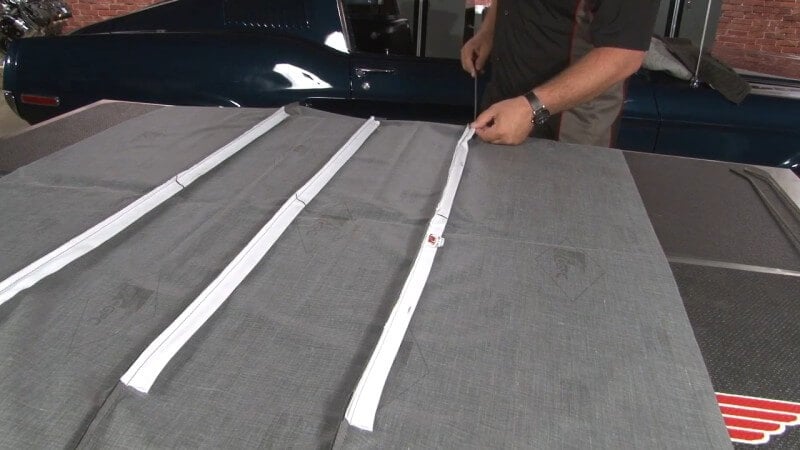
Step 5: Install Headliner Rods in Headliner
First, you need to find the back of the headliner. The back of the headliner should have a piece that comes out further. This is important to know so that your headliner rods go in the correct direction.
Then, slide the headliner rods into place in the sleeves along the headliner. Be sure to put the rods in the sleeves in the correct order.
Step 6: Install Rear Headliner Rod in Car
Before installing the rear rod, ensure that the two hanging hooks are still in place. They hold the headliner material in place.
Insert either end of the rear headliner rod into the corresponding holes in the roof.
Then, insert the hooks into the headliner material underneath the rear headliner rod.
Step 7: Install Middle Headliner Rod in Car
Insert either end of the middle headliner rod into the corresponding holes in the roof.
Step 8: Install Front Headliner Rod in Car
Insert either end of the front headliner rod into the corresponding holes in the roof.
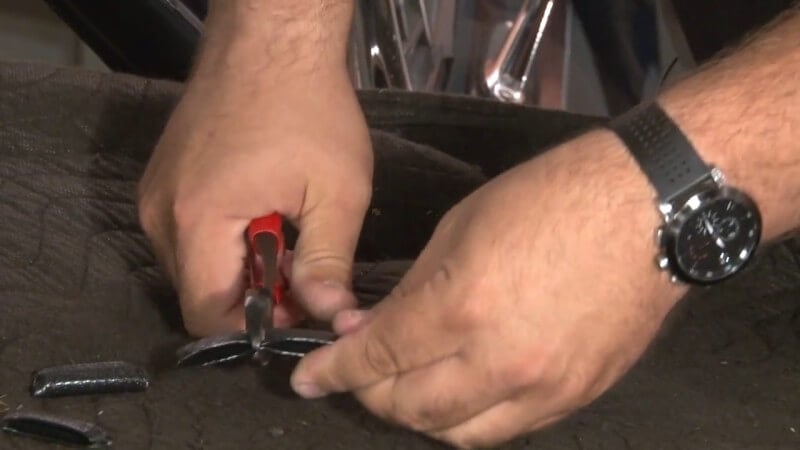
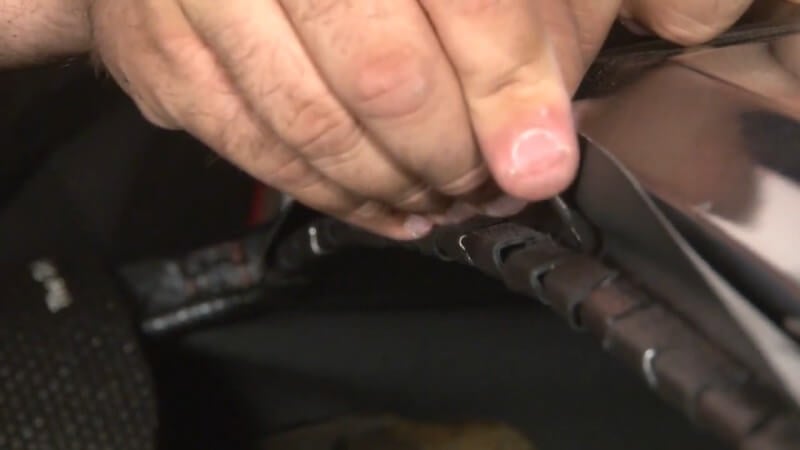
Step 9: Cut Up Extra Windlace
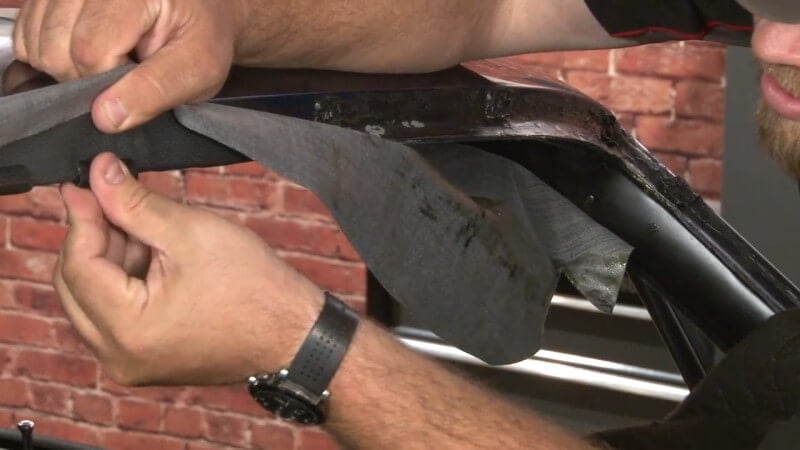
Take the second roll of windlace that you bought and cut it up into a bunch of small pieces. These pieces will help hold your headliner in place and make the job much easier.
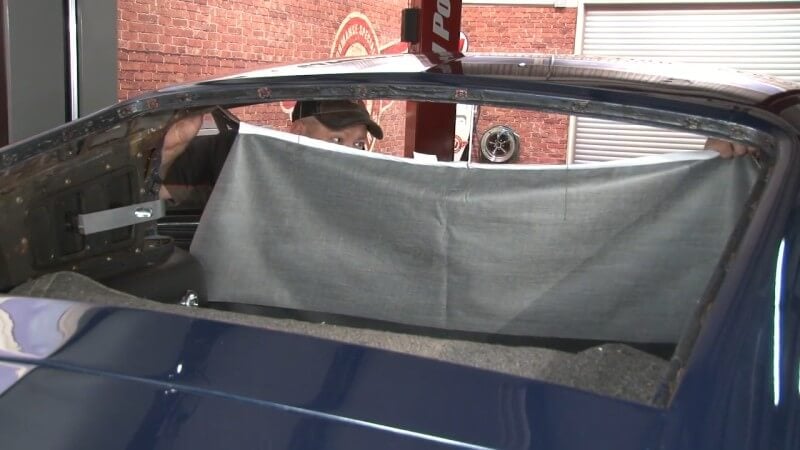
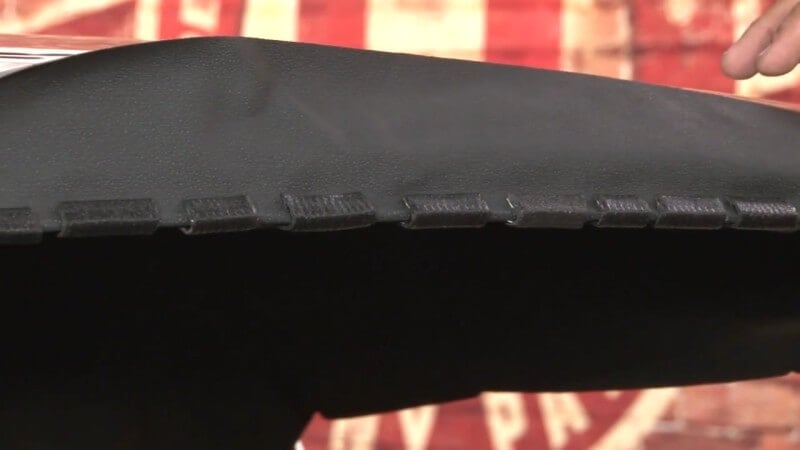
Step 10: Stretch Front and Rear of Headliner
Starting from the center and working outward, gently and carefully stretch the front of the headliner over the lip that your windshield rests on. Then, use the cut-up pieces of windlace to secure it in place on the lip.
After you've done the front, do the same to the rear until your headliner to taut inside the car. Leave about five or six inches of space on either side of the front and rear.
Step 11: Stretch Sides of Headliner
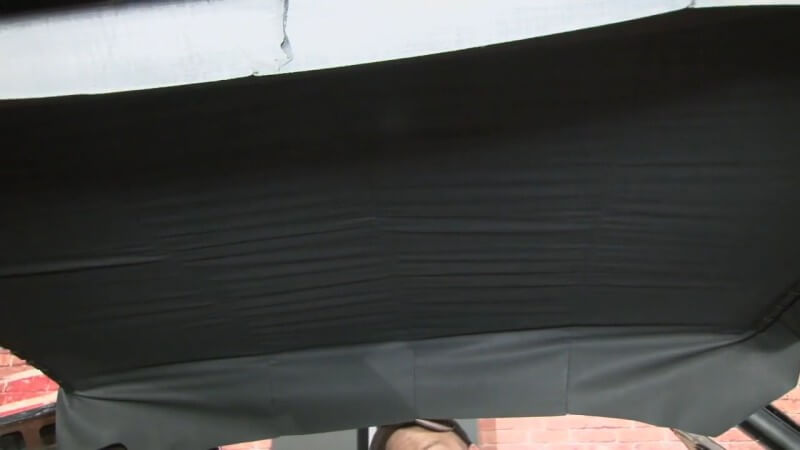
Pull the side of the headliner taut with your hands and repeat the same process you did on the front and rear to the sides of the headliner.
Step 12: Stretch Corners of Headliner
Starting from the front, pull the headliner tight against the pillar and cut a slit on either side to allow for the headliner to clear without getting wrinkled.
Then, use the pieces of windlace to lock the headliner in place. Repeat this process on the other three corners.
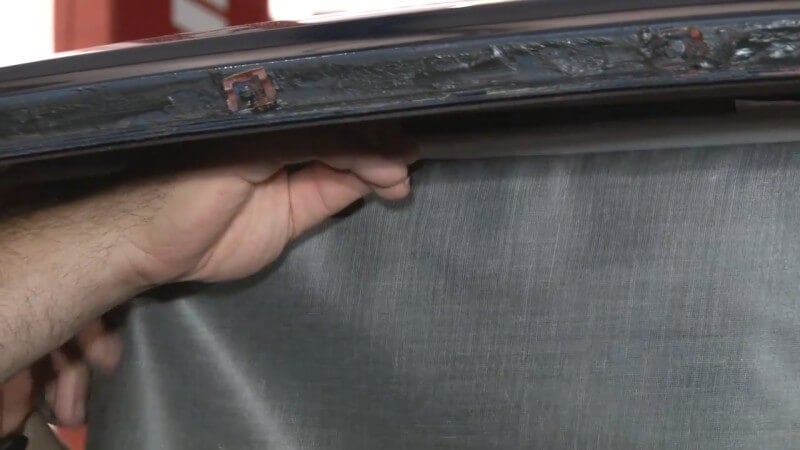
Step 13: Glue Headliner Around Windshield
Working in sections, start on half of the windshield and remove the windlace. Then, pull the headliner down and put glue on the headliner and the metal channel on both sides.
After you've let it set for around 3-5 minutes, pull the headliner back in place and reinstall the windlace to keep the headliner taut while the glue dries.
Do this until you've completed gluing the headliner in around the entire length of the car.
Step 14: Let Glue Dry
After you've got the headliner glued in and you've gotten rid of any wrinkles, let the headliner sit and cure for 24 hours.
Step 15: Install Finished Windlace
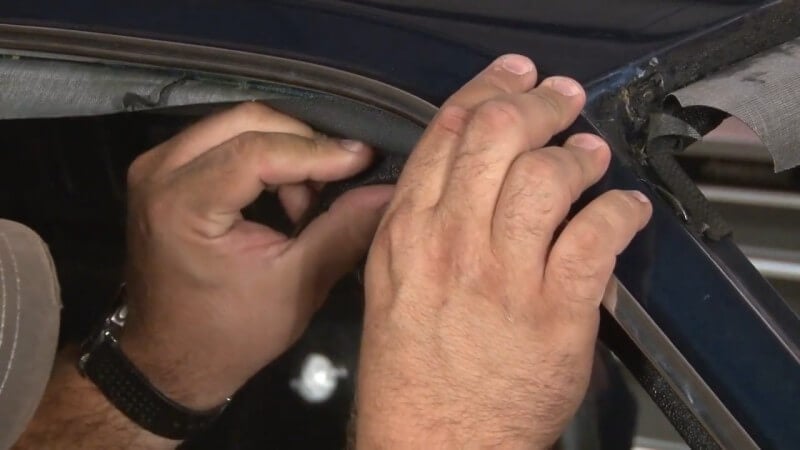
Starting on the inside of the passenger door frame, slowly install your finished windlace while removing the pieces we used to hold the headliner in place. Take your time and be careful not to create any wrinkles while doing this.
Then, use a razor blade to cut off any excess headliner material.
Repeat the process on the driver's side.
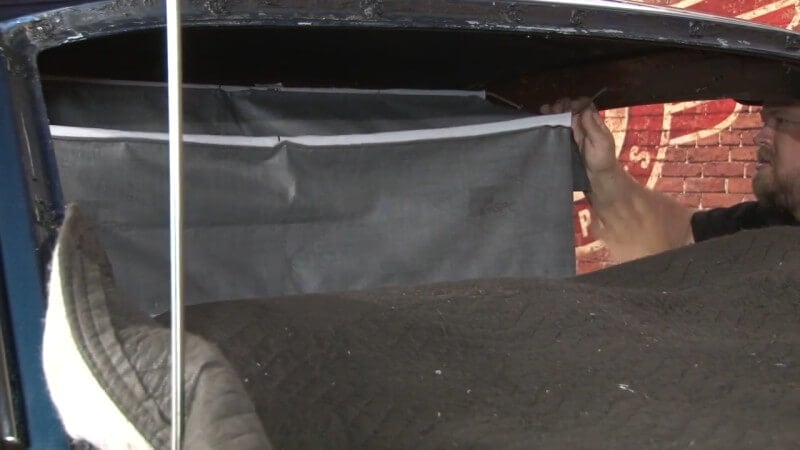
Step 16: Cut Excess Material Around Windshield
Leaving the pieces of windlace we used to glue the headliner in place on, use a razor blade to cut of the excess headliner material.
We'll remove the pieces of windlace later when we reinstall our factory windshield.
Step 17: Cut Excess Material Around Rear Window
Repeat the same process that you used on the front windshield on the rear window.
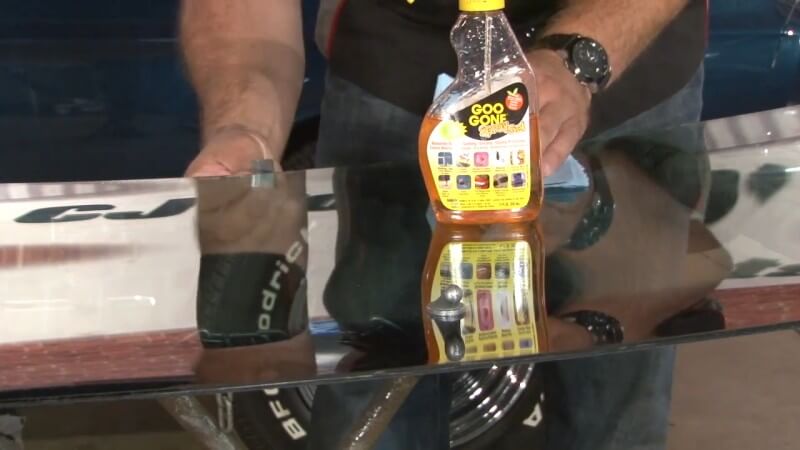
Step 18: Remove Old Window Caulk (Optional)
Feel free to skip this step if you're installing new glass.
Use Goo Gone or another adhesive remover and scrub off any leftover caulk on the glass before reinstallation.
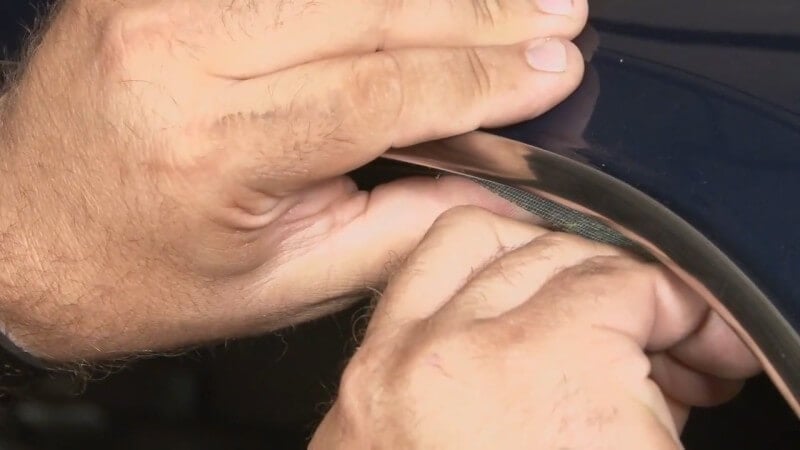
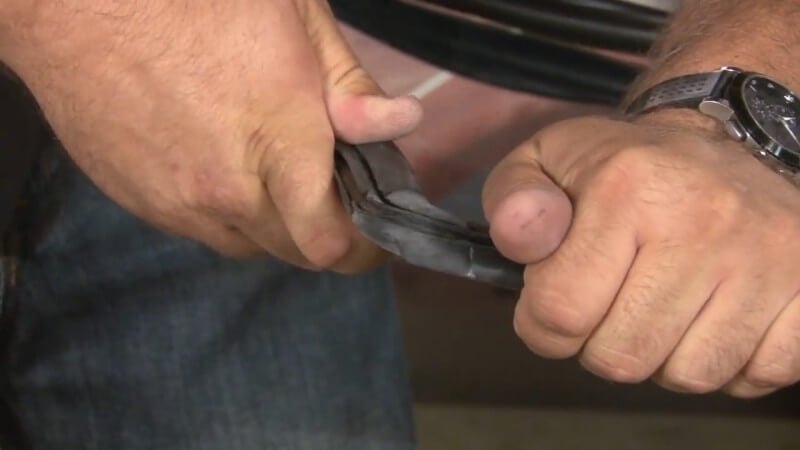
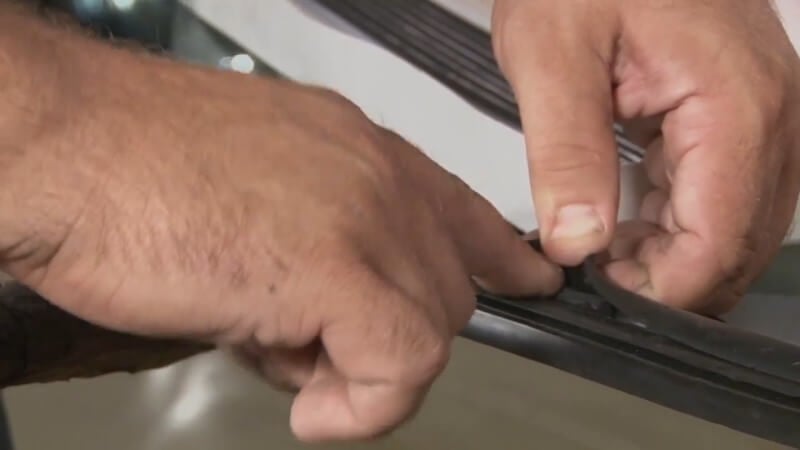
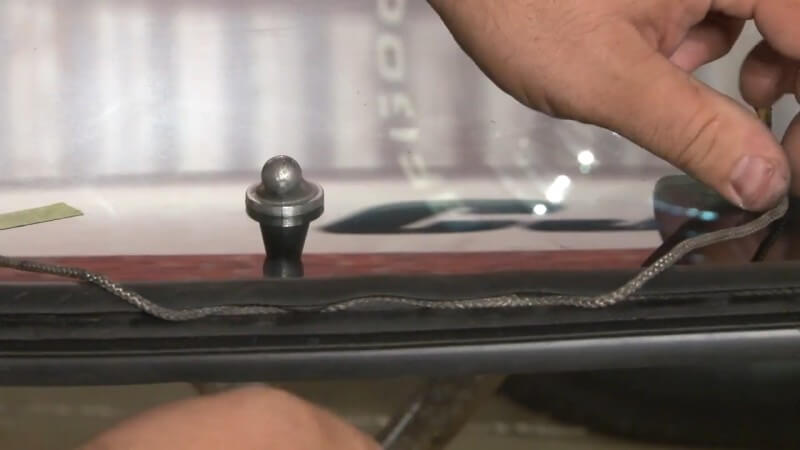
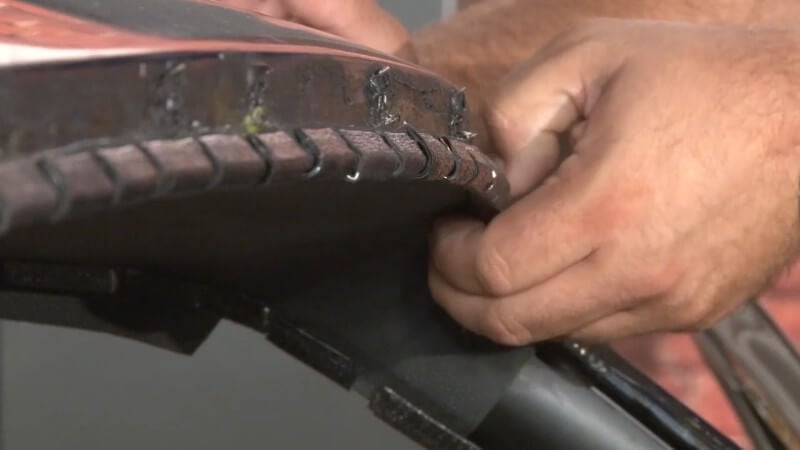
Step 19: Install Windshield Weatherstripping
Lay your weatherstripping out on the glass and get it roughly into place. Then, slowly pop the weatherstripping into place along the edges of the glass until it's completely attached.
Step 20: Apply Strip Caulk
Peel back the edge of your weatherstripping and place strip caulk in the bottom of the weatherstripping. Do this along the entire length of the weatherstrip.
Step 21: Install String
Run about 14 feet's worth of string along the inside of the weatherstripping in the same channel that you installed the strip caulk. This will help the strip caulk go around the inside of your windshield's frame.
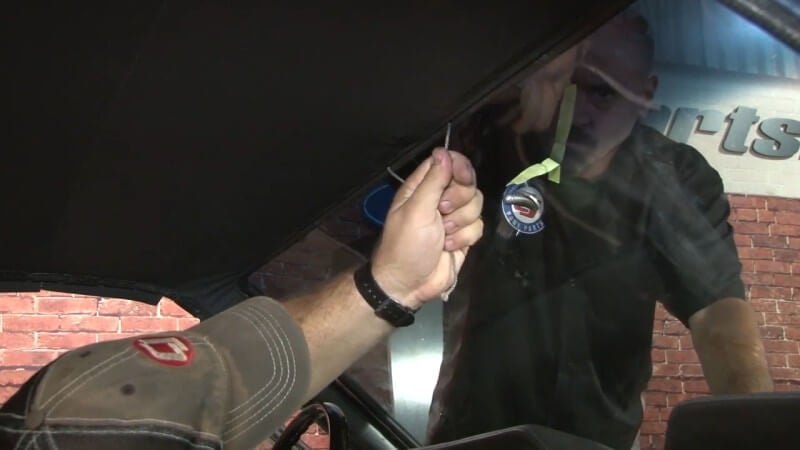
Step 22: Remove Windshield Windlace Pieces
Now that our windshield is ready to be installed, go back and remove the pieces of windlace you used to keep the headliner in place along the edge of where the windshield goes.
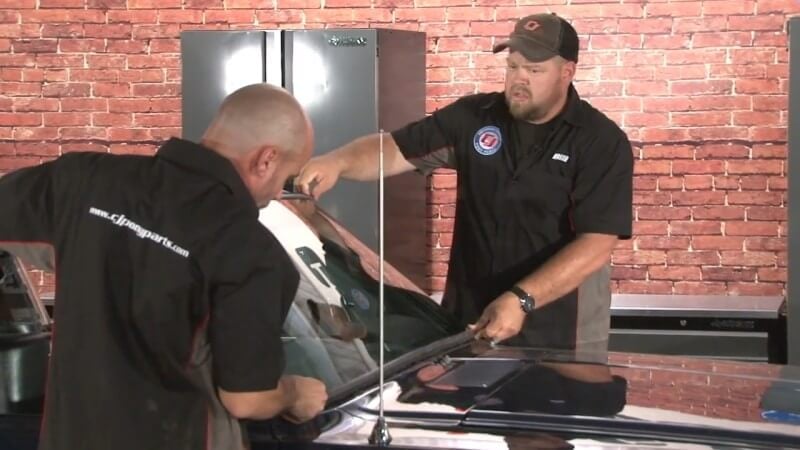
Step 23: Set the Windshield in Place
Gently place the windshield down into place on the car with the help of a friend. Then, push it into place.
Step 24: Remove String
Have a friend gently push down on the windshield glass from the outside as you carefully remove the strong from inside the car.
Step 25: Mask Off Body Panels
Sealant is messy, so it's important to mask off the surrounding body panels before applying it.
Take some body shop tape and run it along the panels surrounding the windshield glass to protect them.

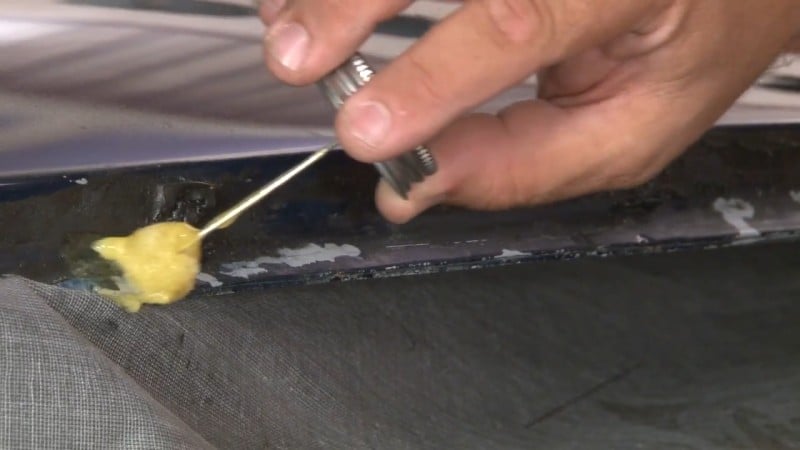
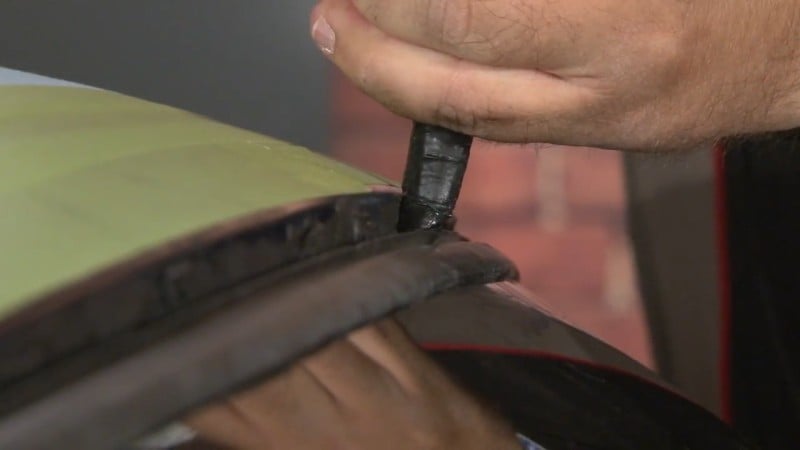
Step 26: Seal the Windshield
Using a caulk gun, three tubes of sealant, and a panel remover tool, carefully lift up the edge of the weatherstripping and apply sealant underneath it along the length of the windshield. Be sure apply the sealant as deep as possible to get the best seal.
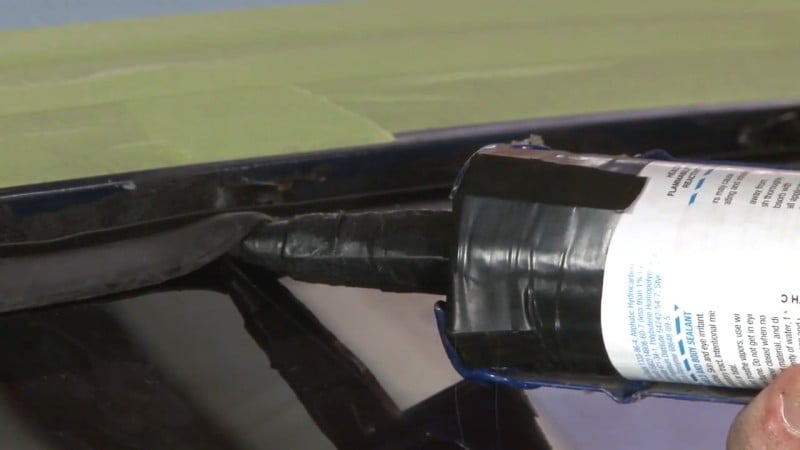
Repeat the process on the outside of the weatherstrip between the seal and the body itself.
Step 27: Install Rear Window
Repeat steps 19-26 on the rear window to install it properly in the car.
Step 28: Clean Front and Rear Glass
Using Goof Off or another solvent, gently rub off any sticky residue with a microfiber towel.
Step 29: Reinstall Door Weatherstrip Channels
Place the door weatherstrip channel into place along the inner lining of the door frame and screw it into place. Repeat this process on the other side.
Step 30: Install Roof Rail Weatherstrip
Apply a thin layer of weatherstrip adhesive to the inside of the roof rail weatherstrip, then push it into place along the inside of the door frame.
After you've pushed it into place, secure it by screwing the front end into place.
Step 31: Test Glass Seals
Spray the windshield with a low-pressure water hose and look for any leaks.
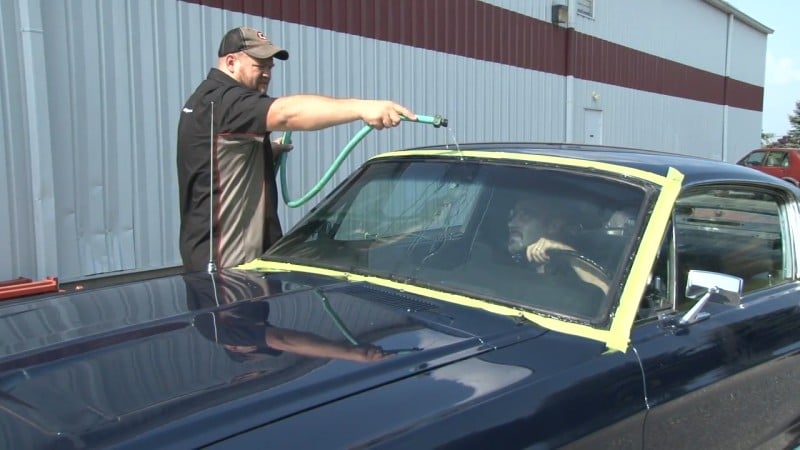
Then, repeat this process for the rear window.
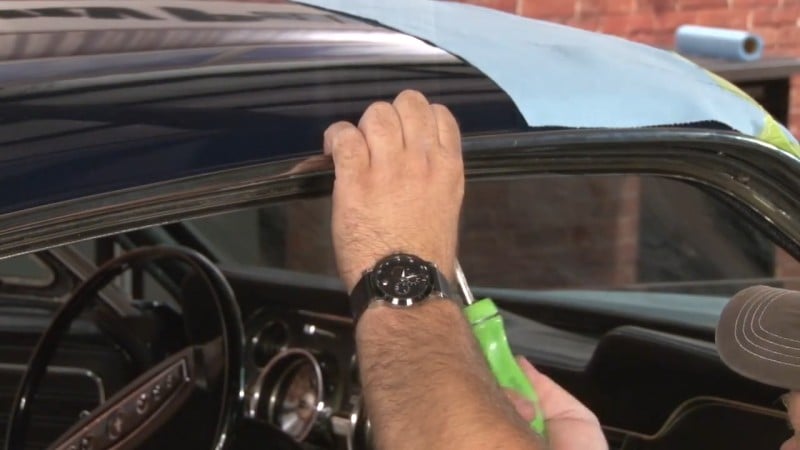
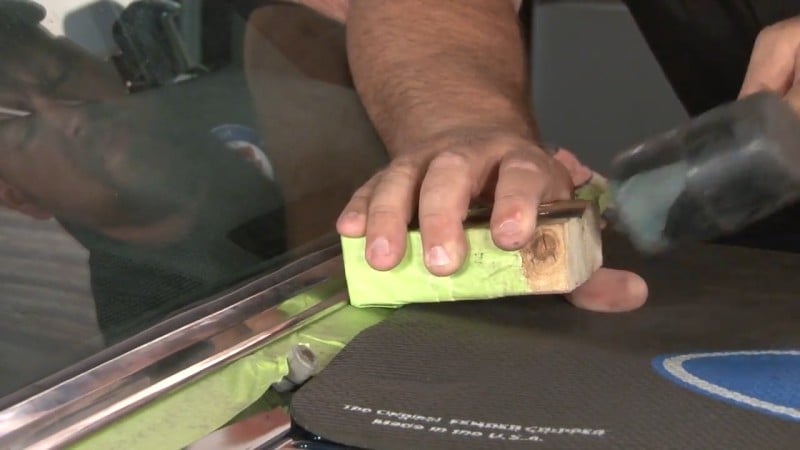
Step 32: Reinstall Window Moldings
Starting from the bottom, line up your window moldings and then carefully lock them into place by applying pressure onto the areas where the clips are.
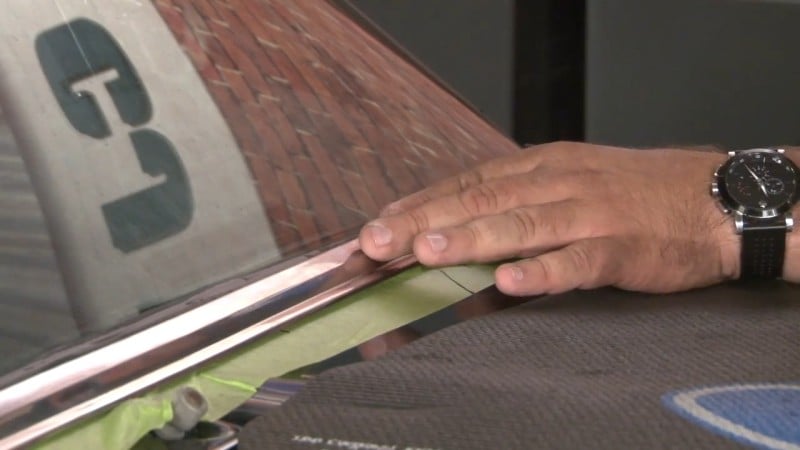
If necessary, a piece of wood and a rubber mallet can help you ensure your clips are secure.
Then, repeat this on the rear window.
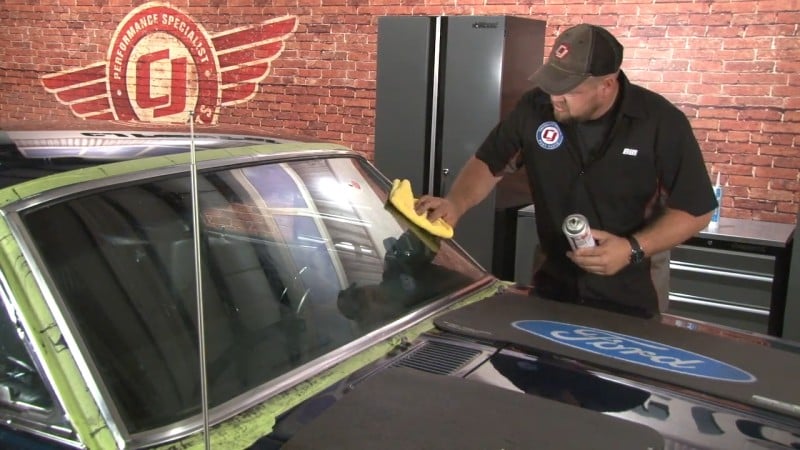
Step 33: Clean Up Glass
Use a solvent and a microfiber cloth to remove any excess sealant or residue. Then, remove the tape.
Step 34: Reinstall Visors
Cut holes in the headliner to mount the visor.
Then, screw the visor in place
Step 35: Reinstall Interior Panels
Once you're done, just add your interior accessories back in place. Then, you'll have an interior that looks and feels as good as new.
Door Panel Repairs
After decades of use, it's common for door panels to show heavy wear. Scuffs, cracks, fading, or loose trim can make the interior feel unfinished even if the rest of your Mustang looks great. In some cases, you can restore the panels with new upholstery, padding, or hardware. For panels that are warped or broken, replacement is usually the best option. Quality reproduction door panels bring back a factory-fresh look and give your cabin a much more polished appearance.
Replacement Door Handles and Window Cranks
Though they may seem like small details, handles and cranks are parts you interact with every time you drive. When they're loose, worn, or broken, it can make the car frustrating to use. Swapping them out is an inexpensive way to improve both function and appearance. New handles restore smooth, reliable operation, while fresh window cranks eliminate the hassle of sticky or stubborn windows. It's a simple upgrade that goes a long way toward making your restoration more enjoyable day to day.
Check out our full Classic Mustang restoration guide to learn everything you need to tackle your next project.


