
How to Install Jacking Rails on an S650 Mustang (2024+)
Last Updated December 1, 2023 | Bill TumasMake working on your brand-new 2024 Mustang a breeze with a set of jacking rails. These upgrades bolt directly to your S650 and allow you to jack your car up all along the frame rails without having to worry about damaging anything.
Check out the video below for an in-depth walkthrough of the installation process.
How to Install Jacking Rails on a 2024+ Mustang
In this installation guide, we'll walk you through installing 2024+ Mustang jacking rails on your ride. They're the perfect upgrade for any home mechanic planning on wrenching on their new S650 Mustang.
While the process is largely the same for any set of S650 Mustang jacking rails, we installed a set of jacking rails by ACCELATEC that's made to work on any 2024+ Mustang. With just some basic tools, you can fit your 2024 Mustang with a set of jacking rails in under an hour.

Tools Needed
- 1/2" Ratchet
- 15MM Socket
- 13MM Socket
- Razor Blade
- Blue Loctite
Step 1: Trim Splash Shield
Starting on the driver's side, locate the two bolts hidden under splash shielding towards the front of the car. Then, use a razor blade to cut a section of the splash shielding out. Start by cutting along the seam on the splash shield and then straight across toward the curve in the shielding. This allows the new 2024 Mustang jacking rails to sit flush against the car.

Step 2: Remove Factory Bolts
Remove the two factory bolts underneath the section of splash shielding that you cut out. Save the two bolts because they'll be used to mount the jacking rail.

Step 3: Remove Rear Bolt
Locate the two factory bolts towards the rear of the car along the pinch weld. Then, remove the one closest to the front of the car and save it for later. The jacking rail only mounts to the front bolt and an unused hole along the pinch weld, so you don't need to remove the second bolt.

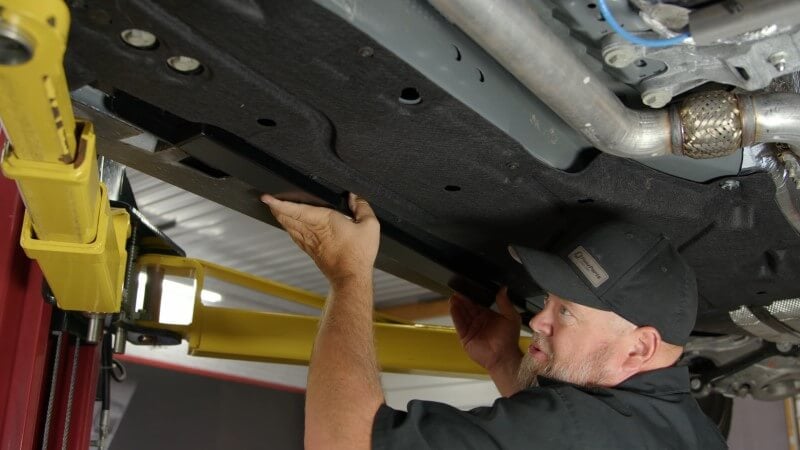
Step 4: Mount Jacking Rail
Since we've started on the driver's side, take the longer of the two jacking rails and align it into place along the pinch weld. Make sure that the holes line up before bolting anything into place.
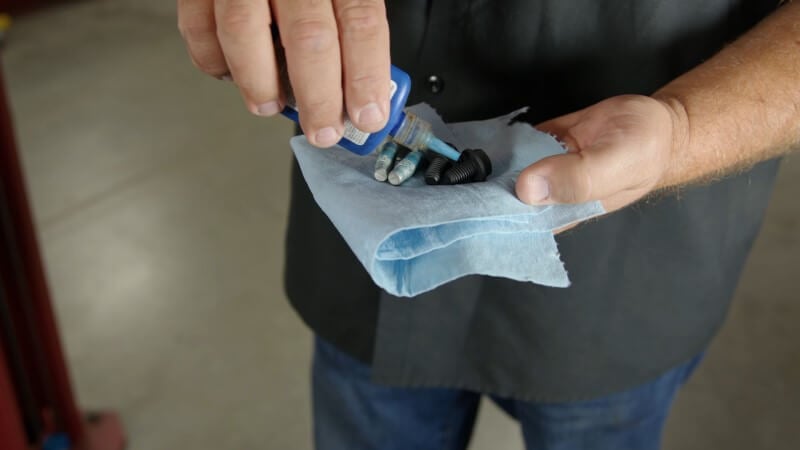
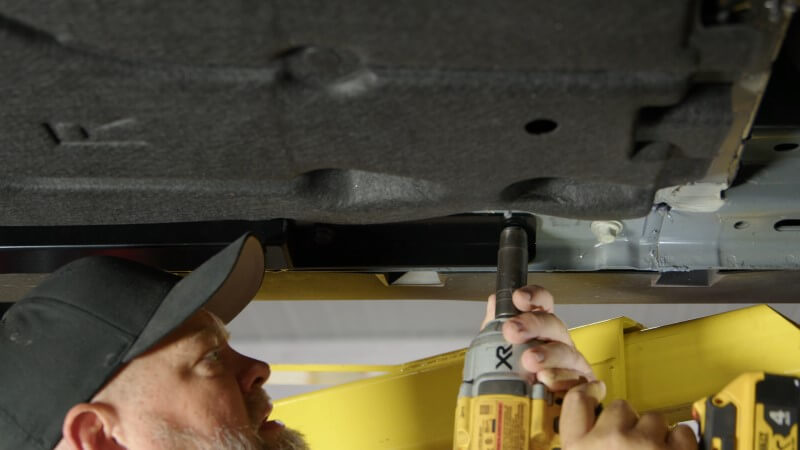
Step 5: Bolt Jacking Rail Into Place
Squeeze a drop of Loctite onto each bolt to ensure it stays in place after installation. While the ACCELATEC jacking rail kit comes with bolts, you can reuse the factory hardware to mount the jacking rail, if you like.
Then, get each bolt hand-tight to ensure that everything fits up properly. After you've made sure everything fits properly, tighten the bolts down fully.
Step 6: Repeat the Process
Now that you've done the driver's side, it's time to repeat the process on the passenger side. Follow the installation steps outlined above on the other side.
Congratulations, you're all done!
Jack Your 2024 Mustang Up With Ease
A set of S650 Mustang jacking rails is a great first mod for any owner looking to work on their ride themselves. Jacking rails make it significantly easier to lift your 2024 Mustang. You'll be able to quickly and easily get to working on your car instead of wasting time getting the car off the ground.
If the ACCELATEC S650 Mustang jacking rails aren't for you, we have a variety of other brands and styles to fit your build.


