Window Regulator Concours Passenger Side Mustang 1965-1966
Highlights
- Passenger Side Specific
- Concours Correct Reproduction
- Direct-Fit Replacement
- Sold Individually


CJ Classics Passenger Side Concours Correct Window Regulator for all 1965-1966 Mustangs.
If you're restoring a classic 1965-1966 Mustang, then you definitely don't want to neglect the windows. After all, there are few things more enjoyable than driving down the road with the windows down! So be sure your windows can be properly rolled up and down, and order this CJ Classics Passenger Side Concours Correct Window Regulator from CJ Pony Parts!
Features & Benefits:
- Concours Correct
- Silver Cadmium-Plated to Prevent Rust
- Exact Reproduction
- Original Metal Thickness on Body, Large Gear and Swing Arm
- High Tension Spring for Easy Operation
- Correct Threads and Splined Shaft
- Exact Same Dimensions as Original for Proper Handle Alignment
- Extra Strong Internal Gear with Improved Rivets
- Direct Fit Replacement
This CJ Classics Passenger Side Concours Correct Window Regulator is an exact reproduction of your original one, and it's silver cadmium-plated to help prevent against rust. It features the same thickness on the body, large gear and swing arm as your original, plus a high tension spring for easy operation and the correct threads and splined shaft. As a matter of fact, this window regulator is the exact same dimensions as your factory one to ensure proper handle alignment, and it also has an extra strong internal gear with improved rivets!
Please Note: This window regulator is for the passenger side only. If you need one for the driver side, please see CJ Pony Parts # WR15L.
Order a CJ Classics Passenger Side Concours Correct Window Regulator for your 1965-1966 Mustang from CJ Pony Parts today!
California Residents: Proposition 65 Warning
Related Categories: Mustang Door Window Regulators
Installation Videos
Video Transcript
For this installation you'll need a Phillips Head screwdriver, door panel removal tool, 3/8 ratchet, 1/2 inch socket, small pick and if you're working on a '64 1/2 or early '65, you'll need a clip removal tool.
To access the window parts, we'll have to pull off the door panel. We're going to start with our door handle and our window crank. Our '65 has the early style clip on window handle and door crank-you'll need this tool to remove them. We're going to line it up with the top of the handle, slide it straight down and remove. Here's a close-up of the clip so you can see how it's removed. Once this slides up to the corner tab, push the clip outward and allow it to release itself. You want to keep your window crank handy because the window will have to go up and down to be able to remove it. Keep this clip off here-that way it won't latch in place.
At one point in time our '65 had a remote mirror so we're going to remove the remote control. Last step before we can remove the panel, is going to be the arm rest. You want to grab your door panel removal tool and remove your door panel. I'll remove your water shield. The regulator is held in by these four bolts here that we'll have to remove. These two are for adjustment-we can leave them alone for now. These three back here are going to hold our scissor in place-we have to remove them. We'll remove these two nuts that's at the bracket for the back of the scissor-that'll allow us to slide it out of the way, give us a little more room to remove everything.
Before we remove the scissor extension,-you can see right here-one of the broken window rollers; this is very commonly the culprit of the window that's hard to roll up, hard to put down or it moves around a lot when it's going up and down. We'll be replacing these, along with the scissor and the regulator.
We'll remove the clip now so we can remove our scissor from the window channel. With the small cotter pen-holds the regulator to the extension; we're going to push out the regulator. In our case our window regulator wasn't really in bad shape and the scissor had some play-the main culprit in our problem was the window rollers. As you can see both of them are busted causing issues with the window going up and down. There's only supposed to be two in here-the third one that must have broken somewhere along the line-these were replaced and that one was left behind.
We're going to remove them all and replace them with new ones. The last roller is this channel here which we're going to remove. There's the third roller which as you can see is also broken.
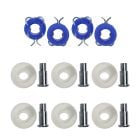
This is the basic design of the regulator and the scissor when it's going to be installed in your door. The regulator is going to turn the gear to move the scissor up and down. This is going to be the channel that we removed it's lifted onto the lower window roller and once installed these two rollers here will go on the window roller channel on the bottom of the glass itself. Your regulator and your scissor are in good shape. They do sell rollers separately-they come in a two pack-you'll need three per side.
With both the track we removed and the track still on the glass, want to clean them out as good as possible and put a new multi-bearing style grease in there to make the roller move easily against the channel. I'm going to clean and grease the channels on the car as well. Then we can install our new regulator. Install the same way we took out the original one-drop it to the bottom of the door-bring it across and up. Install the hardware just hand tight for now.
I'm going to pull the rollers off of our new scissor-put them in the channel and then we'll snap the scissor into them when we're done the installation. Pull the clip off and slide it off. We'll put the clip back on the roller into the lock position. The stud on the scissor will pop into place once we get it installed in the door. We'll put a little grease on the roller before we install it and we'll slide it in the channel. It should move nice and pretty with no resistance whatsoever.
We're going to begin installing the scissor. Knotting stud for the scissor is going to go through the hole in the regulator. Reinstall the clip; push the arm down-the scissor attached to it. Bring up the first part of the scissor, attach it to the roller, slide that over, and the second one-pop that in as well. We're going to line the scissor knotting bracket up with the holes-you do that by slightly turning the regulator-that will begin to come over into place. Now we can also tighten our regulator.
We're going to slide the channel on the latched roller down here. Before we reassemble everything on the door we want to test it out. Press the handle on, if it turns down like it's supposed to, back up-we're ready to reinstall our door panel. This time you normally want to replace the water shield before you reinstall your door panel. In our case-we'll actually going to be converting over to a different style door panel in the near future so we don't want to waste a set of water shields that we're just going to rip right back off anyway.
We're going to remove these clips-you want to slide the clip back down into the lock position before you reinstall your door panel or else it just going to pop right back off. Reinstall the washer first, if you hear a little pop-you'll know it's on. Check everything once last time and our installation is finished.
Now that the warm weather is here we're thrilled when you put the window up and down on our Weekend Wrench without any kind of hassles. Installation should only take you around an hour-you'll be back on the road in no time.

-

-

-
 Power Window Kit With Crank Handle Switches Coupe/Convertible Mustang 1965-1966$1,862.99 MSRP $1,960.99
 -

-