CJ Classics Door Panel Cup Insert Mustang Pony 1965-1966/ Deluxe 1967
Highlights
- Factory-Correct Colors
- Sold Individually
- Fits Driver or Passenger Side
- Great for Restorations

Scott Drake Door Panel Cup Insert for 1965-1966 Mustangs with a Pony Interior and 1967 Mustangs with a Deluxe Interior.
Restoring a classic 1965-1967 Mustang means you want every detail to be just right, which is why you should order this Door Panel Cup Insert by CJ Classics! It comes in factory-correct colors for specific years, and it's an excellent way to add a nice finishing detail to your Mustang's Pony or Deluxe interior.
Features and Benefits:
- Door panel cup inserts
- Sold individually
- Your choice of color
- For Pony or Deluxe interiors
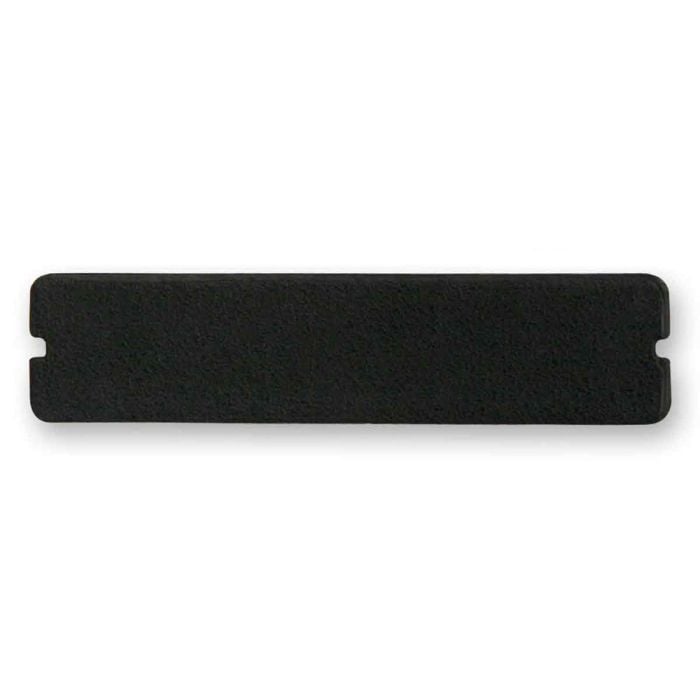
This door panel cup insert is the part that fits into the bottom of the door panel cups in vintage Mustangs with a Pony or Deluxe interior. These cup inserts are sold individually, and your Mustang will require two of these in order to do both the driver side and passenger side doors. You can choose from black, parchment or white.
Black: Factory-correct for 1965-1967 Mustangs
White: Factory-correct for 1965-1966 Mustangs
Parchment: Factory-correct for 1966-1967 Mustangs
Vehicle Fitment:
- 1965-1966 Mustang with Pony Interior
- 1967 Mustang with Deluxe Interior
California Residents: Proposition 65 Warning
Related Categories: Mustang Parts, Mustang Interior, Mustang Door Panel Cups
Installation Videos
Video Transcript
The TMI pony door panels are available in all the factory colors, as the correct texture. It already comes pre-cut for the door panel cup, door crank, window crank, as well as a stainless steel trim. Flipping it over, it's pre-cut for all your door panel clips and has a nice heavy backing as well. When installing pony door panels, you do have to change the door panel shaft and the door handle to be specific for the pony interior. For this installation, you'll need a crank clip removal tool, door panel removal tool, Phillips head screwdriver, T25 Torx bit, pick and a flashlight.
We're going to start by removing our original door panel. First step, remove the door handle crank and the window crank. On our '65, we have the early style clip-on window crank and door crank. You'll need a specialty tool to remove the clips. Just line it up directly with the handle, push in until you hear it release and slide it off. Next, we're going to remove the two Phillips head screws that hold on our arm rest. Now, we're going to remove the remote mirror control, which in our case isn't hooked up. Now, we're going to use our panel removal tool to remove our door panel.
At this point, there would normally be a water shield that would cover this entire area, which you'd have to remove to get to the door handle shaft. In our case, we took the water shield off when we fixed our window regulator and didn't replace it because we planned on installing these pony door panels. Now, we're going to remove the three screws that hold the door handle shaft to our door. Now, we need to remove the door latch rod from the door latch itself. I'm going to push it through the door panel, and just flip it upside down. There's a little metal retaining clip, I need to free that clip with a small screwdriver. With the clip free, you can slide the rod out from the latch and remove the old latch.
Here's a better look at the clip out of the car, the door lock rod is L-shaped. It goes through this clip and then goes through the bottom of the shaft. It's actually clipped here, you do want to remove and transplant to your new door panel shaft. It's plastic; you just squeeze the back, and carefully push it through. Now, we'll install it in the pony door handle shaft, make sure we install the clip on the back of the shaft, not on the front, and we're ready to install in our door. You'll install the rod through the back of the door handle shaft. Then slide the clip up into place and lock it.
Now, we'll flip the door handle shaft up in the place, with the lock riding up in the bottom of the shaft, put it through the door and reinstall the hardware. Now, you want to check the operation since if you didn't get it right, you're going to have a hard time opening your door. Just grab your old door handle, just put it onto the new shaft, use a screwdriver to close the door and check to make sure it opens properly. Now, we're ready to begin installing our water shields. You want to use strip caulk to hold the water shield to the door. Basically, follow the line around the outside edge with the holes for your door panel clips go. Now, we're ready to install the water shield to the door itself. You want to take the matte side and face that down on the door. You start by lining up the two holes for your door handle shaft and your window crank and then work from there.
Now, we're going to assemble the pony door panel for installation. First step is to install the inner stainless steel trim. On the back of the inner stainless steel trim, you'll see these little tabs. Grab a small pick right at the tab and lift it straight out. Now, we're going to pull the protective coating off of it. We're ready to install in our door panel. Lining up the tabs can be a bit tedious, and you want to take your time. You will have to bend them a little bit to get everything to line up properly. Now, once you get them pressed through you want to start with the ends, hold down the trim and bend the tab behind the door panel. Now, I'm going to remove the protective coating from the outer stainless steel trim. We're going to slide the trim over the outside of the door panel. Now, we're going to install the pony door panel cup to this cut-out opening here. We're going to push it through the vinyl, just make sure you don't push it all the way through. Just get it right past the stainless steel trim. Once, we get our door panel into the car, then we'll tighten that down.
If you have a remote mirror on your Mustang, the next step is to cut out this opening here so you can mount the control back in the car. Since ours wasn't functional, we're not going to use it with our installation. Our door panel is ready to install.
Last step before installing the door panel to the door is installing this bracket for our door cup. Your water shield has two holes already pre-cut, and we're going to open them up so we can install the bracket. Normally, you would install this clip through this square opening over the hole that holds your bracket on. At some point in time, our Weekend Wrench had the door replaced with an after-market door over the manufacturer's and he did not cut the metal out for these two openings. These are things you sometimes find when working on a classic car. In our case now, we're just going to just drill a screw right through the metal. Now, we'll install our bracket.
You want to make sure all the holes are open in the water shield so you can see where the clips are going to go. Hold the door panel up and see how well they line up. Make sure all your clips are where they belong before you try to put the panel on. If you have them lined up, you can use a pick and a flashlight if you need to just to make sure everything is lined up as it's supposed to be. What you'll want to do is carefully squeeze the panel on.
Now, we're going to screw our door cup to our bracket. Now, we're going to install the cover with the circles down. They'll go over the heads of our screws. Now, we're ready to do the door handle and window crank. We're going to install the door handle first. Start with the escutcheon, put the gasket on top, then we're going to let the satin Scott Drake door handle with the leather, which will match our interior nicely. Now, we're going to install our window crank. Start with the washer, slide the crank on over it, and our installation's finished.
Our TMI pony door panel looks a lot better than the factory ripped up panel does. The Scott Drake handle gives our car a little bit of a modern look, as well. Installation should take you around 3 hours. You'll be back on the road in no time.


