How to Install 3-Point Seatbelts in a 1967-1972 Chevy or GMC Truck
Last Updated November 20, 2026 | Nate MoonisMany 1967-1972 Chevy and GMC trucks originally came equipped with lap belts, which don't provide the necessary upper-body restraint that modern three-point seat belts do. Upgrading to a three-point seat belt system is a practical way to improve rider protection while maintaining the classic appearance of your truck's interior.
In this guide, we'll walk you through installing a three-point seat belt conversion kit on a 1967-1972 Chevy or GMC truck. The kit featured in the Brothers Trucks video uses the factory seat belt mounting locations, including the threaded anchor in the B-pillar, making it a convenient upgrade for your classic pickup.
Check out the video below for a closer look at the installation process.
How to Install Three-Point Seat Belts on a 1967-1972 Chevy or GMC Truck
Replacing your truck's original lap belts with a three-point system adds a shoulder restraint to help limit forward movement during sudden stops or collisions. This installation uses the existing factory mounting locations, so you won't need to create new mounting points when installing the compatible kit shown in the video.
Tools and Supplies Needed:
- Ratchet and socket set
- Wrench set
- Torque wrench
- Three-point seat belt conversion kit
- Supplied mounting bolts and hardware
1967-1972 Chevy and GMC Truck Three-Point Seat Belt Installation
Important: Seat belts are critical safety equipment. Before installation, inspect the factory mounting points for rust, damage, or previous modifications. Use only the hardware supplied or specified by the seat belt manufacturer, and follow the kit's instructions for anchor placement, retractor orientation, and tightening specifications. Do not reuse damaged mounting hardware.
Step 1: Locate the Factory Seat Belt Mounting Points
Identify the original lap belt mounting locations near the seat and the threaded shoulder belt anchor in the B-pillar. The conversion kit shown in the video is designed to use these existing mounting points.
Remove the original lap belts if they're still installed, keeping the mounting areas accessible for the new hardware.

Step 2: Position the Lower Seat Belt Assembly
Feed the lower portion of the new seat belt assembly through the appropriate opening beside the seat, as demonstrated in the video. Make sure the belt follows the intended path without becoming twisted or caught against the seat.

Step 3: Secure the Lower Seat Belt Mounting Hardware
Attach the lower seat belt components to the designated factory mounting points using the supplied hardware. Confirm that the mounting brackets are oriented according to the kit instructions and that the belt can move freely without rubbing against the seat frame.
Note: The video doesn't show every lower mounting fastener being installed. Refer to the instructions included with your specific seat belt kit for the correct hardware arrangement and torque specifications.

Step 4: Position the Upper Shoulder Belt Bracket
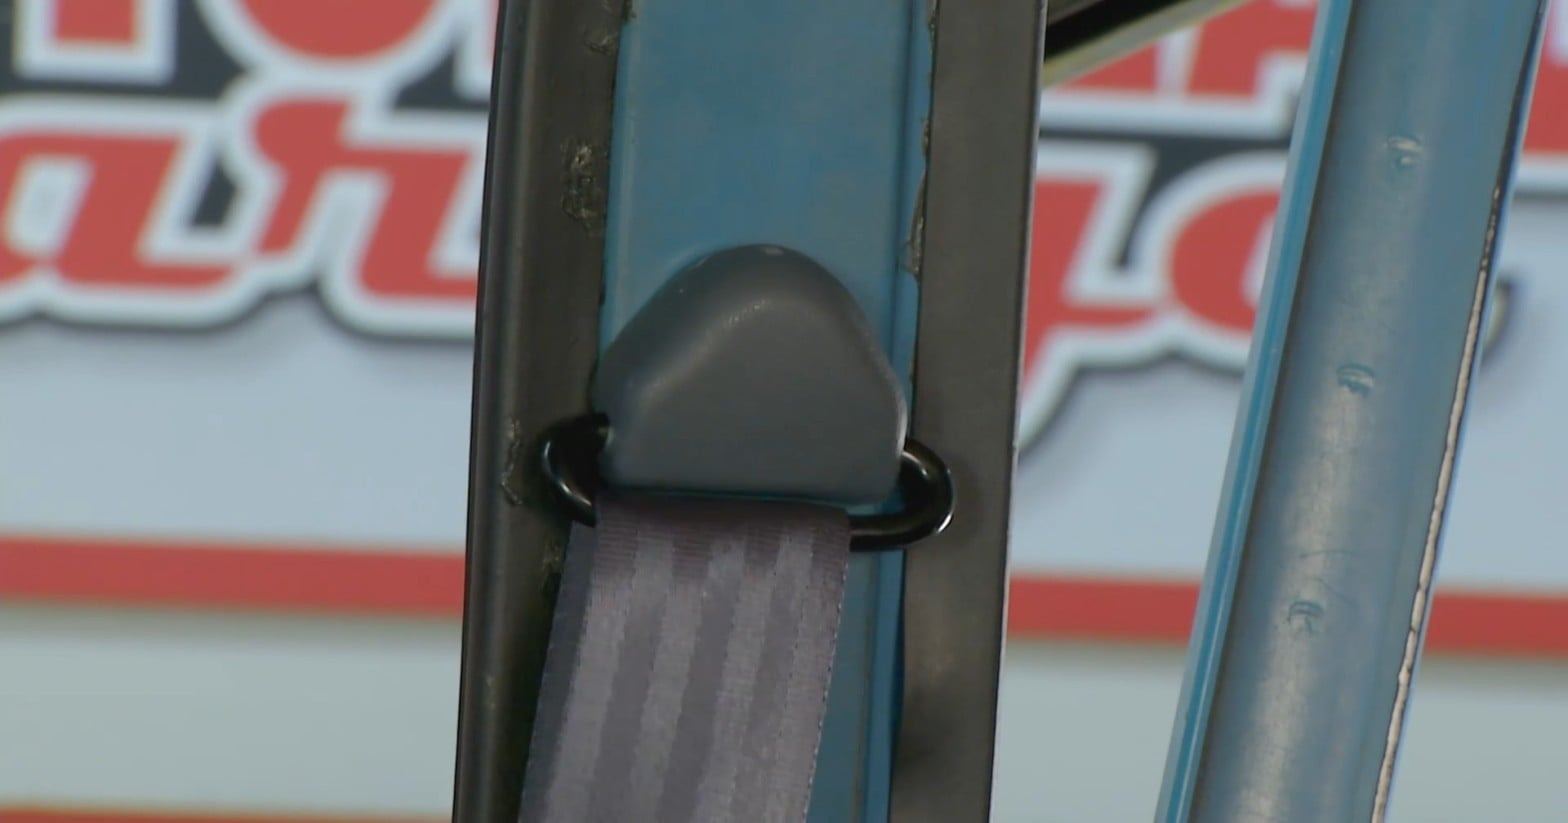
Locate the threaded mounting hole in the B-pillar behind the door opening. Position the supplied upper shoulder belt bracket against the mounting location, making sure the belt is routed correctly.

Step 5: Install the Upper Shoulder Bolt
Insert the supplied shoulder mounting bolt through the upper belt bracket and thread it into the factory B-pillar anchor.
Tighten the bolt to the seat belt kit manufacturer's specification. The shoulder bolt is designed to secure the bracket while allowing it to pivot as the belt moves.

Step 6: Install the Shoulder Belt Trim Cover
Position the supplied trim cover over the upper shoulder belt mounting hardware. Guide the belt through the cover opening and secure the trim piece as directed by the kit manufacturer.
Check that the upper bracket can still pivot freely after the trim cover is installed.

Step 7: Route the Shoulder Belt Across the Seat
Pull the shoulder belt across the seat and check that the webbing is straight. Make sure the belt passes smoothly through the upper bracket and isn't twisted along its length.
The kit shown in the video uses an inertia-locking retractor that allows the belt to extend during normal movement and is designed to lock during certain sudden movements or changes in vehicle motion.
Step 8: Check the Seat Belt Buckle and Latch
Insert the metal latch plate into the seat belt buckle until it clicks into place. Check that the buckle holds the latch securely, then press the release button to confirm that it disengages properly.
Repeat the process several times to verify that the latch and buckle operate smoothly.

Step 9: Verify Seat Belt Operation
With the seat belt installed, confirm that the webbing extends and retracts smoothly, the upper bracket pivots freely, and the belt sits correctly across the occupant's shoulder and lap.
Check that all mounting hardware is tightened to the manufacturer's specifications and that the belt isn't rubbing against sharp edges or becoming trapped by the seat.
Verify the retractor's locking operation using the test procedure specified by the seat belt manufacturer. Complete the same installation and inspection process on the opposite side of the truck.
Upgrade Your 1967-1972 Chevy or GMC Truck With Three-Point Seat Belts
Replacing your truck's original lap belts with a three-point seat belt system is a worthwhile improvement for a classic pickup that sees regular road use. The additional shoulder restraint provides better upper-body protection, and a compatible conversion kit makes use of the truck's existing mounting locations.
Find three-point seat belt conversion kits and other interior restoration parts for your 1967-1972 Chevy or GMC truck at CJ Pony Parts.