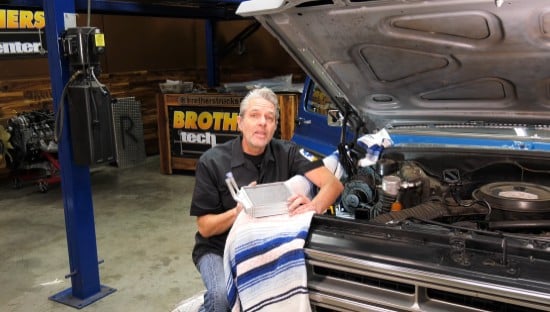
1973-1987 Chevy and GMC Truck Dash Pad Replacement
Last Updated November 13, 2026 | Nate MoonisCracked, faded, and warped dash pads are common problems on 1973-1987 Chevy and GMC trucks. Years of sun exposure can leave the original dashboard looking worn, even if the rest of your interior is in good condition. Replacing the dash pad is a straightforward way to clean up your truck's interior and bring back its factory appearance.
In this guide, we'll walk you through removing the original dash pad and installing a replacement on your classic Chevy or GMC truck. The process involves removing the instrument cluster bezel, transferring several components to the new pad, and carefully lining everything up during reassembly.
Check out the video below for a more in-depth installation breakdown.
How to Replace the Dash Pad on a 1973-1987 Chevy or GMC Truck
This step-by-step guide covers removing the factory dash pad, transferring the mounting clips and air vents, and installing the replacement dash pad.
Tools and Supplies Needed:
- Phillips head screwdriver
- Flathead screwdriver
- 1/4-inch socket or nut driver
- Socket set and ratchet
- Magnetic parts tray
- Small pick or awl
- Drill with small wire wheel or rotary tool (if needed)
- Cleaning supplies
- Replacement dash pad
- Replacement dash trim (if needed)
1973-1987 Chevy and GMC Truck Dash Pad Replacement Steps
Step 1: Prepare the Truck Interior
Park your truck on a level surface and disconnect the negative battery cable before working around the dashboard's electrical components. Clear out any loose items from the cab to give yourself room to work.
Pro Tip: The video demonstrates this installation with the seat removed, providing additional room to access the dashboard. Removing the seat isn't required, but it can make the job more comfortable.
Step 2: Remove the Instrument Cluster Bezel Screws
Locate and remove the screws securing the instrument cluster bezel to the dashboard. These screws are typically long, narrow Phillips head screws with small integrated washers.
Pro Tip: Use a magnetic parts tray to keep track of the screws as you remove them. Some trucks may have different fasteners installed from previous repairs.

Step 3: Remove the Lower Dashboard Screws
Remove the additional screws along the lower portion of the dashboard and instrument bezel. Some of these fasteners may have 1/4-inch hex heads instead of Phillips heads.
Keep the different fasteners organized so they can be reinstalled in their original locations.

Step 4: Remove the Radio Knobs
Pull the radio knobs straight off their shafts to provide clearance for removing the instrument cluster bezel.

Step 5: Remove the Headlight Switch Knob and Shaft
Pull the headlight switch knob outward to its extended position. Reach behind the dashboard and locate the small release button on the switch housing.
Press the release button while gently pulling the knob and shaft out of the switch.

Step 6: Remove the Instrument Cluster Bezel
With the screws and control knobs removed, gently pull the instrument cluster bezel away from the dashboard. Work carefully around the surrounding trim to avoid damaging the plastic.

Step 7: Remove the Original Dash Pad
Once the instrument bezel and dash pad mounting screws are removed, carefully lift the original dash pad away from the dashboard.
Pay attention to the air conditioning vents and duct connections behind the pad. These may catch as you remove it and might need to be gently separated.

Step 8: Inspect the Dash Pad Mounting Clips
Turn the original dash pad over and locate the metal mounting clips along its front edge. These clips slide into slots in the dashboard structure and help secure the pad without visible screws along the top.
Inspect the clips for damage before transferring them to the replacement pad.

Step 9: Remove the Air Vents and Dash Trim
Remove the air conditioning vent assemblies and any attached trim pieces from the back of the original dash pad. Set aside the reusable components and their mounting hardware.
Pro Tip: The original plastic trim can become brittle with age. In the video, several mounting studs break during removal. Consider having replacement trim available if yours is cracked or deteriorated.

Step 10: Remove the Dash Pad Mounting Clips
Use a small flathead screwdriver to gently lift the locking tab on each mounting clip. Slide the clip backward to disengage it from the slot in the original dash pad.
Repeat the process until all reusable mounting clips have been removed.

Step 11: Prepare the Replacement Dash Pad
Inspect the replacement dash pad and locate the mounting clip openings. Some of the dash pad material may extend into these openings and need to be trimmed slightly before the clips can be installed.
Remove only enough excess material to allow the clips to fit properly.

Step 12: Install the Mounting Clips on the New Dash Pad
Position each mounting clip over its corresponding slot in the replacement dash pad. Push the clip down and forward until its retaining tab engages the opening.
Make sure each clip is securely attached before continuing.

Step 13: Install the Dash Trim on the Replacement Pad
Position the dash trim against the replacement pad and align its mounting studs with the corresponding holes.
The trim has an uneven mounting hole pattern, with two holes on one side and one on the other, helping you identify the correct orientation.

Step 14: Reinstall the Air Conditioning Vents
Position the air conditioning vent assemblies on the back of the replacement dash pad. Align their mounting studs with the corresponding holes and secure them with the original hardware.

Step 15: Adjust the Material Around the Vent Mounting Holes
If the vent mounting studs don't extend far enough through the new dash pad, check for excess material around the mounting holes.
Use a small wire wheel or rotary tool at low speed to carefully remove a little material around the affected holes. Remove only enough material to allow the mounting hardware to engage.
Important: Work slowly to avoid removing too much material or damaging the replacement dash pad.

Step 16: Position the New Dash Pad on the Dashboard
Bring the replacement dash pad into the cab and line up the metal mounting clips with the corresponding slots in the dashboard structure.
Work the pad gently into place, paying particular attention to the corners where the fit may be tight.

Step 17: Engage the Dash Pad Mounting Clips
Check that each mounting clip is aligned with its corresponding slot. Gently press the dash pad into place until the clips engage and the pad sits securely against the dashboard.
Check the fit along the entire front edge before installing the screws.

Step 18: Reconnect the Air Conditioning Ducts
Open the glove box to access the air conditioning duct connections behind the dash pad. Carefully align the ducts with the vent openings and reconnect them.
Pro Tip: The video demonstrates gently moving the glove box liner past its stop for additional access. Be careful with the original plastic, as it can become brittle over time.

Step 19: Start the Dash Pad Mounting Screws
Begin reinstalling the screws along the lower edge of the dash pad. Leave them slightly loose at first so you can make small adjustments to the pad's position.
If the replacement material covers a screw hole, use a small awl to locate the mounting point and create a small opening.

Step 20: Align and Tighten the Dash Pad Screws
Once all the mounting screws are started, check the dash pad's position and adjust it as needed. Tighten the screws evenly after everything is properly aligned.
Important: Avoid overtightening the screws, which can damage the mounting areas or distort the replacement dash pad.
Step 21: Reinstall the Instrument Cluster Bezel
Position the instrument cluster bezel over the dashboard and check its alignment with the gauge cluster and lower dash.
Start the lower mounting screws first, then work your way around the bezel. If necessary, use a small awl to locate screw holes hidden behind the new dash pad material.
Pro Tip: Before reinstalling the bezel, consider replacing worn gauge lenses or addressing any instrument cluster issues while everything is accessible.

Step 22: Reinstall the Radio and Headlight Switch Knobs
Slide the radio knobs back onto their shafts and reinstall the headlight switch knob and shaft. Make sure the headlight switch shaft locks into place and operates correctly.
Step 23: Check the Finished Dash Pad Installation
Inspect the replacement dash pad to make sure it sits evenly across the dashboard and all trim pieces are securely attached.
Reconnect the battery and test the headlights, radio, gauges, and air conditioning vents. If you removed the seat for additional access, reinstall it and tighten the mounting hardware before driving.
Congratulations, you're all done!
Refresh Your 1973-1987 Chevy or GMC Truck's Interior With a New Dash Pad
A replacement dash pad can make a noticeable difference in the appearance of your classic Chevy or GMC truck's interior. Getting rid of the cracks, fading, and warping that develop over time helps bring the dashboard back to its original look without requiring a complete interior restoration.
Find replacement dash pads, instrument bezels, interior trim, and other restoration parts for your 1973-1987 Chevy or GMC truck at CJ Pony Parts.