Mustang Restoration Chapter 7: Brakes
Last Updated November 25, 2025 | Meghan DrummondBrake problems are some of the easiest to notice and the most important to address. During your test drive, you may have noticed squealing, a soft brake pedal, or vibrations during stopping. While these problems sound bad, they're pretty common in older vehicles. But you do need to take a little extra care during your brake restoration.
A beautiful Mustang restoration without adequate brakes is a terrifying proposition for everyone. Fortunately, most of the original brake equipment can be restored. The parts you should replace, like brake pads or rotors, are generally classed as “consumables.” So, period-correct replacements shouldn't cost any show points.
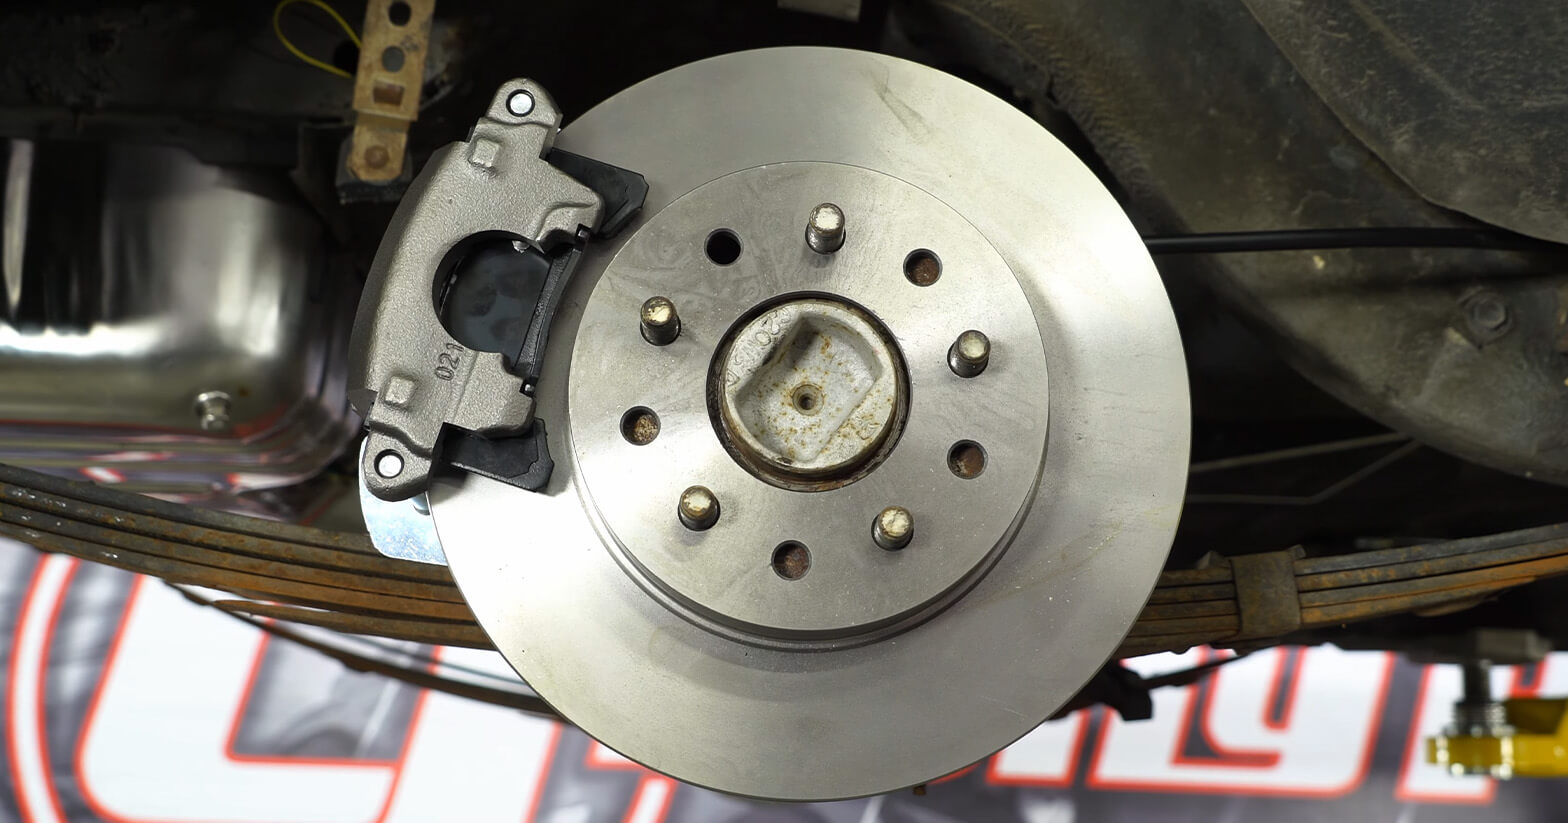
Disc vs Drum Brakes
While all first-gen Mustangs have drum brakes in the rear, many have disc brakes in the front. Disc brakes have many advantages over drum brakes. They perform better in wet weather, have better heat dispersion, and are easier to inspect.

If you're going for a performance rebuild, you may want to upgrade to front and rear disc brakes. If you're building a daily driver, you should upgrade to front disc brakes, even if you leave the drum brakes in the rear.
For show Mustangs, there's no choice but to repair the brake components that are in front of you.
Covered In This Chapter:
- Inspecting and Cleaning Your Brakes - Disassembling your brakes for cleaning and diagnosis
- Rebuilding Drum Brakes - How to rebuild your drums (if you're keeping them)
- Disc Brake Upgrades and Replacements - How to convert to disc brakes or replace existing ones
- Other Brake System Components - Parts of the brake system you should clean or replace
- Bleeding Your Brakes - How to remove air from your brake lines
Inspecting and Cleaning Your Brakes
Since you lifted your Mustang and removed all four wheels to update the suspension, you should be ready to look at the brake system as well.
As you work through your Mustang's brakes, you'll be cleaning your original parts. Even if you plan on replacing them, looking at the way the brakes have worn can tell you vital information about the state of your brake lines and other mechanical gremlins.
Most people recommend a simple alcohol-based solvent for cleaning brake parts.
You should also focus on one wheel at a time to make sure you don't accidentally mix parts. Though the wheel cylinders look similar, all four are different and can't be interchanged.
Disc brakes and drums operate differently, but wear similarly. If something is wrong, you'll notice large grooves on the braking surface. After cleaning, run your finger along the braking surface. If there are grooves deep enough to catch a fingernail, then you'll need to get them re-machined.
| Part | Most Likely | Look For | Notes |
|---|---|---|---|
| Backing Plate | Won't need to be replaced | Signs of leaked fluid or rust | Clean and repaint gloss black |
| Brake Spindle | Won't need to be replaced | Any bending or major damage | Clean and re-grease |
| Rotor (Disc Brakes) | Often replaced | Grooves, rust, or uneven wear | |
| Drum (Drum Brakes) | Won’t need to be replaced | Grooves, rust, or uneven wear | |
| Caliper (Disc Brakes) | Won't need to be replaced | Signs of leaks | Original 4-piston fixed caliper model is a good upgrade for post-1967 Mustangs |
| Caliper Bracket (Disc Brakes) | Won't need to be replaced | Excessive rust or worn areas | |
| Brake Shoes (Drum Brakes) | Often replaced | Areas worn thin | |
| Brake Pads | Often Replaced | Uneven wear | |
| Bearings | Won't need to be replaced | Inability to rotate | Need to be greased thoroughly |
| Adjusting Springs (Drum Brakes) | Usually Replaced | Rust or loss of tension | Loss of tension over time makes these likely to be replaced |
| Return Springs | Usually Replaced | Rust or loss of tension | Replaced to preserve tension |
| C-Clips | Usually replaced | Difficult to remove without breaking | |
| Grease Seals | Usually replaced | Brittleness or loss of elasticity | Not designed for reuse |
| Grease Caps | Usually replaced | Replaced due to dirt and debris | |
| Flexible Brake Hose | May need replacement | Leaks, brittleness, soft patches | Rubber can become brittle over time |
| Hard Brake Line | Usually does not need replacement | Leaking or excessive rust | Good time to upgrade to more durable stainless steel |
| Wheel Cylinder | May need replacement | Degraded seals or leaking | Wheel cylinders should be preserved for show cars, otherwise easier to replace |
| Brake Hose Retaining Clip | Usually replaced | Rust or external damage | Hard to remove without breaking |
| Outer Bearing Nut Retainer | Won't need to be replaced | Damage | Will need to be replaced if it has been lost |
How to Rebuild Drum Brakes
Your Mustang has at least one set of drum brakes. Many of the components of drum brakes lose their tension and effectiveness over time. Rebuilding your drum brakes serves two purposes. The most obvious is returning your brakes' stopping power. The second is uncovering any hidden issues.
Rebuilding the Front Drum Brakes
Step 1: First, remove the brake cap.

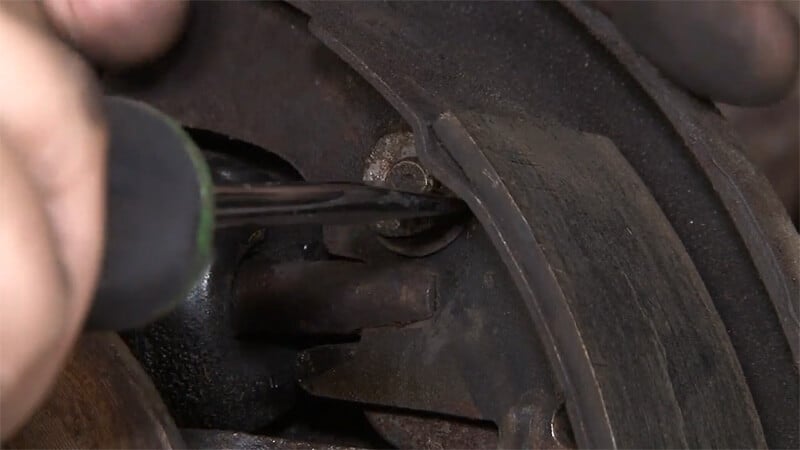
Step 2: You'll see a more intricate-looking assembly once the cap is off. Use a screwdriver to flatten and then remove the cotter pin.

Step 3: Once you remove the cotter pin and washer, you'll see a large nut. Remove it using a pair of pliers.

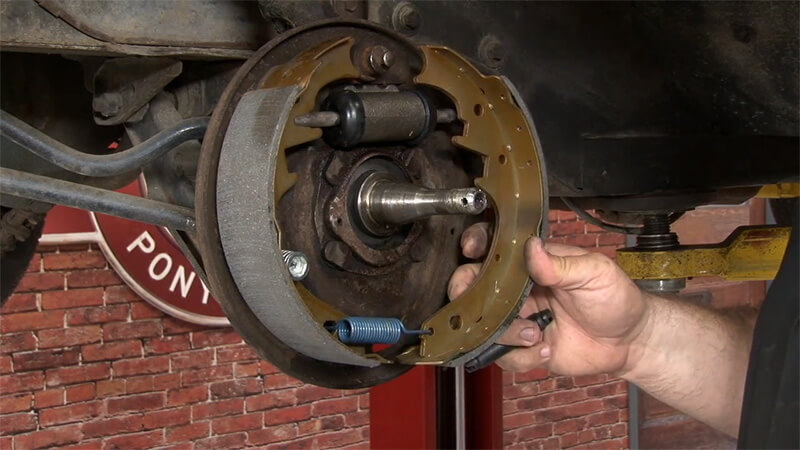
Step 4: Pull the drum off the spindle. You can do this barehanded or with gloves, either way, you'll be getting dirty.

Step 5: With the drum removed, take a good look at the inside. While it's normal for this part to be dirty, you don't want to see any cracks or signs of major wear. You'll need to replace a cracked drum immediately.

Step 6: Inspect the wheel bearing inside the drum brake. If you've been noticing bad wheel bearing symptoms, like screaming or wheel spinning, this is a great time to replace that as well.

Step 7: Use brake cleaner to clean your actual drum brake. This will make it easier to work on and also help you get a better look at any issues before they become serious.

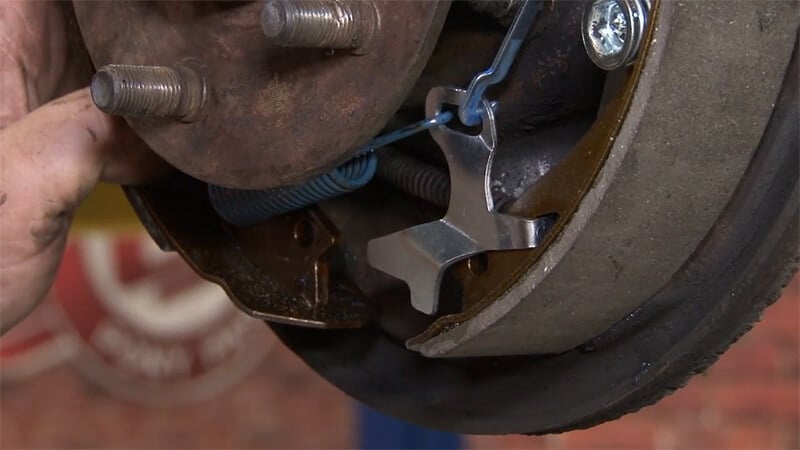
Step 8: Using either a brake spring tool or a pair of needle-nose pliers, remove the two springs from the top of your drum brake.

Step 9: Remove the springs that hold the brake shoes in place.

Step 10: Once these springs are removed, you'll be able to easily slip off your Mustang's brake shoes.

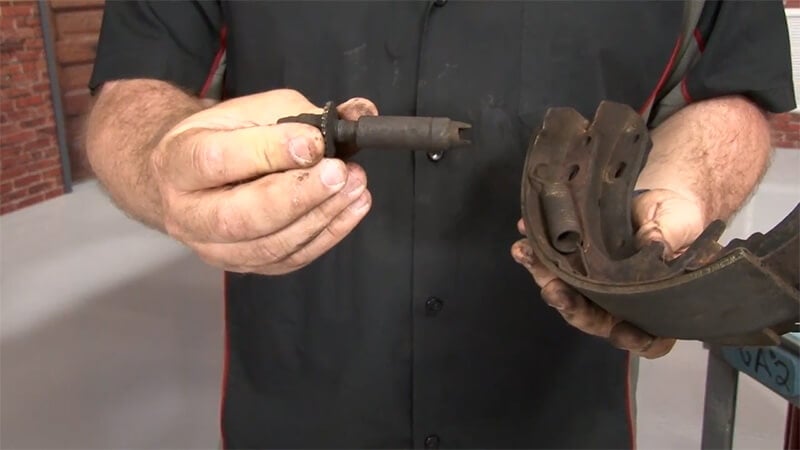
Step 11: The old brake shoes and springs are no longer needed. Before discarding, make sure to hold on to the adjuster. You'll need to reuse this piece, but you should clean it first.
Step 12: To replace the wheel cylinder, pull the two ends.

Step 13: Release the hose attached to the wheel cylinder from behind and remove the two bolts holding the cylinder in place.

Step 14: With the bolts out, you can remove the wheel cylinder.
Step 15: Thread the new wheel cylinder onto the brake hose. Bolt it in where the previous wheel cylinder was.

Step 16: Apply grease to the flat spots on the back of the drum plate

Step 17: Apply grease to the ends of the previous wheel cylinder before it's installed into the new one.

Step 18: The final thing to grease before reinstalling the brake shoes will be the adjuster. Remove the cap and then apply a small amount of grease to the end.

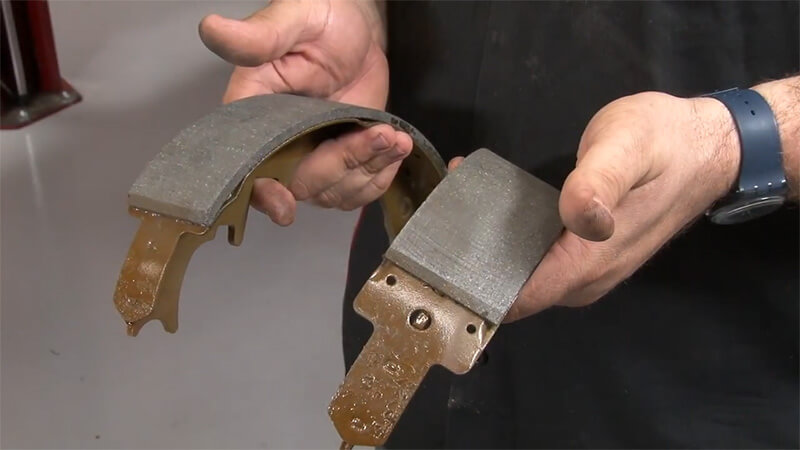
Step 19: Compare the brake shoes to figure out which one goes up front and which goes to the back. They may look identical, but they're designed to be location-specific. The shorter drum shoe will go to the front.
Step 20: Push the shoe over until it's touching the stud and wheel cylinder end.

Step 21: Once the shoe is lined up, attach the drum brake shoe springs.

Step 22: Before installing the second brake shoe, hook the blue spring through the bottom hole on the first shoe.

Step 23: Hook the blue spring in through the hole on the second brake shoe, and then wedge the adjuster in place between the two shoes. The gear on the adjuster should face towards the Mustang's rear. Once the adjuster is in place, give the shoe a final squeeze and insert the shoe spring on the other side.
Step 24: Starting with the rear springs, place the top springs into the drum brake.

Step 25: Grease the center spindle before reinstalling the drum.

Step 26: Place the drum and reinsert the hub assembly.

Step 27: Replace the washer and tighten the central nut. Turn the drum while tightening the nut.

Step 28: Replace the cotter, washer, and pin.

Step 29: Finally, replace the cap.

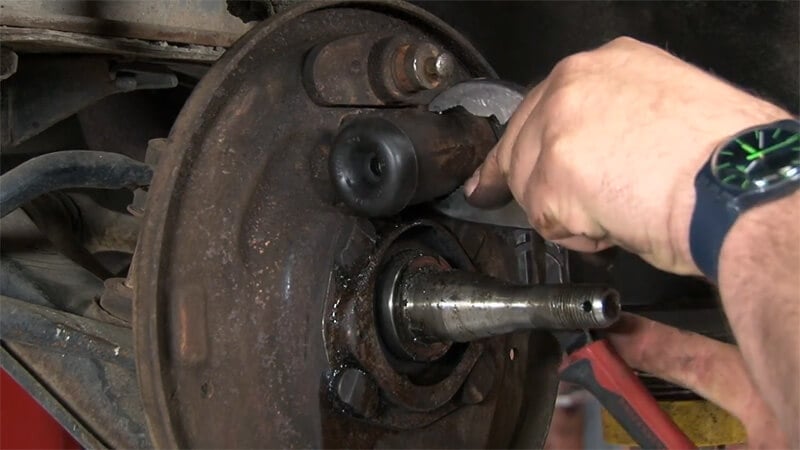
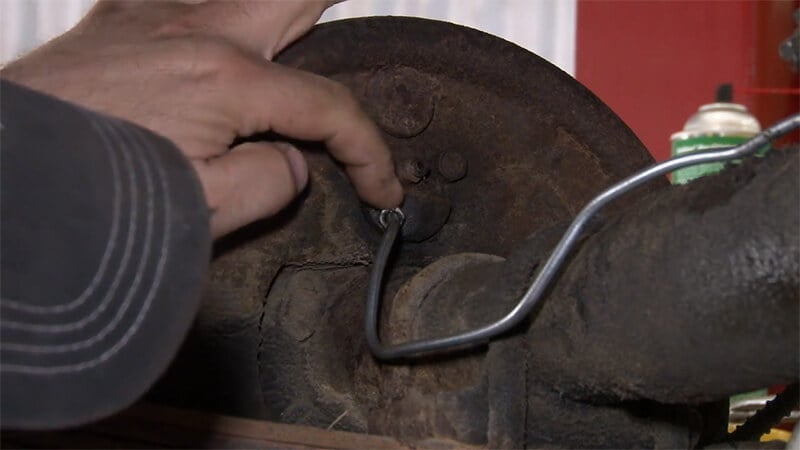
Step 30: Once the front drum is back on, use a small flat-head screwdriver to turn the adjuster wheel inside the brake (shown below with the front drum off). Keep adjusting the brake until you feel even and consistent drag. Spin the assembly throughout the adjustment process. You'll probably have to adjust further after driving.

Step 31: Once you're finished adjusting, place a supply plug in the rear drum opening. This keeps debris from getting into your brakes.

Rebuilding the Rear Drum Brakes
The process for rebuilding rear drum brakes is nearly identical to the process for the front brakes. The major difference is that the parking brake connects to the rear brake assembly.
The addition of the parking brake changes the layout somewhat. It's also an extra part that needs to be inspected and connected correctly. The first difference you may notice is a small C-clip above the wheel cylinder in the back.
Step 1: Use a flathead screwdriver to loosen and remove the C-clip.
Step 2: Loosen the brake line that's running to the wheel cylinder. The brake lines in the rear are hard instead of flexible, but the process is identical to what you did on the front brakes.
Step 3: While installing the new shoes, pick up the parking brake component and reattach it with a C-clip.

Step 4: Install the top spring, parking brake adjusting cable, and its bracket together. The bottom of the spring will go through the bracket and then into place. The adjuster cable will be secured to the top bolt before the spring.

Step 5: Hook the bottom of the parking brake adjuster cable into the lower bracket and spring.
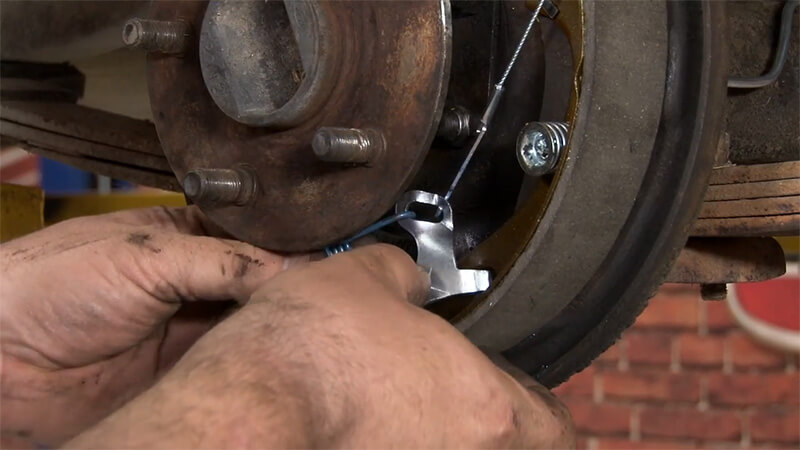
Step 6: Once the spring is attached to the second brake shoe, secure the parking brake adjuster cable's bottom bracket in place.
Disc Brake Upgrades and Replacements
Depending on the model of Mustang you have, you may already have front disc brakes. If not, converting your front drum brakes to disc brakes is a great way to improve your braking power.
If you're not concerned with period-correctness, you can install a set of disc brakes on your rear wheels as well. The process for restoring an existing set or upgrading to a period-correct set is almost identical. We should also note that eight- and six-cylinder Mustangs had different wheels, but the process for changing their disc brakes is very similar as well.
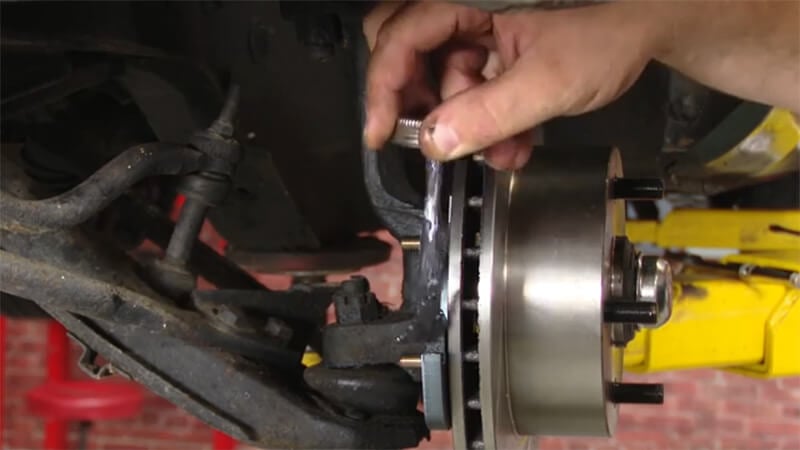
How to Replace or Upgrade Your Disc Brakes
Step 1: Disconnect the hard brake line from the flexible brake hose. These parts are likely covered in undercoating and may not be reusable. Remove as much of the undercoating as you can with a flathead screwdriver before working with the parts. If they're beyond repair, you can cut through them.

Step 2: If you're replacing drum brakes, the next step will be removing the backing plate for your drum brake. The four bolts that hold it on might be challenging to remove after several decades of dirt accumulation.

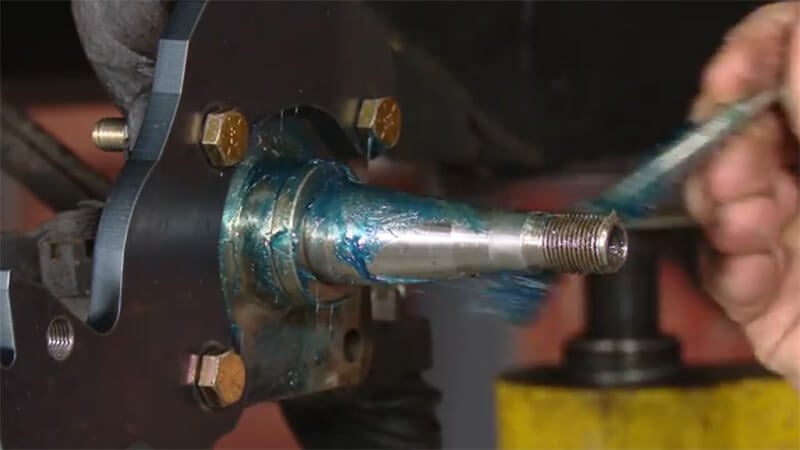
Step 3: With the backing plate off, you should see a spindle. The spindle can be reused, so just clean away the gasket remnants.

Step 4: Thoroughly clean the surface of the spindle. A rotary tool can be used to make the process go a little faster.

Step 5: To install the disc brake, you first need to attach the caliper mounting bracket.

Step 6: Take the rotor seal and look for the tapered side of the metal ring. That will face inwards. Slide this ring onto the spindle.

Step 7: Next, you'll want to properly grease the bearing. This is a great time to wear a pair of gloves. You want to really work the grease into the bearing.
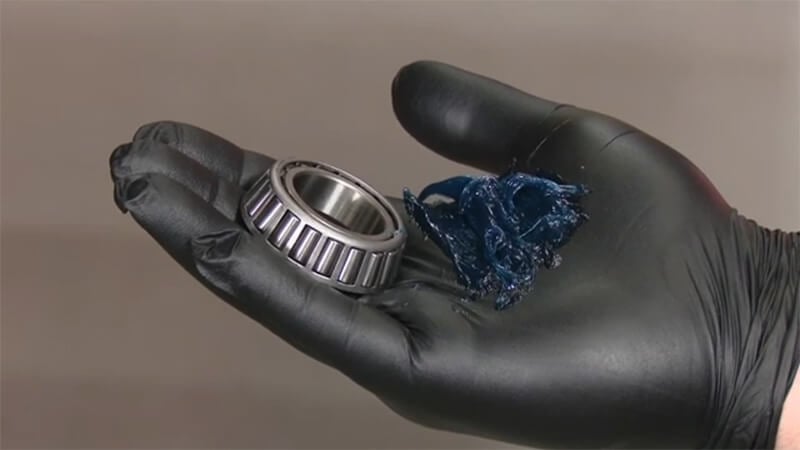
Step 8: Once greased, slip the bearing into the back of the rotor. Insert the other part of the seal on top of the bearing.

Step 9: Grease up the brake spindle.
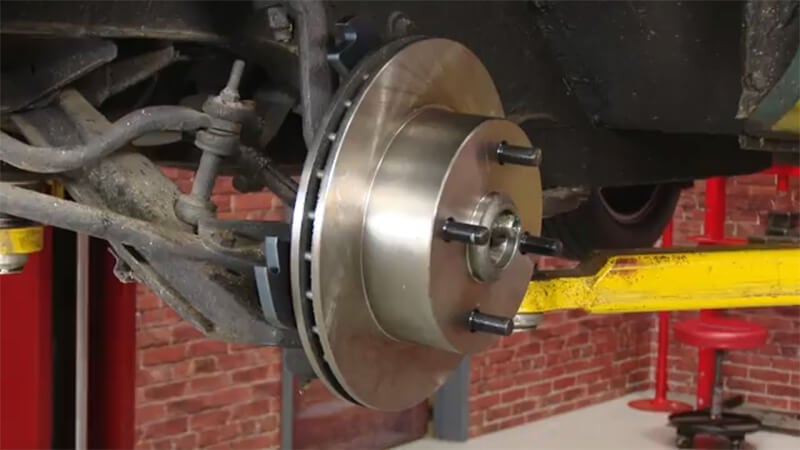
Step 10: Put the rotor into place on top of the spindle.
Step 11: Grease the smaller front bearing the same way you greased the one in the rear of the rotor.

Step 12: Once it is totally packed with grease, the front bearing can go into place on the spindle.

Step 13: Install the washer over the bearing to hold it in place.

Step 14: Add the retaining nut to hold the washer in place. Once everything is properly tightened, add the cotter pin.

Step 15: Finally, add the grease cap to the front to keep the bearing sealed off from debris.

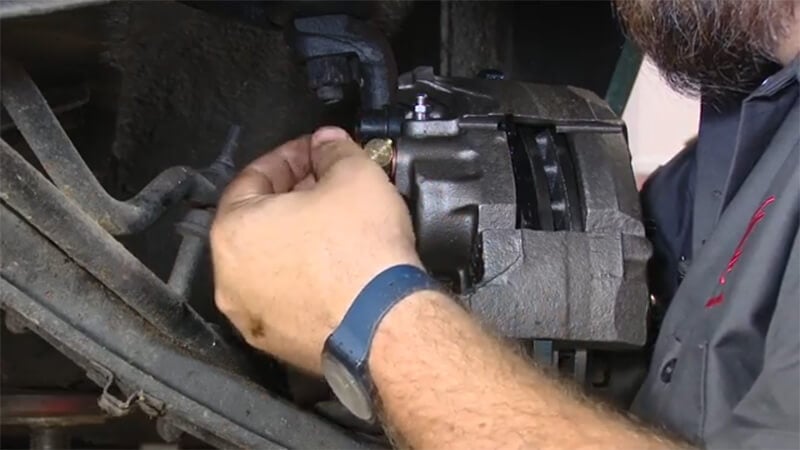
Step 16: Now, it's time to add the caliper. Before adding the caliper, apply caliper grease to the bracket.
Step 17: Place the caliper in position on the bracket and then bolt it into place.

Step 18: Connect the brake line to the back of the caliper.
Step 19: Connect the flexible brake hose to the hard brake line.

Other Brake System Components
Besides drum or disc brakes, there are a few other brake system components you'll want to check out. The master brake cylinder, the brake line, and of course, the brake pedal itself. If your Mustang was equipped with power brakes, there will also be a power brake booster to examine.
The brake lines and brake pedal shouldn't need to be replaced unless they're actually damaged. Some Mustang owners choose to upgrade their brake line to a stainless-steel alternative. Otherwise, simply clean these two items.
The master cylinder and power brake booster need to be salvaged for show Mustangs. If there's any obvious damage to these two parts, you can replace them with replicas or rebuild them.
Brake Master Cylinder
Right away, you'll notice whether your master cylinder is a single or double bowl model.
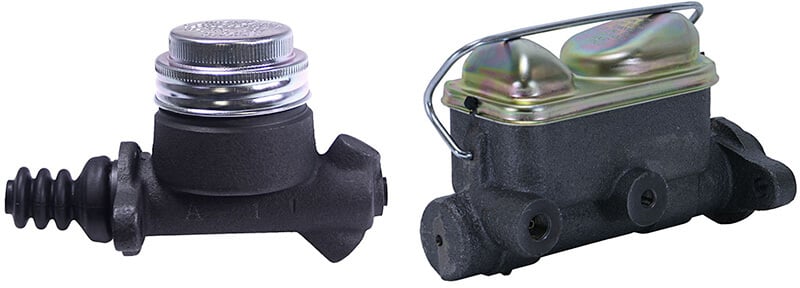
The dual bowl is a better design. For daily drivers, it makes sense to upgrade to a double bowl if one's not already equipped.
The single bowl design uses one reservoir to supply pressure to the front and rear brakes. That means that if anything happens to one brake, all four could lose pressure.
The double bowl separates the reservoirs for the front and rear brakes. This makes it less likely that all four brakes will lose pressure simultaneously.
Restoring your master cylinder, whether it's a single or double bowl, should be the same.
Rebuild kits are sold for individual master cylinders, and it's important to get one that matches. These kits include the parts most likely to break down.
From there, rebuilding the master cylinder is as easy as following the assembly instructions.

Bleed Your Brakes
Whether you've installed new equipment or simply cleaned and replaced your existing brakes, bleeding the brakes is the final step.
Brake bleeding allows you to “bleed,” or remove, the excess air from your brake lines. This increases the hydraulic pressure and your brake's responsiveness. Any time your brakes lose responsiveness, brake bleeding is a good routine maintenance step.
There are two methods of brake bleeding. One method uses automatic bleeders. The other method, the one you'll most likely be using, requires a partner. For an in-depth overview of the process, check out our guide to bleeding your brakes.
Finishing Up Your Brakes
Though your brakes have been cleaned, rebuilt, and bled, there's still the possibility that they'll need more adjustments. Until you're certain that they're working correctly, be cautious. Test your brakes out a few times before hitting the open road.
Check out our full Classic Mustang restoration guide to learn everything you need to tackle your next project.


