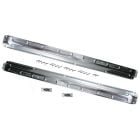
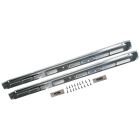
Scott Drake Quarter Panel Ornament Pair Mustang 1965
Highlights
- Factory-Correct Design
- Chrome Plated Finish
- Direct-Fit Replacement
- Sold As A Pair


Pair of Scott Drake Quarter Panel Ornaments for 1965 Mustangs.
Having shiny, new, chrome-plated accents on your classic, 1965 Mustang makes a world of a difference. Replacing the chrome exterior trim on your car can have a rejuvenating effect, refreshing the whole look of your ‘Stang for a small price. CJ Pony Parts carries a high-quality reproduction Pair of Scott Drake C5ZZ-65290A76/7 Quarter Panel Ornaments for all 1965 Mustangs. Order your own set today and make your beloved pony car shine again.
Features and Benefits:
- High-quality Scott Drake reproduction
- Factory-correct design with proper fit and appearance
- Chrome-plated finish
- Attaches to the front of the quarter panel on both sides
- Sold as a pair for the driver and passenger side
- Fits all 1965 Mustangs
- Direct-fit replacements, easy installation
This high-quality Scott Drake reproduction pair, made using the factory-correct design with the proper fit and appearance, includes (1) driver side quarter panel ornament, (1) passenger side quarter panel ornament and all necessary mounting hardware. The ornaments have a chrome-plated finish and attach to the front of the quarter panels on both sides of your Mustang. These direct-fit replacements easily install onto any 1965 Mustang. Simply remove your old, stock ornaments and replace them with these Scott Drake reproductions.
Included:
- (1) Driver side quarter panel ornament
- (1) Passenger side quarter panel ornament
- All necessary mounting hardware
California Residents: Proposition 65 Warning
Related Categories: Mustang Parts, Mustang Exterior Trim, Mustang Moldings, Mustang Quarter Panel Moldings & Ornaments
Installation Videos
Video Transcript
The Scott Drake kit provides everything needed for your 1965 Mustang, including new studs, new seals, the retaining nuts, and of course, the high-quality chrome ornaments themselves. For this installation, you're going to need a 3/8" ratchet, 3/8" socket, short extension, Phillips head screwdriver, a T10 Torx bit, and a small 3/8" wrench.
The installation is going to begin actually inside of the car. To get to the hardware on the inside we have to remove the bottom seat, the seat back, and then the quarter trim panels themselves, to be able to access the nuts on the back. Back seat, just lift up and pull out. Now, to remove the seat back, there's going to be a bolt on each side. When you take apart a car like this, a low- mileage car, sometimes you find some pretty cool stuff. Here's the original shipment tag dated December 11, 1964, from the back seat of the car. To get the quarter trim panel off, we're going to start by removing our door seal plate. There's going to be nine screws that hold this on. There's four across the top, and then five on the inside edge here. For the inside edge, you might need either a right-angle, or a small screwdriver. The other ones are very easy to get to with a normal Phillips head.
Now we can start on quarter trim panel removal. Start by removing the window crank. There's a little set screw Alan key on the top here, so we'll loosen that up to remove the crank. With the crank out of the way, grab ahold of the windlace, just pull that right off like that. Now we can work on the five screws. One here, two, three, four, then one up top. If your car still happens to have the paper back here, we're going to carefully now peel this off. This is going to be tight quarters. It is kind of tough to see. The good thing is the nuts on the quarter ornaments are usually only hand tight, so you should need any kind of crazy ratchets or wrenches to get them off. Usually just holding the socket in your hand will do the trick.
You can see here, right here is the bottom one. The second one is right behind the window thing, just basically right behind the window track here. The third one is up high here, which you can actually get it from the top as well. In the original setup, more than likely the middle one won't have a nut. All you've got to do is release the bottom one and the top one. Again, you should be able to do it by hand, just make sure you hold on to the quarter ornament. Now we're going to reach up here for the top one. Again, you can get it from that top opening as well, whichever one you're more comfortable with. Once the retaining nuts are off, carefully remove the quarter ornament.
Now grab our new Scott Drake ornament. They are side specific. If you look on the back, they are labeled left-hand and right-hand. Start by threading in the studs. Put our seals just in place on top of them for now, and they're ready to go on the car. I'm going to give the area just a quick clean here before we install the new one. Carefully put the ornament in place. Then we're going to thread on our new nuts on to the studs to hold it in place. Start with the top one, then the bottom one. Scott Drake provides the hardware, so we're going to put the middle one on as well. It's kind of hidden behind this, a little bit harder to get to, but you'll see it. Like I said, hand tight should suffice, but I'm going to use my small wrench in here and give them just an extra little quarter crank just for security.
Now we're going to reinstall our quarter trim panel. The first step in the process is going to be reinstall our paper. With the quarter trim panel mounted, now I can reinstall the windlace. Then reinstall the washer and window crank. With our quarter trim panel reinstalled, now we can reinstall our door seal plate. Okay, now you want to repeat the process on the other side, reinstall the rear seat, and your installation's finished.
The new Scott Drake quarter ornaments add a nice fresh look to the side of our 1965 Mustang. The installation's not too bad. It's a little time consuming, the working area is a little on the tight side, but overall, it shouldn't take you any more than two hours. You'll be back on the road in no time.