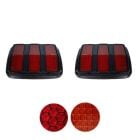
Sequential LED Taillight Kit Ultra Bright Mustang 1965-1966
Highlights
- 90 LEDs On Each Light
- Sequential Lighting
- No Additional Wiring
- Direct-Fit

Ultra Bright Sequential LED Taillight Kit for all 1965-1966 Mustangs.
Are you looking for a way to enhance your 1965-1966 Mustang's safety and visibility as you're driving down the road? But you want something that'll maintain its original and authentic appearance? If so, you should take a closer look at this Ultra Bright Sequential LED Taillight Kit! It combines the best of both worlds: the LED taillights shine 5 times brighter than your stock lights, but your Mustang will still look exactly the same when these lights are turned off!
Features & Benefits:
- Increases Your Mustang's Visibility When You're on the Road for a Safer Driving Experience
- Taillights Shine Up to 5 Times Brighter Than Stock Lights
- Taillights Won't Sequence When Braking Because of Flasher Unit with Patented "Smart Signal" Technology
- 90 LEDs on Each Side for a Total of 180 LEDs
- Mustang Still Looks Original When Lights are Off
- White Board Design Creates Greater Reflectivity and Light Output
- Original Lenses Can be Used Because These Taillights Run Cooler than Standard Incandescent Bulbs
- Easy Installation with No Additional Wiring or Modifying
- Comes with All Required Installation Hardware and Detailed Instructions
- Comes with Two Taillights: One for the Driver Side and One for the Passenger Side
This Ultra Bright Sequential LED Taillight Kit is an excellent way to increase your Mustang's visibility as you're driving down the road: each light has 90 LEDs for a total of 180 LEDs! These taillights will shine brighter than your factory lights. But you don't have to worry about them sequencing when you hit the brakes because they come with a special flasher unit with patented "Smart Signal" technology that tells the lights not to sequence when you hit the brakes. However, it'll tell the lights to sequence when you use your turn signals! Their white board design creates greater reflectivity and light output too! You can use your Mustang's original lenses when you install this kit since these LED lights will run cooler than standard incandescent bulbs. You'll also get instructions and all of the hardware you'll need to install them. You won't need to worry about adding any additional wirings or making any other modifications to install these either!
This Kit Includes:
- Two (2) Taillight Modules (90 LEDs per Side)
- One (1) Flasher Module
- Complete Illustrated Instructions
Please Note: This kit does not include taillight bezels, lenses or bodies.
California Residents: Proposition 65 Warning
Related Categories: Mustang Parts, Mustang Lighting, Mustang Taillights, Restomod Parts, Restomod Lighting
Installation Videos
Video Transcript
These LED panels have 90 LEDs per side, making them roughly five times brighter than your factory bulbs. At the same time, the LEDs run much cooler, so there's no problems using your factory lenses. Our kit comes with this special flasher unit. It's going to make all three panels light up when you hit the brakes, but also sequential them when you hit your turn signal. The kit's going to come with all hardware needed for installation, as well as detailed instructions. For this installation, you'll need a regular Phillips head screwdriver and you'll need a small Phillips head screwdriver.
Although this rare emberglow Mustang is in excellent shape, it's still uses the original one-bulb taillights. With the lights on or when you hit the brake, the lights aren't very bright.
We're going to start by removing the four screws holding on the factory bezel and lens. Now you want to remove the original bulb.
The next step is to install the LED panels. You want to make sure you have the proper side, also in the proper direction so sequencing works as it should. These install right in the factory bulb housing. The LED panel is going to attach to the stud on the back of the bulb socket. You'll see when we slide it over, our LEDs are actually hitting the housing. You want to make sure that doesn't happen as this can cause an issue the LED and void the warranty. The kit comes with these various size spacers to allow you to space the panel away from the body so it's not touching. Once you figure out the correct size spacer, I'm going to thread it onto the stud. I'll use this applied screw. I'll tighten our panel, again making sure it's not touching the housing on any sides.
Before we reinstall our lens, we just want to double check to make sure they're working properly. Turn on our parking lights. Once you confirm they're good, you want to reinstall the lens and do the same process on the other side.
Now we're ready to install the flasher module. The first step is to unplug your factory flasher. You're going to find it hanging underneath the dash, right up behind the brake pedal. Disconnect the two leads and pull the flasher out. Now we're going to install the red and green leads from the aftermarket flasher. The red lead is going to go to the orange wire. The green lead is going to go to the blue wire.
The last step is to ground the flasher. I'm going to use the factory courtesy light to ground here. Once we've made all connections, we're going to hide the flasher. It comes with double-stick tape. We're just going to stick it right up on top of the steering column.
Once we've finished the wiring, we're ready to test our turn signals. You want to put the key to the accessory position. We'll start with the right side. Now we'll check the left. As you can see with our lights off, our car looks 100 percent original. As soon as we turn the lights on, you see bright LED sequentials not only look great, they make the car a lot more visible as well. Installation should only take you around 30 minutes, so you'll be back on the road in no time.