Cooling Fan Clutch Upgrade Mustang 5.0L 1979-1993
Highlights
- OE Performance
- Precision Machined
- Direct-Fit Replacement
- Thermal Design


Cooling Fan Clutch Upgrade for 1979, 1980, 1981, 1982, 1983, 1984, 1985, 1986, 1987, 1988, 1989, 1990, 1991, 1992 and 1993 5.0L Mustangs.
Improve your horsepower with the Cooling Fan Clutch Upgrade made for your 1979-1993 5.0L Mustang. If your engine is running on the warm side, simply slip this new upgraded clutch cooling fan into your engine bay. This highly efficient, heavy-duty thermal clutch fan provides additional cooling for the powerful 5.0 liter engine. After the straightforward installation, you'll notice an improvement in performance and horsepower!
Features and Benefits:
- OE-Style Replacement
- Less Drag to Improve Horsepower
- Upgraded Cooling
- Heavy-Duty Thermal Clutch
California Residents: Proposition 65 Warning
Related Categories: Mustang Parts, Mustang Air Conditioning & Heating, Mustang Fans & Fan Shrouds
Installation Videos
Video Transcript
We're going to be installing this reproduction fan blade, along with this upgraded clutch on a 1990 Mustang. The upgraded clutch is going to feature less drag, which will free up some horsepower, but will still engage properly to keep our engine cool. For this installation you'll need a 1/4" ratchet, 11-mm deep socket, 1/2" shallow socket, and 11-mm ratcheting wrench.
You can check the condition of your factory fan clutch by spinning the fan with the engine not running. If it spins freely like ours does, it means the clutch is probably not engaging properly, which can create cooling issues. If it doesn't spin at all, the clutch is probably fully engaged, causing a drag on your motor. In our case, with it spinning as freely as it is, we're going to upgrade to the low-drag clutch.
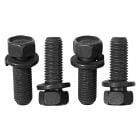
The clutch and fan assembly are bolted to your water pump with these four bolts here. We're going to start by removing those. Now we're going to separate the fan from the water pump. Just let the fan sit in the bottom of the shroud, and we're going to remove the two top shroud poles. Now you want to lift the shroud up just high enough to get the fan out through the front. Now we're going to disassemble our original setup so we can use the bolts with the new clutch and fan.
Now we'll install our clutch in our new fan, and our clutch fan's ready to install. Now we'll install it the opposite of how we removed it, lifting up the fan shroud, and placing the fan inside. When you lower the shroud down, you want to make sure you get it in the two metal clips at the bottom. We'll rest the fan there while we reinstall the bolts. Now we're going to reinstall the fan to the water pump. We'll lift the fan up onto the stud and then line up one of the holes with one of your bolts. We'll make that hand tight to hold it in place, and we'll install the other three bolts. Now we can check and see that our fan is working like it should. It has resistance as it's supposed to, so now we'll start it up.
Now that we have our heavy duty clutch fan setup installed, we're looking forward to some cooler operating temps during the upcoming summer months. You might hear an additional whine from the clutch fan. That's perfectly normal, being that it's a heavy duty part. Installation should take you no more than about half an hour. You'll be back on the road in no time.