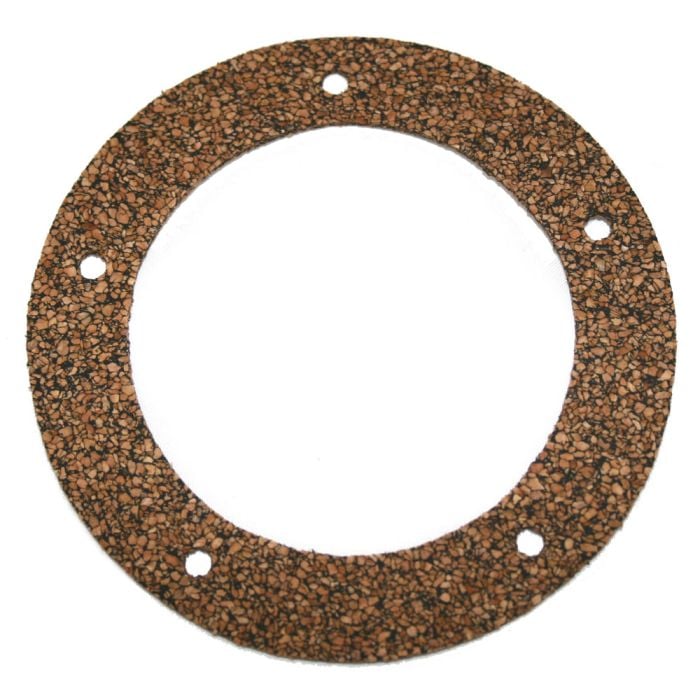
Fuel Filler Pipe To Body Gasket Cork Mustang 1965-1973
Highlights
- High Quality Cork
- OEM-Style Reproduction
- Sold Individually
- Fits 1965-1973 Mustang

Fuel Filler Pipe To Body Cork Gasket for all 1965, 1966, 1967, 1968, 1969, 1970, 1971, 1972 and 1973 Mustangs.
If you're replacing your gas cap or filler pipe it is highly recommended that you change out the worn gasket. Order this Fuel Filler Pipe To Body Cork Gasket for your 1965-1973 Mustang today!
Fuel Filler Pipe To Body Cork Gasket Features and Benefits:
- Convenient direct-fit replacement
- Composed of high quality cork
- Does not warp or dry out like rubber gaskets
- OEM screw holes designed to match up identically
- Sold individually
This is the gasket that sits on the end of the filler pipe and meets the gas cap. Since it's made of high-quality cork, this gasket will not warp or dry-out like normal rubber gaskets. The direct-fit replacement makes installation a breeze, and the OEM-style screw holes will perfectly match up, so there's no need for modifications.
Tech Tip: If you put two gaskets on the filler pipe, it helps to move the gas cap away from the tail light panel. This helps to keep the gas cap from scratching the car when it is twisted during opening.
Whether you’re in search of exhaust clamps, interior upholstery, bulbs or a set of wheels and tires, CJ’s has the parts you need to bring your early model Mustang build back to life!
Order a Fuel Filler Pipe To Body Cork Gasket for your 1965, 1966, 1967, 1968, 1969, 1970, 1971, 1972 or 1973 Mustang from CJ Pony Parts today!
California Residents: Proposition 65 Warning
Related Categories: Mustang Parts, Mustang Engine, Mustang Engine Hardware, Mustang Fuel Tank Area, Mustang Fuel Filler Pipes
Installation Videos
Video Transcript
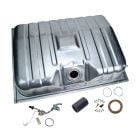
This is our standard fuel tank kit for the '65 through '68 Mustang. It includes the tank, sending unit with the correct brass float, mounting hardware, filler hose and the filler pipe gasket.
For this installation you will need a flat blade screwdriver, Philips screwdriver, hammer, 3/8-inch ratchet, 1/2-inch socket, 3/8-inch socket, 1/4-inch ratchet, 7/16-inch socket, 5/16-inch socket, short extension, wire cutters, pry bar, 3/8-inch open-end wrench, scraper, safety glasses and a lift or jack and jack stands.
As you can see, the tank in our '66 has a nice big dent in it. It's due for replacement. The first step is going to be to drain the fuel. There is a couple ways you can do this. Drain it either from your sending unit, or if the tank has a drain, you'll want to use that. The best way to drain it? Take your car for a drive. If it's not drivable, either one of these ways will work.
The last step before removing the fuel tank from above is to disconnect the sending unit. You're going to pull the sending unit wire off the stud and then you'll want to disconnect the hose. We have the original stock crimp-clamps, which are one-time only and so you'll want to cut that off. Keep your pan handy as you may still have a little fuel come out of it. Now, we are ready to move inside the trunk. After you drain the tank, you'll want to clear your trunk out and remove the bolts that are holding the tank in place. Now, we're going to loosen the two screws the hold the filler pipe seal to the tank and to the filler pipe.
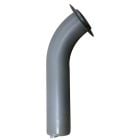
Now, we're going to disconnect our filler pipe. To remove the filler pipe you have to take the gas cap off. There are four bolts in the front here and there is on the back that we have to get off first. You'll want to pull the filler hose off the tank by twisting the whole assembly. Twist the hose off the pipe and pull out your filler. You'll be reusing the filler tube with your new tank. We include a new hose and also a new gasket so you can throw both of those away. Now, we are ready to remove the tank from the car itself.
Even though the hardware is removed there is still some seal holding it in place. We're going to start with a pry bar and see if we can get it loose. If you have trouble getting it off with a pry bar, a jack underneath the car forcing it up will usually do the trick as well. We are going to be installing new sealant with the new tank and so we want to get the surface as clean as possible and scrape off the old excess sealant. Once you've finished cleaning the original sealant off the trunk you will probably have a couple areas that are bare metal. We recommend a coat of primer before you install the new tank. Once you're finished with the primer, it usually only takes about 5-10 minutes to set up and then we can get in to installing our tank. I will put some strip caulk around the outside edge before we install the new tank. This will replicate the OEM caulking. Make sure not to leave any gaps in the corners; you want to seal all the way around. Before the tank goes back in the car, you want to test your sending unit; whether it's the original or a new one, you will still need to test it before you put it on the car.
You will use your multimeter set on ohms to test your sending unit. You want to ground it anywhere on the chassis, push the positive to the stud. You should see somewhere between 70 and 80 ohms, which is empty. As the flow goes up, that number is going to decrease, getting roughly to 8-10 by the time the tank would be full. As you can see, our sending unit is working properly.
Once you have tested your sending unit and you know it's good, we are ready to install it. The first step is to install this ring. There is a groove that it goes in to. I will put the float in at an angle first and make sure that the stud is at the bottom and put the ring on. I get about _ turn by hand. I will use a hammer to push it on the rest of the way. If you are ever working with a sending unit that has fuel involved, you'll want to use a brass punch. Since everything is new here a flathead screwdriver and hammer will work fine. Now, we're ready to install our tank.
The tank is going to go in the same way the old one came out. Line up the holes and grab our new hardware. Right now, we're going to put the fuel filler hose on. It goes over the tank. Slide it down and put the clamp on, but we're not going to tighten it down just yet. Put another one over here. Now we will install the fuel filler pipe. The new gasket comes with it, so make sure that you put it on before you put the pipe in. Once you install the filler pipe, your hose plants in place and we will tighten them back down. Now, we will reinstall our gas cap. Line the gasket up with the holes. The last step is to connect the sending unit. Make sure that you grab a new hose clamp to replace the one we took off. Now, our installation is finished. Once you're finished with the install you'll want to put some fresh fuel in the tank and check everything for leaks before you take it for a test drive. Installation should only take you for about an hour so you'll be back on the road in no time.