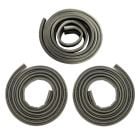
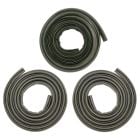
Door Weatherstrip Pair Mustang Coupe/ Hatchback 1979-1993
Highlights
- Seals Against Water and Debris
- High Quality Rubber
- Direct Fit Replacement
- Sold as a Pair


Pair of Door Weatherstripping for all 1979, 1980, 1981, 1982, 1983, 1984, 1985, 1986, 1987, 1988, 1989, 1990, 1991, 1992 and 1993 Coupe and Hatchback Mustangs.
Keeping weather and noise out of your 1979-1993 Coupe or Hatchback Mustang with this new Pair of Door Weatherstripping from CJ Pony Parts!
Features and Benefits:
- Sold as a pair
- Fits both sides
- Forms seal with closed door
- Original styling
- Requires no adhesive or clips
- Fits Coupes and Hatchbacks only
This weatherstrip attaches around the entire door opening and forms a seal with the door when closed. This door weatherstrip is not side specific. This weatherstrip is styled after the originals for a clean and precise fitment. It is made to fit coupes and hatchbacks only. It mounts on the pinch weld of the door jam with serrated edges so that it doesn't fall off. A metal inner channel ensures proper fitment. Mounting hardware and adhesive are not needed due to the metal channel. Simply form the weatherstrip over the door jam to install. This weatherstrip has a soft enough rubber material to properly seal the vehicle, yet has enough give for easy closing of the doors.
Please Note: This weatherstrip is designed primarily for coupes and hatchbacks, but will fit convertibles with minor trimming.
Vehicle Fitment:
- 1979-1993 Mustang
California Residents: Proposition 65 Warning
Related Categories: Mustang Parts, Mustang Weatherstrip, Mustang Coupe Weatherstrip, Mustang Hatchback Weatherstrip
Installation Videos
Video Transcript
Now on this car, the passenger side has the normal rips and tears. The driver's side has actually been replaced at one point in time, but that does not fit very well. So we're gonna take it apart and install this weatherstrip. The first thing we're gonna do is remove it, but to do that, we have to remove all the trim panels around it, so we can properly remove it, and then properly install the new weatherstrip.
We're gonna start by removing the screws from our door sill plate. Then remove the kick panel and the A-pillar. Now the kick panel should have a Christmas tree clip installed. Many of them, including my car, it is missing. But if it does, just pull the clip off, and then you can remove the kick panel. All right, now we're gonna move on to the quarter trim panel. You don't have to remove the entire panel, which would be a lot of work. You gotta remove those screws from the front though, just so we can pull it back to seat the door weatherstripping.
With the quarter trim panel loose, now you can remove the headliner trim. This is just held in place by spring clips, so get a good grip on it, and just pull. All right, for the A-pillar, what we're gonna do is remove the screws, again, so we can push it back. You can remove it if you want to, but to do that, the lower screw is going to require you to take the speaker grill off, which is a little bit more work than you really have to do. If you take off the middle screw, you can actually push it back enough that we'll be able to get the weatherstripping in place.
Okay, now we can remove our original weatherstripping. All right, just grab this seam, and just start pulling. Now we're ready to being the installation of our new weatherstrip. Where I found the best place to start, is pretty much lining up with the bolt from the seat belt, and then work forward, and work your way around. What you're simply going to do is just put it over. There's a metal insert inside the weatherstrip. Just press it onto the pinch. Pay extra attention to make sure you go around the curves, that it is tight against the corners. That's where it's most likely going to come off.
Now the weatherstripping does come with extra length. You will have to cut it to fit, but before you do so, I like to grab a small rubber mallet. Work your way around again. Make sure it is all the way seated on your pinch bulb, before you cut anything off. All right, now we know that the weatherstrip is seated properly. Now we can cut it. We want to make sure you get the cut pretty exact, because you want it to be right up against the start of the weatherstrip. The more gap you get there, the more likely you're gonna get an air noise.
Once the weatherstripping is cut and in place, now we can reinstall all the panels that we removed. All right, so everything is back installed. Now you repeat the process on the other side, and your installation is finished. Our new door weatherstripping obviously fits a lot better than the previous one. It's gonna seal the door up a lot better as well.
I should mention, when you're finished with the installation. The door might be a little tight to close the first few times. The weatherstrip will have to break in a little bit, but it will give a little bit. If you leave it outside in the sun, it's gonna be even better. As far as the installation goes, figure about an hour to an hour and a half for both sides. The only tools you'll need are a Phillips head screwdriver, and a small mallet. You'll be back on the road in no time.
-
 Beltline Weatherstrip Inner Driver Side Coupe/Hatchback Mustang 1981-1993$26.99 MSRP $32.993 Reviews
 -