LED Turn Signal Resistor Kit
Highlights
- Fits Most Vehicles
- Eliminates Hyperblinking
- Easy Installation
- Includes Necessary Hardware


LED Turn Signal Resistor Kit.
When you replace the dull turn signal bulbs with more modern LEDs, most vehicles will start to hyperblink due to the LED bulb using less power. In this situation, your vehicle may think that the bulb is out. Eliminate this hyperblinking issue by ordering this LED Turn Signal Resistor Kit from CJ Pony Parts.
Features and Benefits:
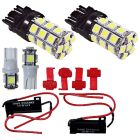
- Includes 2 Resistors & 4 Quick-Splice "Scotch-Lock" Connectors
- Eliminates Hyperblinking of LED bulbs
- Extra-Long 8" Leads
- Resistance Rating of 6ohm, 50w
- Easy Installation
- Fits Most Vehicles
This kit comes with two resistors in total and four quick-splice "scotch-lock" connectors to complete an LED turn signal assembly for either the front or rear of your vehicle. The kit is designed to combat the annoying hyperblinking that may occur when converting to LED bulbs. The resistors have extra-long eight inch leads to help make installation much easier. They also have a resistance rating of 6 ohm, 50w, which is typically enough to offset one bulb.
Tech Tip: When installing this kit, make sure to connect one side of the resistor to the positive turn signal wire and the other side to the negative with the included connectors.
*If you are installing four LED turn signals (for the front and rear), it is recommended to use a total of four resistors.
California Residents: Proposition 65 Warning
Related Categories: Mustang Bulbs, Mustang Lighting Hardware, Focus ST Body & Appearance, F-150 Lights, Restomod Lighting
Installation Videos
Video Transcript
Today we're going to be installing these resistors in line with our LEDs to fix the hyper flashing on our 2016 F-150. These resisters get wired into the factory turn signal harness to increase current draw which will prevent hyper flashing. These resistors are sold as a pair but since we have LEDs in the front and rear of our truck, we're going to be installing two pairs today.
Here's hyper flashing. Hyper flashing is when the blinker blinks significantly faster than it's supposed to and it can get pretty annoying. It looks annoying and it sounds annoying and we're going to fix it by installing these resistors.
Tools you'll need for this installation: A quarter-inch ratchet, 7 millimeter socket, 8 millimeter socket, 10 millimeter socket, an extension, pliers, and a flat head screwdriver.
We're going to start by installing the resistor on our rear turn signals and in order to get to the harness, the whole housing has to come off. Once you get the two bolts out just pull the housing forward. You don't necessarily have to do this but for the sake of the video we're going to completely remove the taillight assembly.
To get to the wiring harness, we're going to have to cut back some of this electrical tape and then get the loom out of the way. We'll be splicing the resister into two wires here. The blue wire, which is the power wire for the turn signal and the black wire with the yellow stripe, which is the ground. We're going to be using the supplied wire taps for the splicing. The first wire we're going to do is this blue wire and you're going to slide it into the connector here all the way in, pry it apart. Make sure the wire gets seated all the way in there. Next, grab one of the wires from the resistor. Stick it in as far as you can. Hold it in place, grab yourself a pair of pliers, and pinch it until you hear a click. Flip this over. Now we can do the same thing to the ground wire.
Now that we've spliced the resistor, we're going to mount it. You can either mount this with screws or with double stick tape, but you need to make sure it won't contact the harness. You don't want it melting the loom or the harness itself. We're going to be using double-sided taped for mounting this resistor. Mount it up and out of the way. Now we're going to apply some electrical tape to seal it up. Now we can reinstall the housing.
Now repeat the process on the other side and we can head to the front.
We're ready to do the front turn signals now. In order to get to the harness for them the headlight needs to come off and in order for the headlight to come off, this trim panel has to come off so we're going to start with that. Remove these two 7 millimeter bolts. Pop out this plastic clip. Now pop this trim panel off. You’re going to pull this section out and then pull the whole assembly forward. Remove the seven bolts securing this trim panel on. Then remove this plastic clip. There's a clip right in here that you have to pinch with some pliers. Push on this clip and pull up on the trim panel.
Now there's three bolts holding the headlight in. The first bolt we're going to remove is back in here. You will need an extension to get to it. Now the two up top. Pull the headlight out, then undo your connections.
Here are the two wires that we're going to be splicing into. The two wires that we are using are on the outside of this connector. The power wire, which is this blue wire with the green stripe and the ground wire is this black wire with the yellow stripe. This wire in the middle is for the marker lights.
Now it's time to mount the resistor. There isn't a really good way to mount this being that there has to be so much movement with the harness when you install the headlight, so what we're going to do is zip tie this to the harness but not have the resistor touch anything. Just zip tie the wires, that way if it gets hot it won't touch or melt or anything.
With the resistor mounted and not touching anything, we can reinstall the headlight. Reconnect the connectors. Reinstall the headlight. Reinstall the bolt securing the headlight. Reinstall this lower trim piece. Reinstall this clip. Now we can put the front cover on. Install this clip. Finally, install these two screws. Repeat the process on the other side and your installation is finished.
We got our resistors installed, it's a lot less annoying in here. Installation was pretty simple. It should be about two hours and before you know it you'll be heading down the road.
Vehicle Fitment
This product will fit the following Bronco years:
This product will fit the following C10 years:
- 1960,
- 1961,
- 1962,
- 1963,
- 1964,
- 1965,
- 1966,
- 1967,
- 1968,
- 1969,
- 1970,
- 1971,
- 1972,
- 1973,
- 1974,
- 1975,
- 1976,
- 1977,
- 1978,
- 1979,
- 1980,
- 1981,
- 1982,
- 1983,
- 1984,
- 1985,
- 1986,
- 1987,
This product will fit the following F-100 years:
- 1948,
- 1949,
- 1950,
- 1951,
- 1952,
- 1953,
- 1954,
- 1955,
- 1956,
- 1957,
- 1958,
- 1959,
- 1960,
- 1961,
- 1962,
- 1963,
- 1964,
- 1965,
- 1966,
- 1967,
- 1968,
- 1969,
- 1970,
- 1971,
- 1972,
- 1973,
- 1974,
- 1975,
- 1976,
- 1977,
- 1978,
- 1979,
This product will fit the following F-150 years:
This product will fit the following Focus years:
This product will fit the following Mustang years:
- 1964.5,
- 1965,
- 1966,
- 1967,
- 1968,
- 1969,
- 1970,
- 1971,
- 1972,
- 1973,
- 1974,
- 1975,
- 1976,
- 1977,
- 1978,
- 1979,
- 1980,
- 1981,
- 1982,
- 1983,
- 1984,
- 1985,
- 1986,
- 1987,
- 1988,
- 1989,
- 1990,
- 1991,
- 1992,
- 1993,
- 1994,
- 1995,
- 1996,
- 1997,
- 1998,
- 1999,
- 2000,
- 2001,
- 2002,
- 2003,
- 2004,
- 2005,
- 2006,
- 2007,
- 2008,
- 2009,
- 2010,
- 2011,
- 2012,
- 2013,
- 2014,
- 2015,
- 2016,
- 2017,
- 2018,
- 2019,
- 2020,
- 2021,
- 2022,
- 2023,
- 2024,
- 2025,
- 2026,
-
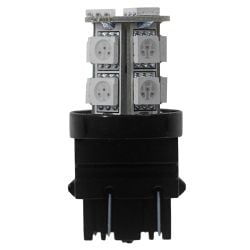 Oracle Lighting LED Bulb Front And Rear Turn Signal Fiesta ST 2014-2015/Rear Turn Signal Focus ST 2013-2014/Front Turn Signal/Side Marker Amber Mustang 1990-2004$16.803 Reviews
 -
 Oracle Lighting LED Bulb Red Taillight Fiesta ST 2014-2015/Focus ST 2013-2014/Brake Light Mustang 1988-2004/Rear Turn Signal Mustang 1994-2004$16.806 Reviews